Code Viewer
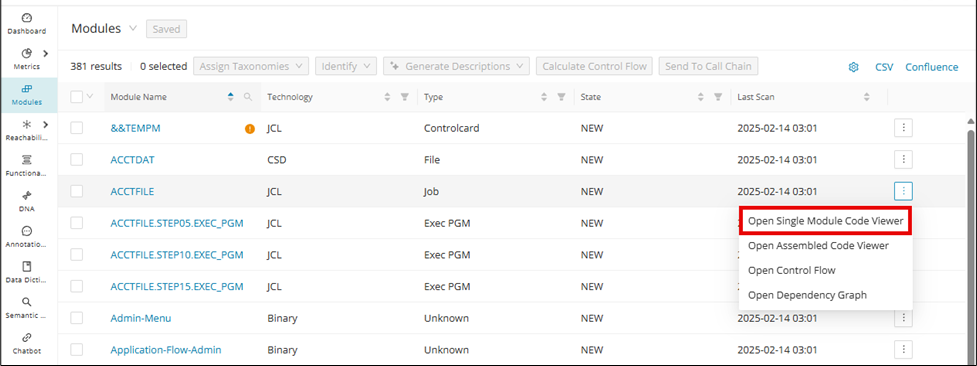
The Code Viewer in the Web UI enables you not only to view annotations and data dictionary entries, but also to perform actions similar to those in Eclipse. To view the code, go to the Modules page and select the desired module. Then click Open Single Module Code Viewer to view the unassembled source and click Open Assembled Code Viewer to view the assembled source.
From here, you can view the read-only code of the selected module, from which you can either:
- Open Assembled/Single Module View
- Create/Edit Annotations
- Create/Edit Data Dictionary Entries
- Navigate Source via Hyperlinking
- Filter Annotations, Data Dictionary Entries, and Hyperlinking
Code Viewer assembled view
The Code Viewer provides an assembled view for languages (for example, Cobol, Natural, JCL, and PL/1) that use assembling. This view combines the root source with included artifacts so you can inspect the effective code in one place. Use it when copybooks or similar includes make the single-module source incomplete.
Info
COBOL, Natural, JCL, and PL/1 are supported.
Configuration
For this view, the feature toggle codeViewerAssembledView must be enabled in the WebUI feature console.
To access the assembled view from the Code Viewer, click Open Assembled View displayed at the top of the page.
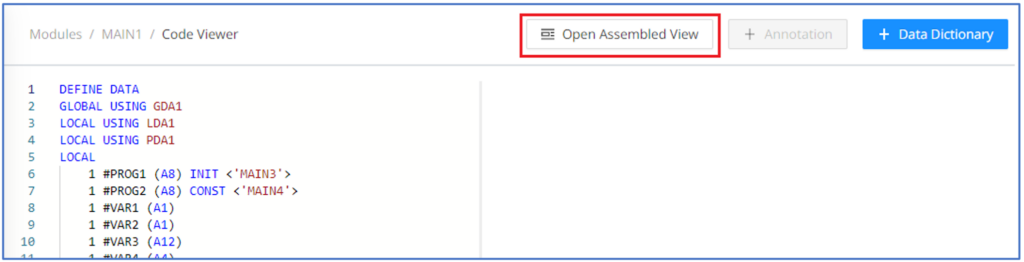
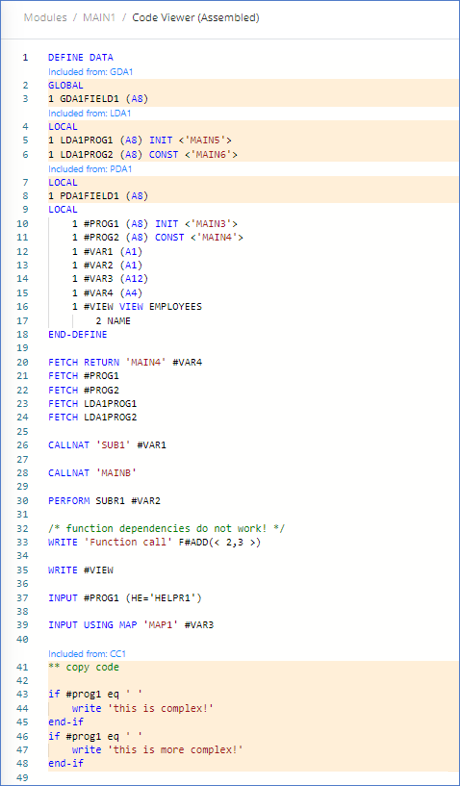
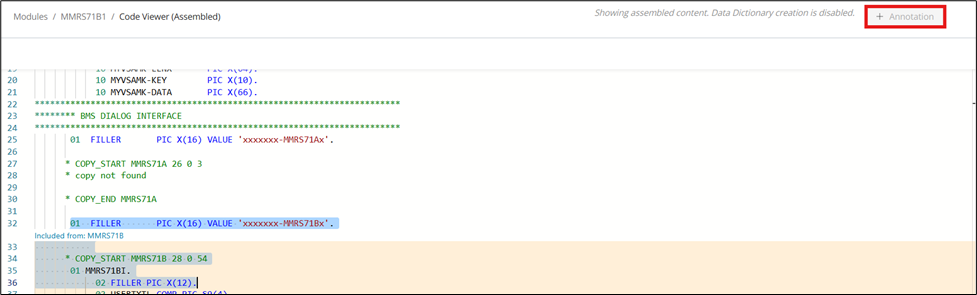
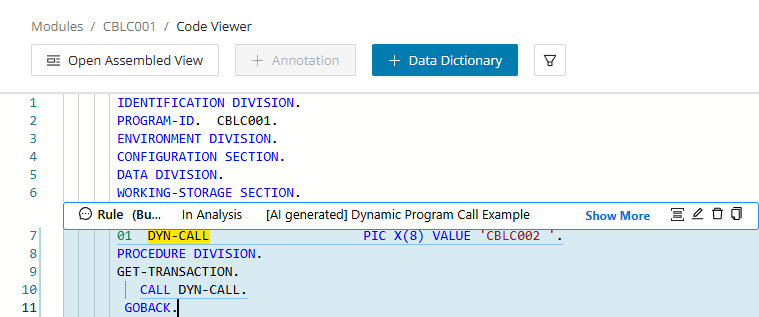
This opens a new tab with the assembled view. It contains the contents of all the included copybooks:
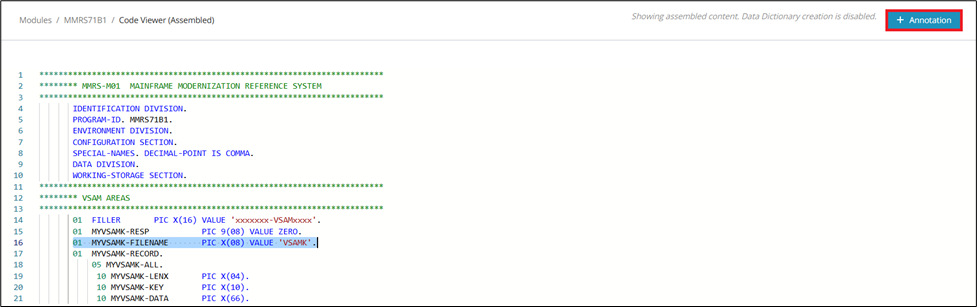

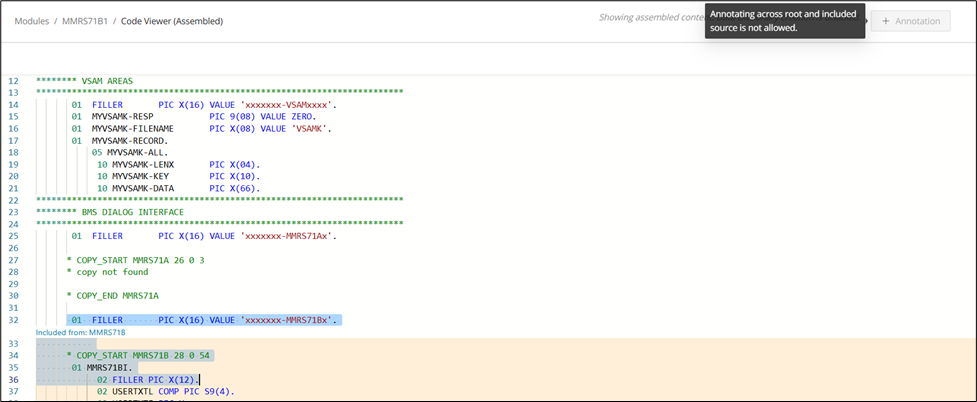
Annotating lines of source code spanning across the root program and included Copybook is not allowed.
+ Annotation is disabled.
A tooltip is displayed while hovering above that "Annotating lines of code is not allowed across the root program and included Copybook".
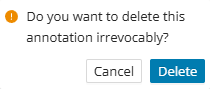
An annotation can be deleted from the CodeViewer (Single Module & Assembled view) by clicking the delete icon on the associated annotation summary bar.


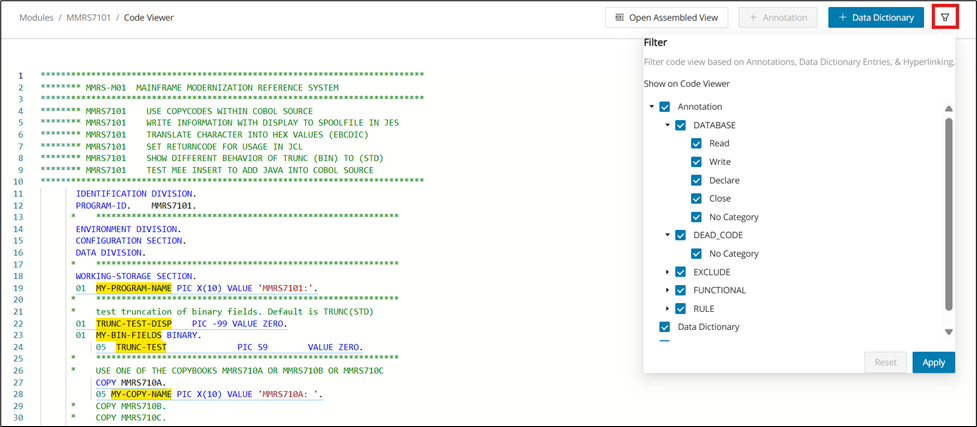
Filter annotations and Data Dictionary entries by clicking the filter icon in the top right corner.
JCL symbolic parameter values
The assembled view for JCL can also resolve symbolic parameter values while you inspect a job. This helps you understand the effective runtime values without leaving the viewer. The note below describes how the hover behavior works.
Info
JCL only: Hovering over Symbolic Variables in the Assembled Code Viewer will show the actual value as a pop-up.

Annotations
With the Code Viewer, you can view, add, edit, and remove annotations. This makes the source panel a direct workspace for documenting code behavior while you review it. The following sections describe the main creation and management actions.
Creating an Annotation in Code Viewer
Step 1:
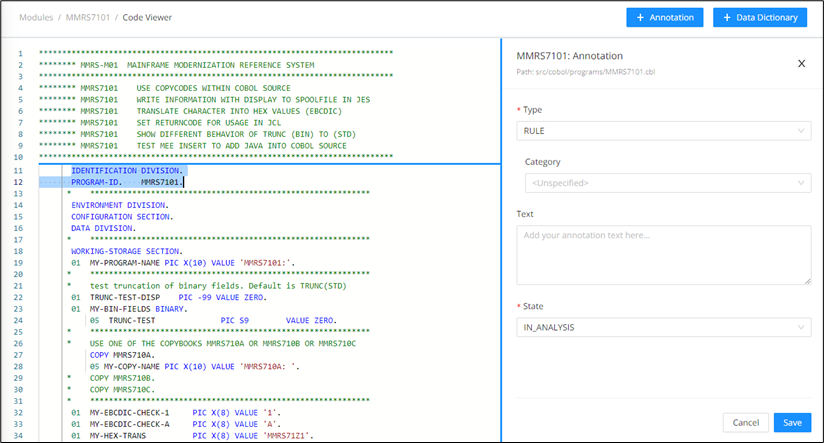
Mark the section of code for which you want to create an annotation, then click + Annotation on the upper right. Alternatively, mark and right-click the section of code, then select Create New Annotation from the context menu.
Step 2:
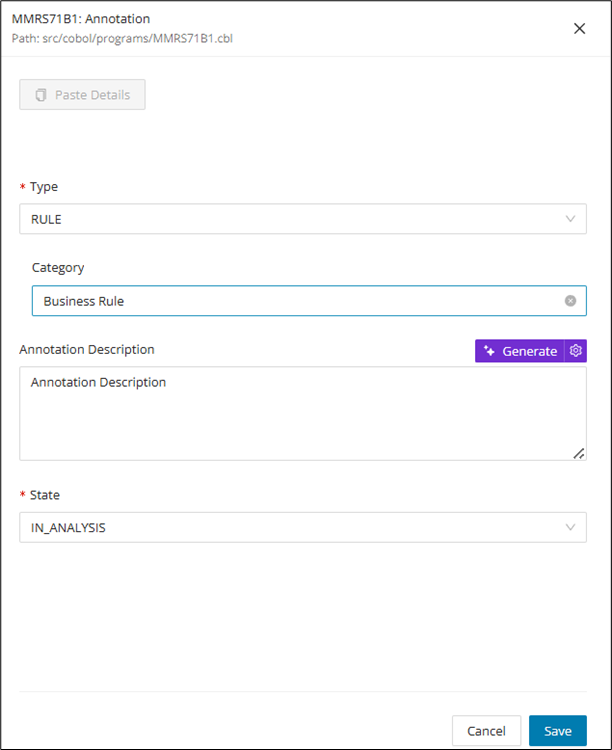
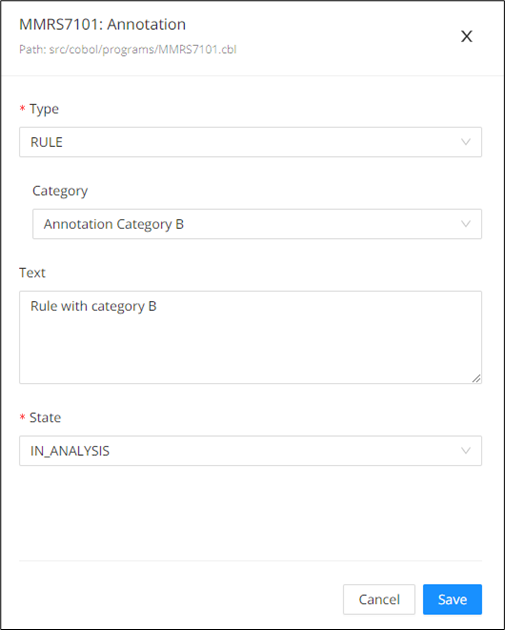
When the annotation editor opens, complete the fields below:
- Type: Select the type of annotation from the dropdown list. The following types are available:
- Database
- Dead code
- Exclude
- Rule
- Category: Select the category (Optional).
- Text: Add a suitable description of the selected code in the text box.
- State: Select the appropriate state from the dropdown list. The following states are available:
- Candidate
- In Analysis
- For Review
- Rejected
- Approved
- Invalid
Step 3:
Click Save to complete the annotation.
Annotation description with Gen AI
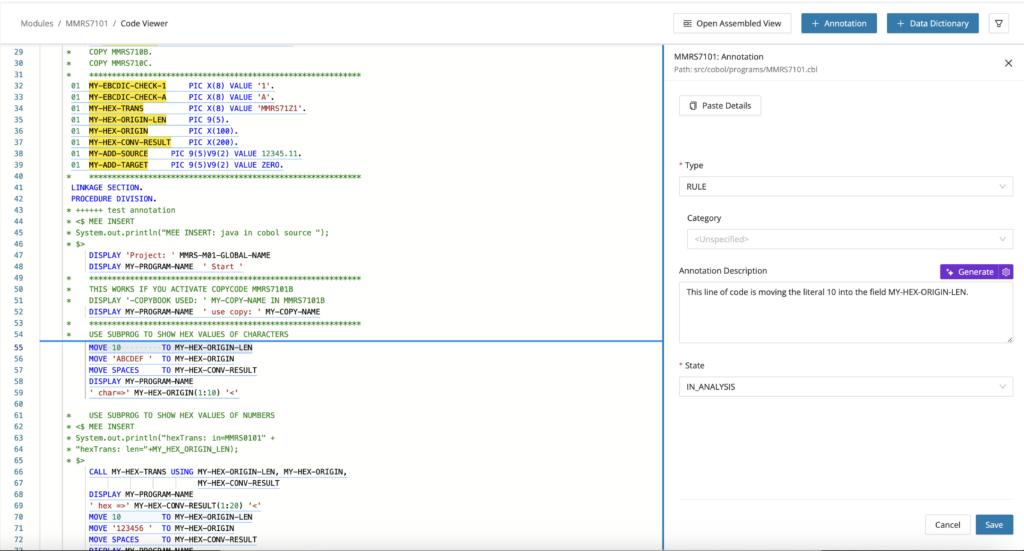
Generate allows users to generate an AI-based annotation translation for the created annotation. The generated description might change with each use of this feature.
Configuration
The feature toggle generativeAiTranslation must be enabled in the WebUI feature console.
Managing Annotations in Code Viewer
After you create an annotation, it will appear directly in the Code Viewer. You can also locate the same annotation in the Annotations page for additional details (see Annotations). From the Code Viewer, you can manually manage each annotation using the actions described below.
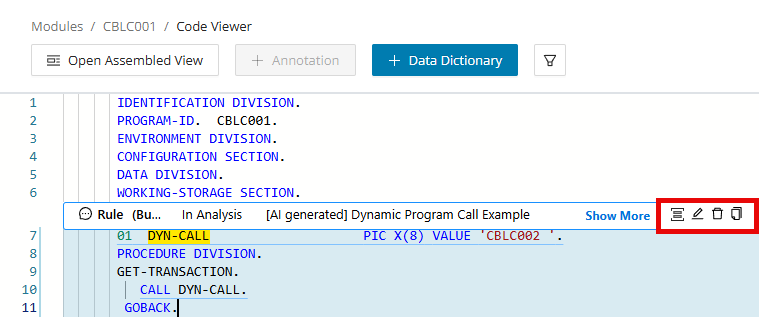
Functional Blocks group one or more annotations into a higher-level "block of functionality," so you can describe code behavior at a process level. From the Code Viewer, click on the Functional Block icon to create Functional Blocks and assign them to annotations. For other creation options, see Functional Blocks Creation
Functional Block Modal from Code Viewer
In Code Viewer, on the annotation overlay, click the Functional Block icon to open the "Assign Annotation to Functional Block(s) modal.
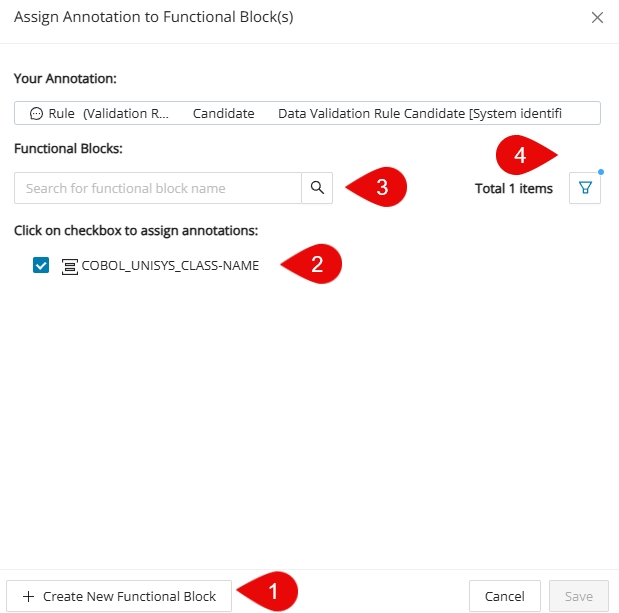
1. + Create New Functional Block : Click to create a new functional block.
Create New Functional Block Walkthrough
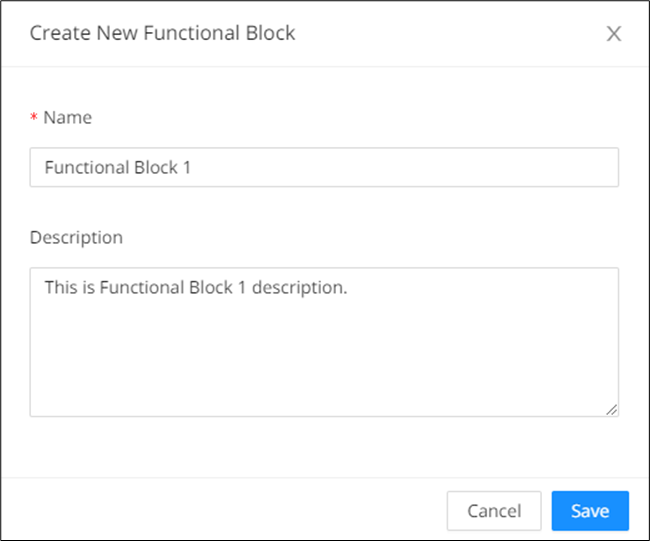
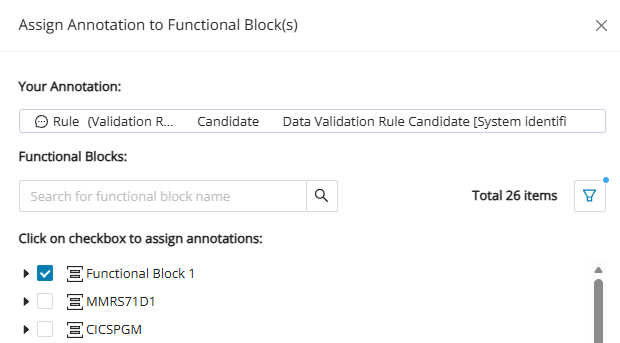
Enter the Name and Description and then click Save . The annotation will automatically be assigned to the newly created block.
Warning
Duplicate Functional Block names aren't allowed within the same module.
2. Assign/Unassign Checkboxes: Check to assign the annotation to a Functional Block; uncheck to unassign.
3. Search: Search Functional Blocks by name/keyword to quickly locate the right one.
4. Filter: Narrow the list of Functional Blocks to your liking from the filter modal.
Functional Block Filter Walkthrough
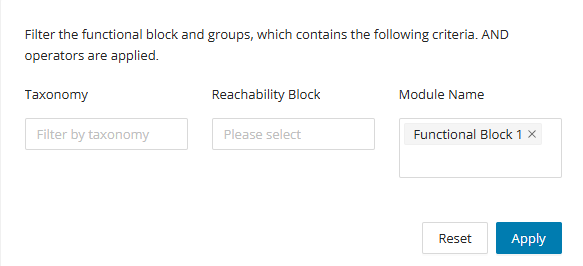
Enter the taxonomy, reachability block and/or module name to filter and click Apply . To reset the filter click Reset .
Click the Edit icon in Code Viewer to open the Annotation Edit side panel, where you can review and update the annotation's details (copy/paste annotation, type and category, English translation, description generation, and state).
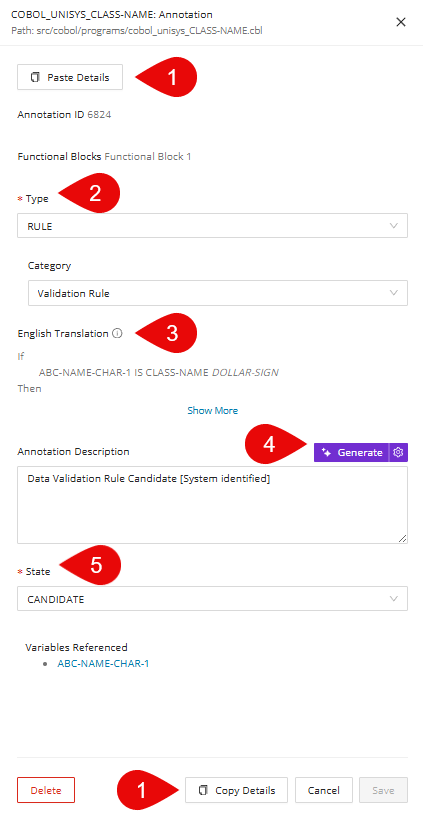
1. Copy/Paste Details: Click Copy Details to copy an annotation's full set of fields, then open another annotation and click Paste Details to apply the same values and make it identical. See Annotation Copying and Pasting for more annotation copy/paste options.
Copy/Paste Details Walkthrough
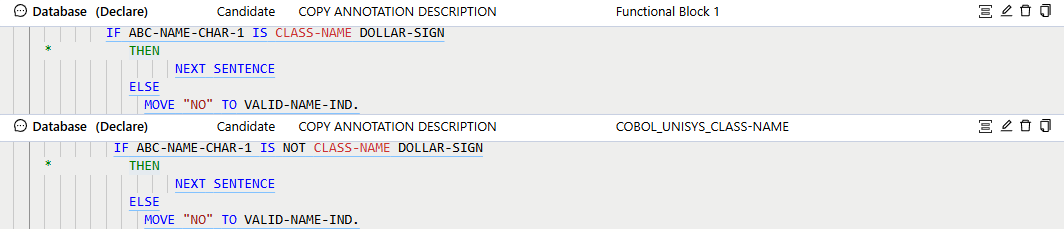
Here is an example of two annotations that contain different fields. Follow these steps to make them identical.
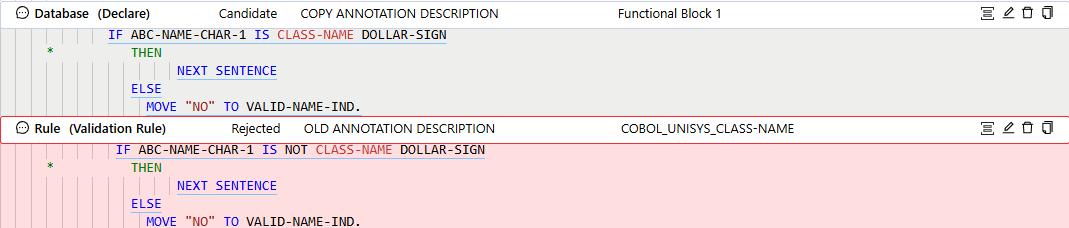
First, click the edit icon of the annotation you want copied and click Copy Details . The button will change to Copied to indicate the annotation's details are ready to be pasted. Then open the annotation you want the details to be pasted to and click Paste Details .
2. Type & Category: Use Type & Category to place annotations into main categories (Type) and further classification (Category) if needed. See Annotation Types and Categories for more information on each Type and Category. You can also add custom categories under the Configuration page (see Annotation Configuration)
3. English Translation: Shows a plain-English rendering of the annotation logic to make the code intent easier to review and validate (see English Translation Data point).
4. Generate Annotation Description: Click Generate to auto-draft the annotation description using GenAI, or click the Advanced setting icon to open the Advanced AI Options modal and fine-tune how the description is generated. See Generate Annotation Descriptions for more context.
5. State: Sets the annotation's current lifecycle status to support review, filtering, and workflow.
Click the delete icon. You will be given a confirmation dialog before completing the action. Click Delete to finalize your decision.
Click the Copy icon to save the annotation details from the Code Viewer. Find (or create) a target annotation, then click Paste Details to populate the fields with the copied content; review and adjust as needed, and click Save . You can find the Paste Details button from the annotation editor from Code Viewer (see Edit) or the Annotations page.
Data Dictionary
The Code Viewer enables you to not only create data dictionary entries, but also to edit and remove them. This lets you capture field-level context while you are already focused on the relevant source lines. The steps below outline how to add, maintain, and delete entries from within the viewer.
Info
COBOL, Java, Natural, and PL/I are supported.
Creating a Data Dictionary entry
Step 1:
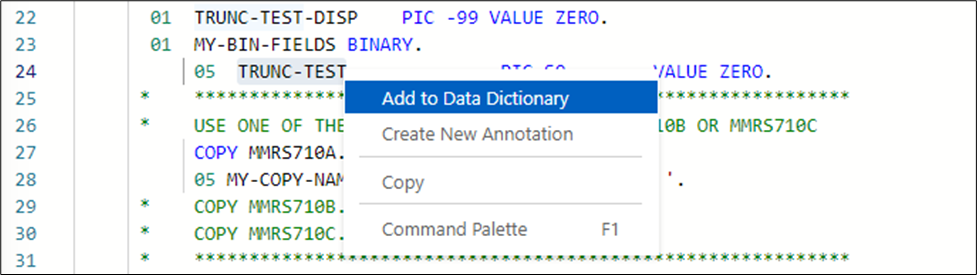
Mark the expression to be entered in the Data Dictionary, then click + DATA DICTIONARY on the upper right. Alternatively, mark and right-click the expression, then select Add to Data Dictionary from the context menu.
Info
Ensure that the entire expression is marked when performing this step.
Step 2:
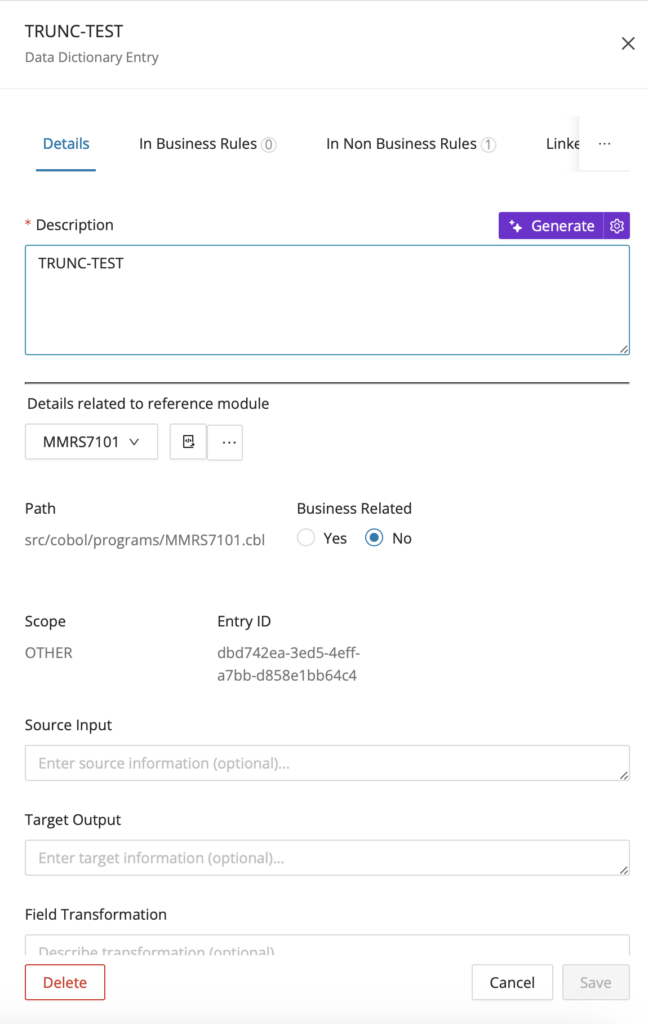
When the Data Dictionary Entry editor opens, in the Details tab, complete the fields below:
- Description: Enter a description for the data dictionary.
- Business-related: Select whether this entry is business-related.
- Optional text boxes: Completion of the Field Transformation, Source Input, and Target Output text boxes is optional.
Step 3:
Click Save to save the data dictionary entry.
Editing Data Dictionary entries
Step 1:
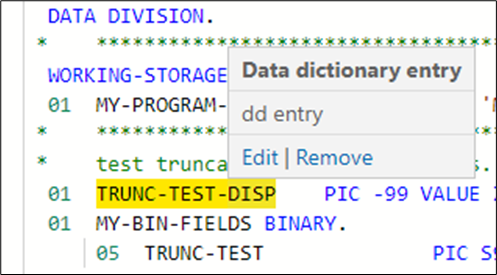
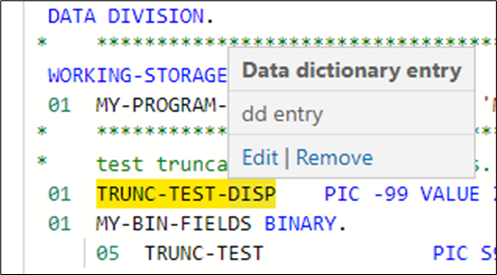
To edit a data dictionary entry, hover the mouse over the entry in question and select Edit.
Step 2:
Make your edits in the window that opens. Any linked Annotations will be shown in the appropriate tab when opened in Code Viewer.
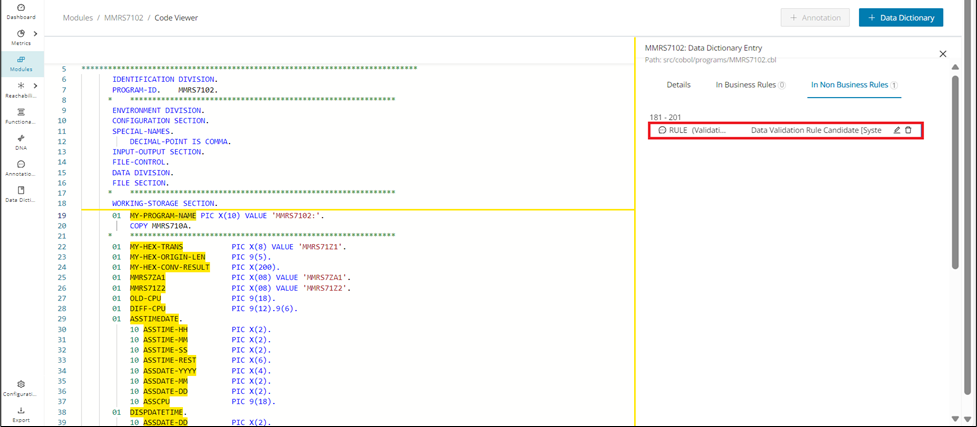
Step 3:
Click Save to save your changes.
Removing Data Dictionary entries
To remove a data dictionary entry, hover the mouse over the entry to be deleted and select Remove.
Data Lineage
You can also launch Data Lineage directly from the Code Viewer for supported fields and technologies. This is useful when you want to move from a specific source reference into a broader data-flow investigation. Follow the Data Lineage page for the CodeViewer for the complete workflow and visualization options.