Annotations
Annotations encapsulate metadata about a snippet of code to provide insights into its purpose. Together, they form the foundation for documenting the functionality of a system, especially when combined into Functional Blocks. The Annotations page allows you to view and work with annotations. It displays a list of all available annotations that can be narrowed down according to your search and filter criteria for each column.
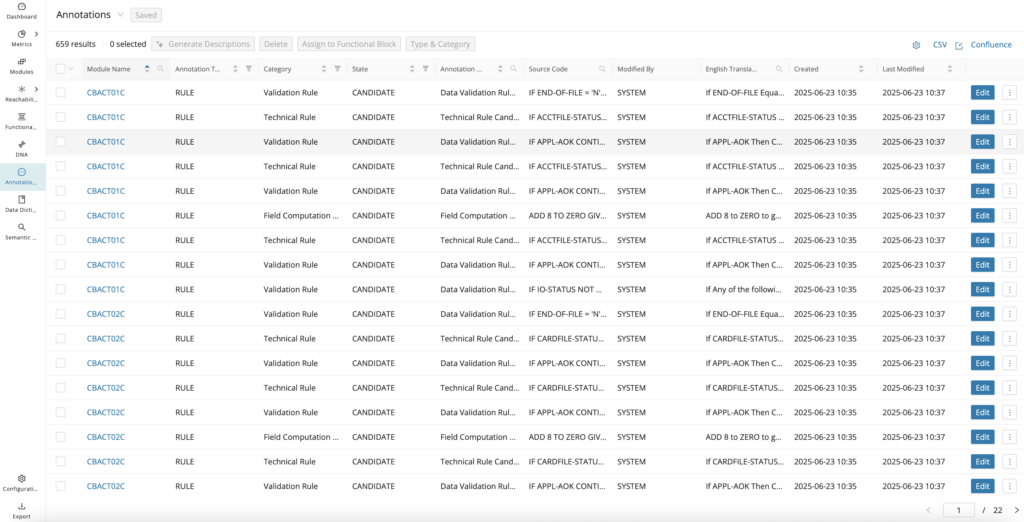
The annotation table provides extensive insight into the project's annotation details. The visible columns can be adjusted using the settings icon in the top right corner.
Click the up and down arrows in the column headers to sort the result list. To refine the search, select specific values for the respective columns via the filter or search icons.
Once the desired annotations are displayed, export the list by clicking CSV in the top right corner.
You can edit the description and state of annotations displayed in the result. Click Edit of the corresponding annotation list entry to open an Edit Annotation Details dialog. Subsequently, enter the description, select the appropriate state from the drop-down list, and click Save .
Open the shortcut menu next to Edit to directly open the Code Viewer for the corresponding module at the position of the selected annotation.
Annotation identification reasoning
When auto-generating annotations, the system justifies why Rule Type annotations were categorized a certain way, for example, (business rule vs technical rule). On the Annotations page, select Identification Reason from the setting options to display a new column with the Identification reasoning types and tags.
Info
Requires executing Identify Candidates to auto-generate the annotations with the Identification Reason data point populated. This feature is currently only supported for COBOL.
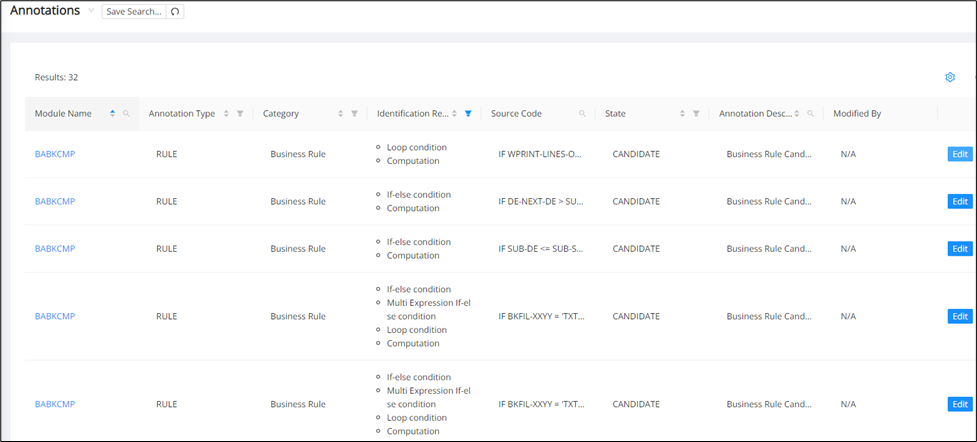
The identification reasoning Types are Conditions, Actions, and Nesting, and the relevant tags are mentioned below:
| Conditions | Actions | Nesting |
|---|---|---|
| If-else condition | Computation | Nested Condition |
| Multi-expression | Input from an external data source | |
| Loop condition | Output to external data source | |
| Cobol Evaluate condition | ||
| Natural Loop File Access condition | ||
| Select condition | ||
| Other condition |
Info
For Nesting, multiple identification reason types can be used per Candidate. For example, a nested If-else will have both a Nested condition and an If-else condition.
Annotation types and categories
Annotation Types are used to place annotated code into main categories, while Annotation Categories are used to further classify annotated code beyond their Type as needed. These help with sorting and filtering the annotations and quickly identifying their relevance among different areas of the system. Type Rule and Database Annotations are generated via Identity Candidates. Type Dead Code via Identify Dead Code, and Type Functional via Identify Functional Block or Identify Candidates.
The following table provides an overview of each of the Annotation Types and Categories:
| Types | Categories | Description |
|---|---|---|
| Database | Close | Signals a database connection closing annotated statement. |
| Declare | Signals a declare cursor annotated statement. | |
| Read | Signals a read, for example, (File/Database) annotated statement. | |
| Write | Signals a write, for example, (File/Database) annotated statement. | |
| Dead Code | None | Signals that the annotated statement(s) will never be executed during runtime. |
| Exclude | None | Signals that the annotated statement(s) are not in scope for the Mining project or can be ignored (Manual assignment). |
| Functional | None | Signals that the annotated statement(s) were generated via Functional Analysis and do not use the heuristics of Identify Candidates. |
| Action | Signals that the annotated statement(s) are executable statements inside of a conditional block and are generated via Identify Candidates. | |
| Condition | Signals that the annotated statement(s) are conditional statements that encapsulate executable statements and are generated via Identify Candidates. | |
| Rule | Business Rules | Signals that the annotated statement(s) represent a business obligation regarding some conduct, action, practice, procedure, or compliance within a key business activity or process. |
| Error Processing Rule | Signals that the annotated statement(s) form decision statements that take into account whether the application is in a state of error before proceeding to take some error handling action(s). Consists of both decision and action statements. | |
| Field Computation Rule | Signals that the annotated stand-alone action statement(s) reference input/output variables to execute some computation and produce an output. | |
| Process Rule | Signals that the annotated statement(s) are part of an executable process flow (Manual assignment). | |
| Technical Rule | Signals that the annotated statement(s) form decision statements that take into account the technical state of an application/system, which is based on the programming language/syntax for an application, before proceeding to take some action(s). Consists of both decision and action statements | |
| Validation Rule | Signals that the annotated statement(s) form decision statements that do a comparison check against the internals of a non-business variable(s) to validate the data before proceeding to take some action(s). Consists of both decision and action statements. |
English Translation data point
The English Translation feature allows the user to understand any annotated COBOL code in plain English by adding the default English Translation column to the Annotations table. It helps reviewers interpret annotation logic without reading every original statement in COBOL syntax. Use it to compare technical expressions with a more business-readable rendering before validating the annotation.
Info
This feature is available for COBOL only.
Info
From the annotation table or editor, you can see referenced business or non-business variables linked from the Data Dictionary. Open the linked Data Dictionary Entry in the Data Dictionary Editor and update the Translated Field Name field to give a more meaningful name to the variable, which will be used in the English Translation of the associated annotation, making the English Translation more meaningful as well.

The English Translation feature only supports annotations with type RULE and is visible from the Annotation tables and also in the Annotation Editor.
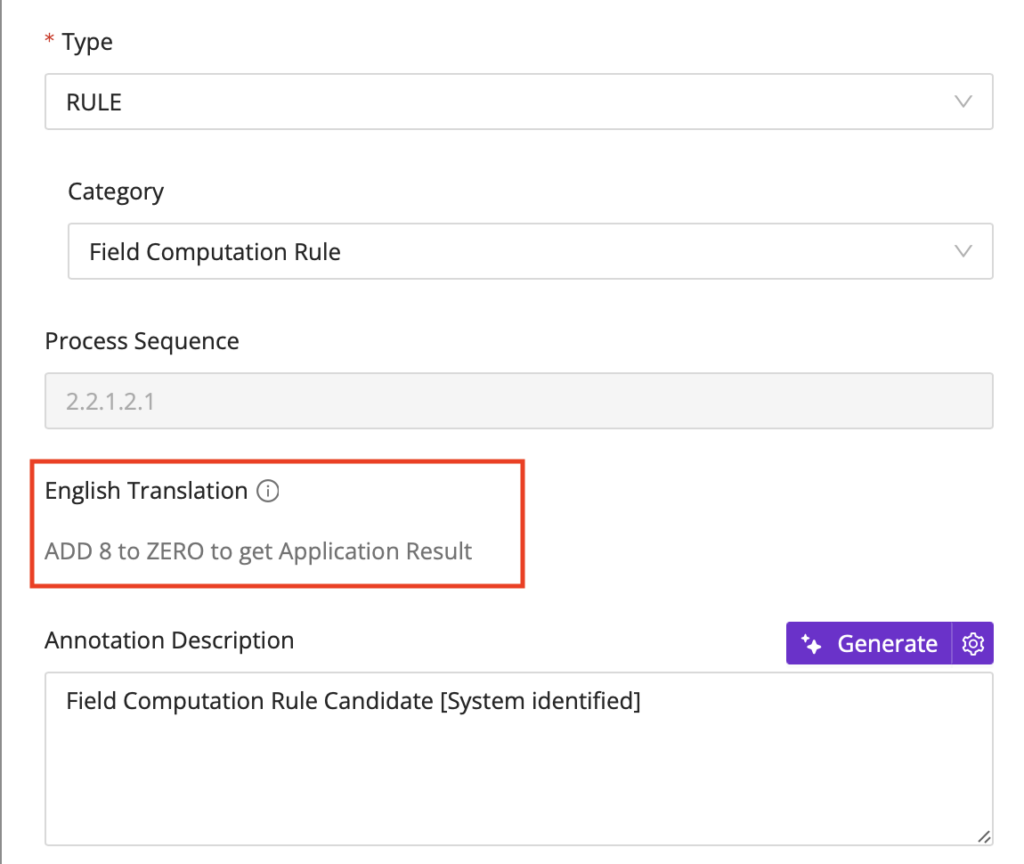
The English Translation feature supports all of the RULE candidates, including:
-
Business Rules
-
Technical Rules
-
Field Computation Rules
-
Validation Rules
-
Error Processing Rules
For comparison expressions, the translation appears as follows:
-
> Greater than
-
>= Greater than or equal to
-
\= Equal to
-
< Less than
-
<= Less than or equal to
For arithmetic expressions, the translation appears like in the following examples:
-
ADDITION: ADD WS_A, WS_B to WS_C == Add WS_A and WS_B to WS_C to get WS_C
-
SUBTRACTION: SUBTRACT WS_A, WS_B from WS_C == Subtract WS_A and WS_B from WS_C to get WS_C
-
MULTIPLICATION: MULTIPLY WS_A, WS_B by WS_C == Multiply WS_A and WS_B by WS_C to get WS_C
-
DIVISION: DIVIDE WS_A, WS_B by WS_C == Divide WS_A and WS_B by WS_C to get WS_C
For expressions with logical operators, the translation appears as follows:
-
&&/&/AND = AND
-
|| / | /OR = OR
-
!/NOT = NOT
Conditional and Action statements should be translated as shown below:
- If/Evaluate/Case type conditional statements with a single expression, the translation appears as follows:
if
-condition here
Then
-actions here
- If/Evaluate/Case type conditional statements with multiple expressions translates as follows:
if any of the following conditions are true:
-expression1 here
-expression2 here
....
Then
-any actions here
- For/Do/While looping conditional statements with a single expression, the translation appears as follows:
while
-expression here
Do
-any actions here
- For/Do/While looping conditional statements with multiple expressions translates as follows:
while any of the following conditions are true:
-expression1 here
-expression2 here
....
Do
-any actions here
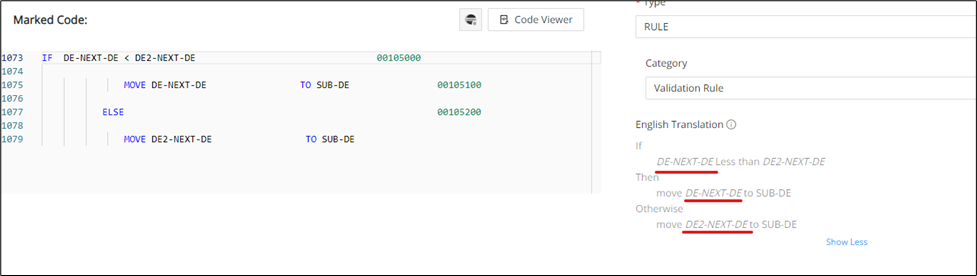
Dynamic field names are those that are not field names/data dictionary entries in the data dictionary table and will be italicized in the translation.
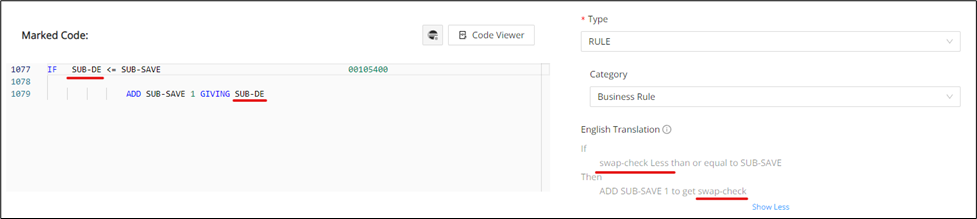
In the English Translation output, if there are linked Data Dictionary entries whose Translated File Name attribute is populated (From the Data Dictionary Editor) to provide a more meaningful name, it will be used in the place of the defined field name.
Business Variables referenced
To display the column “Business Variables Referenced”, click the settings icon in the top right corner and select Base Data > Business Variables Referenced. This view highlights which business-related data elements are tied to each annotation. Use it when you need to trace business context from a rule candidate back to the supporting Data Dictionary entries.
The column contains field names and links to each business-related Data Dictionary entry after the identification of candidates from the Modules Reporting page.
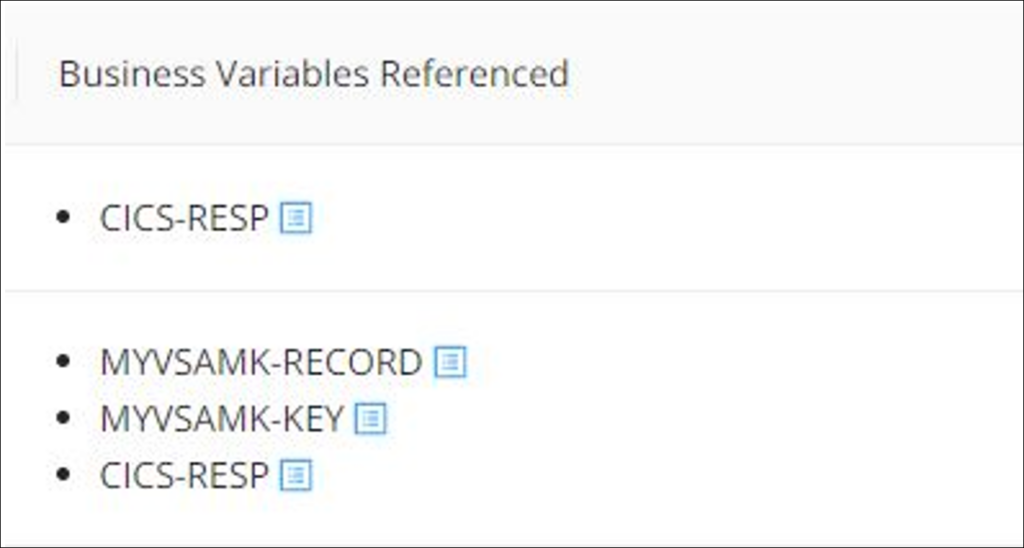
Field names and links are displayed only for Annotation candidates of Type "RULE" and Category "Business Rule".
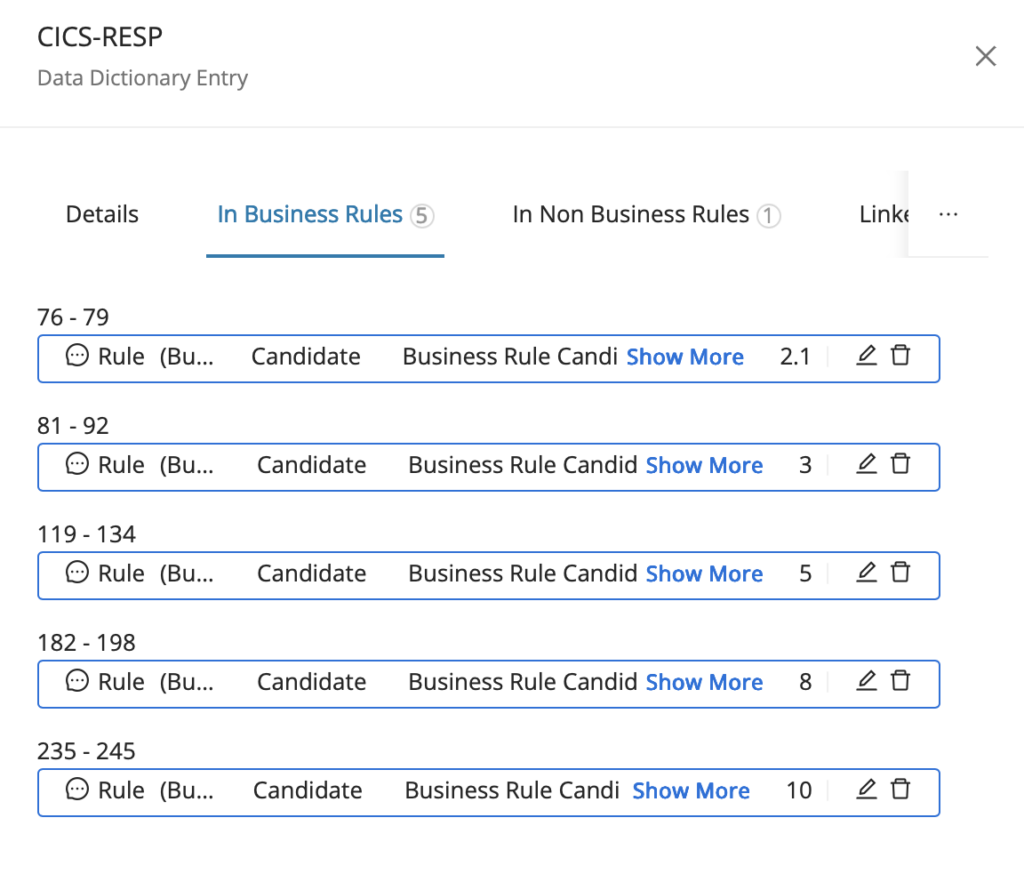
The Data Dictionary editor contains a tab "In Business Rules" with a list of all associated Candidate Business Rules for the corresponding field name. This link is bi-directional, so that the edit icon of each entry in the tab opens the associated Annotation editor for each annotation.
Annotation copying and pasting
In case you would like to manually duplicate annotations across similar code/programs, you can do this using the copy and paste functions for annotations. Copying saves the contents of an annotation to your clipboard so that you can quickly select another snippet of code, create a new annotation, and paste in those saved contents.
Copy Annotation
You can copy an annotation from several places in the UI (for example, from Annotation Tables, the Annotation Editor, or the Code Viewer). Each option copies the annotation’s full details to your clipboard so you can paste them into another (existing or newly created) annotation to quickly duplicate the same configuration.
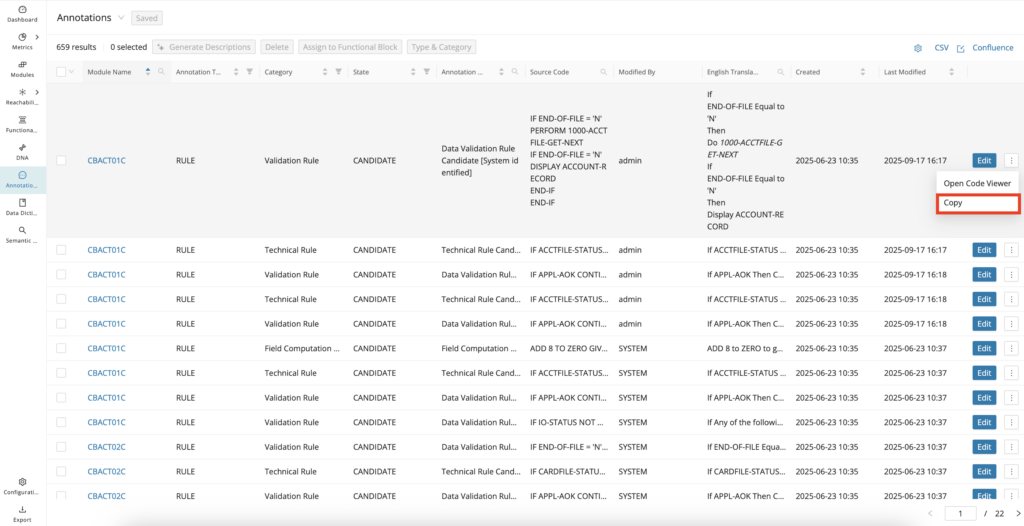
Click on the menu icon of the annotation you would like to copy to open a drop-down menu. Then, click Copy .
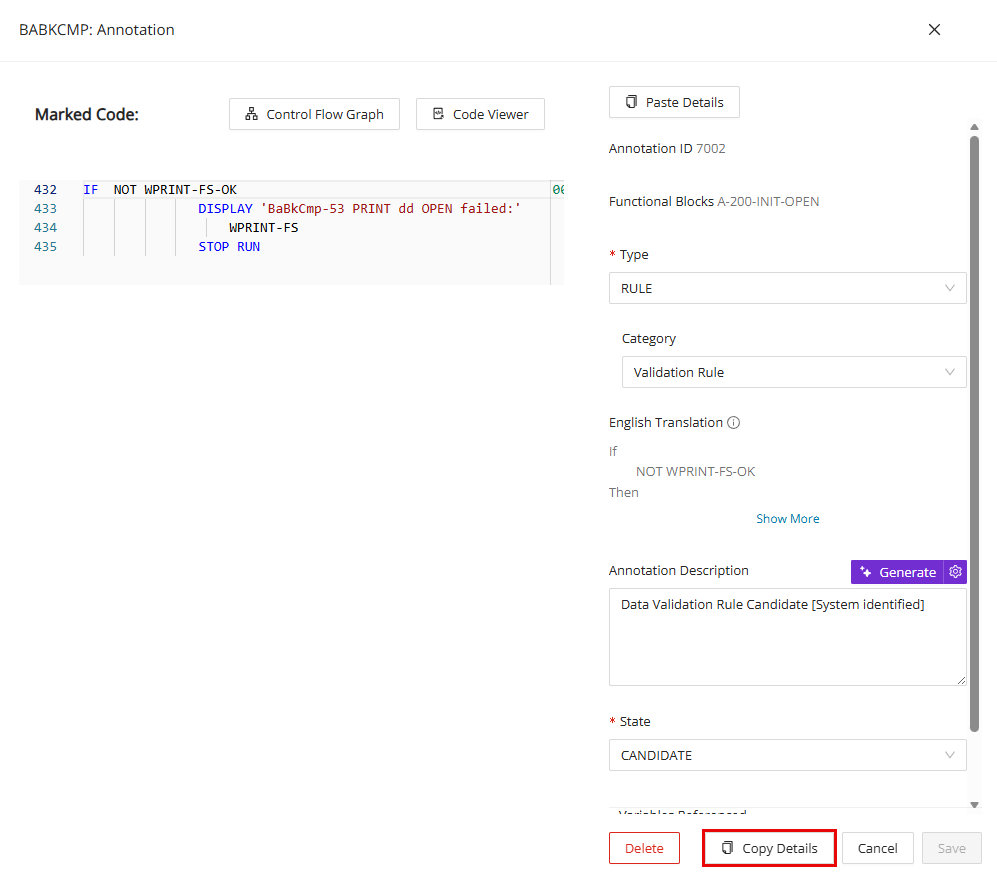
Open the annotation editor for the annotation you would like to copy and click Copy Details .
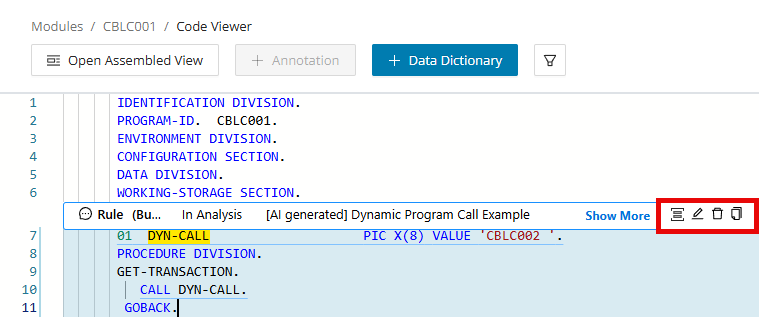
Open the Code Viewer and click on the edit icon of the annotation you want copied. Click Copy Details to copy the annotation. Using this copied annotation, you can Paste Details by either finding another annotation or creating a new annotation to paste the details. See Managing Annotations in Code Viewer for more context.
Paste Annotation
After you’ve copied an annotation, you can reuse it by pasting the saved details into another annotation from either the Annotation Editor or the Code Viewer. Open (or create) the target annotation, then click Paste Details to populate the fields with the copied content; review and adjust as needed, and click Save .
Annotation custom properties
Annotation custom properties let you extend the metadata captured for annotations beyond the built-in fields. They are useful when a project needs client- or domain-specific attributes to support filtering, review, or export. The subsections below describe how categories and mandatory behavior work.
Custom property category
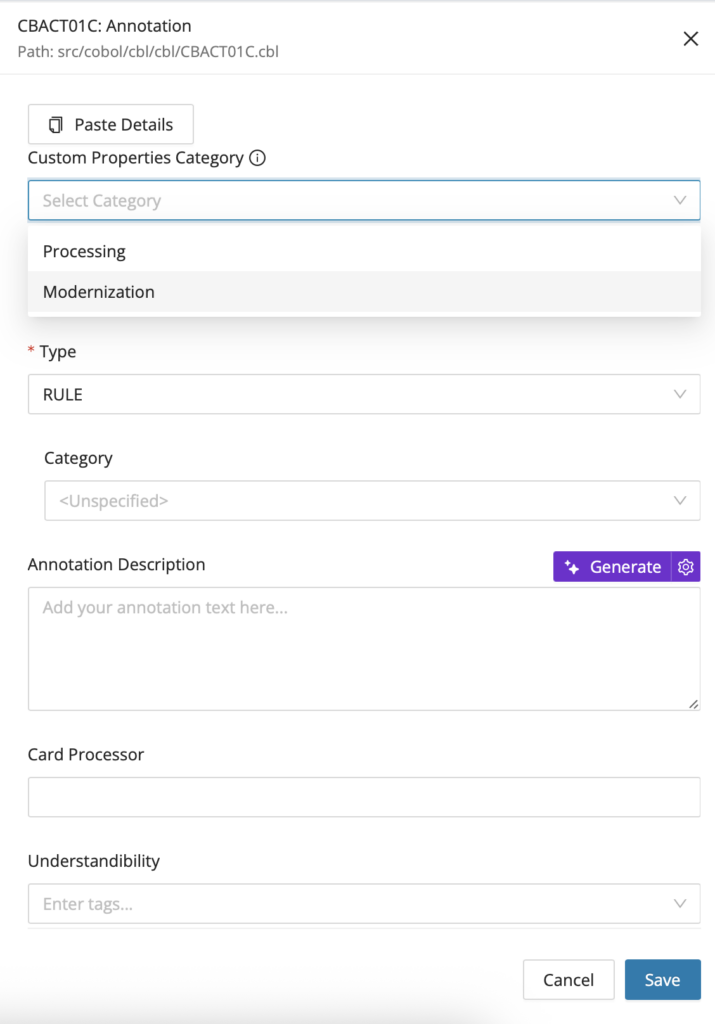
This feature allows the user to select from a drop-down of custom properties categories, which displays the category of custom properties they'd like shown on the annotation editor, and on this basis, custom properties are displayed on the Annotation Editor. When one Custom Property Category is selected on the Annotation Editor, other Custom Property category fields are hidden, and by default, all custom properties scoped to annotations are shown.
Mandatory custom property
The mandatory checkbox has been added in the custom property editor along with an info icon and a tooltip.
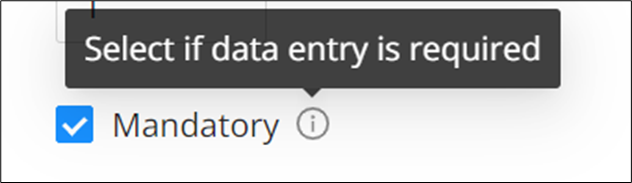
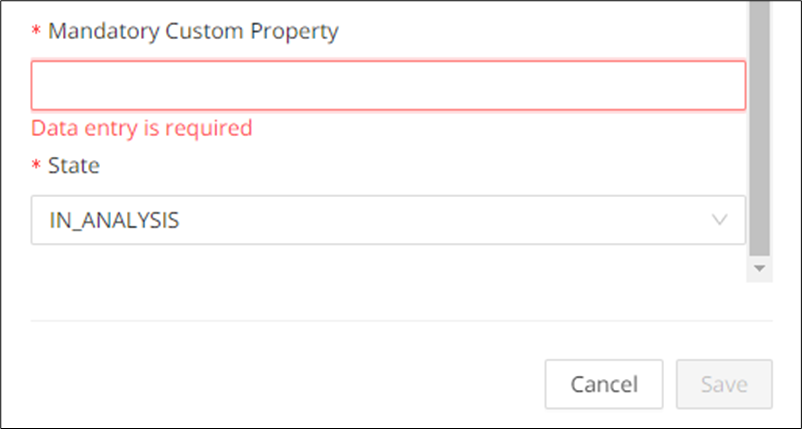
If made mandatory, the custom property is made required in the Annotation Editor. The Save button is enabled and disabled based on the validation of the mandatory field.
Bulk generation of Annotation description
Bulk generation of Annotation description lets you create GenAI-assisted descriptions for multiple annotations in one action. It is useful when you want to accelerate first-pass documentation across a filtered result set. Review the generated text afterward, especially when existing descriptions may be overwritten.
Configuration
The feature toggle generativeAiTranslations must be enabled in the WebUI feature console.
Step 1:
Select all the annotations for which bulk description generation is required and then click Generate Descriptions . The user can overwrite the existing annotation descriptions by selecting those annotations as well.
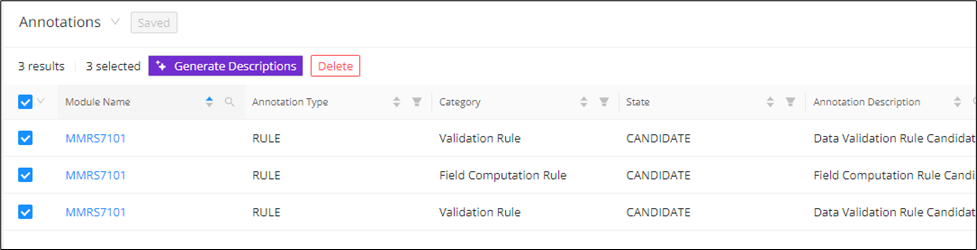
Step 2:
Click Generate Descriptions on the pop-up.
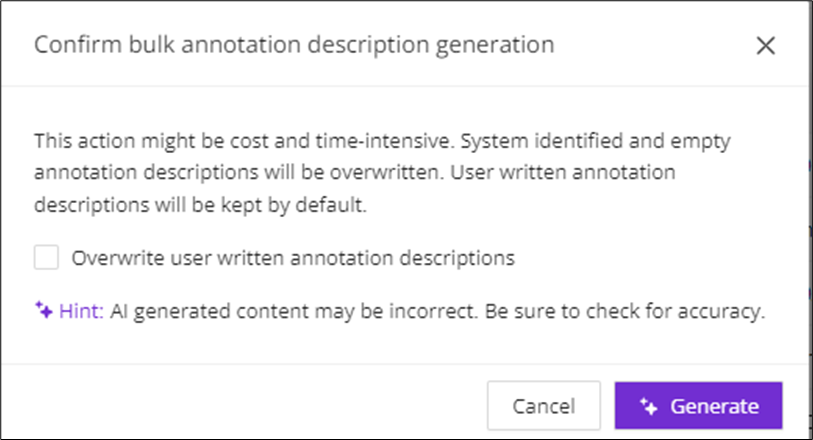
As a result, the annotation descriptions for all of the selected annotations are generated with "[AI generated]" before the description.

Edit Annotation type & category
Individually updating each annotation's type and category can be time-consuming and error-prone. To streamline this process, navigate to the Annotations page and select one or more annotations, and click Type & Category .
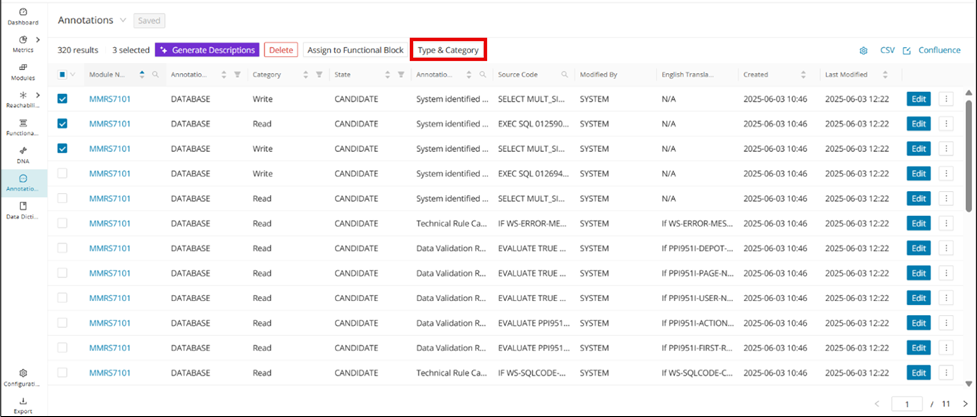
Select the Type and Category and click Save .
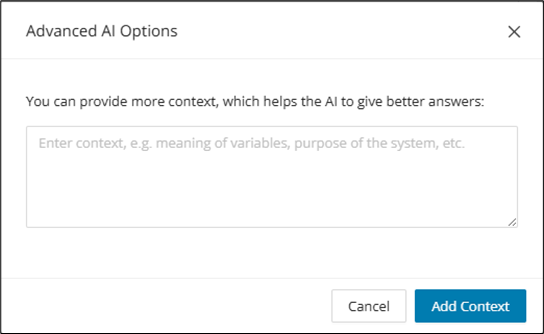
Advanced AI options
There are times when GenAI produces annotation descriptions that are too technical, contain inaccuracies, or require more context. The "Advanced AI Options" modal is where you can provide more context to the prompt and expect better generated results for the annotation description. Some context retrievers that are used by default to provide more meaningful descriptions are:
-
Lines of code before and after an annotation
-
Functional Block: the annotation is part of
-
SQL tables that are accessed in an annotation
-
The name of the module the annotation is part of
Find the "Advanced AI Options" modal from any annotation's edit page. Click the settings icon next to Generate .
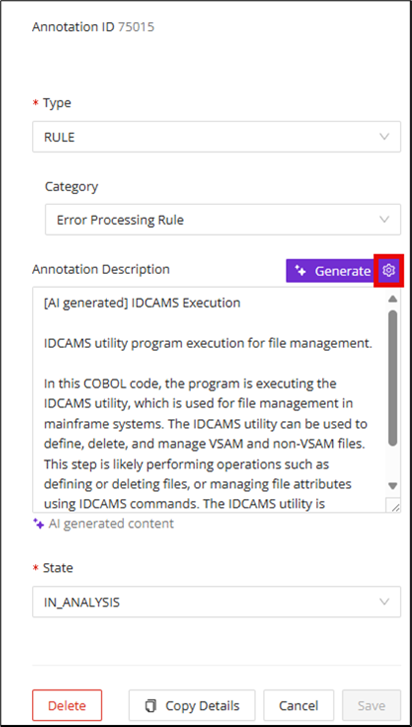
Add any additional industry, client, or codebase-specific context to help generate more meaningful annotation descriptions in the "Advanced AI Options" modal that displays, and then click Add Context .