DB Cutting
The DB Cutting menu provides the functionality at the heart of Decompose. The following section describes the sub-pages that provide the core functionality: Decompose.
Table Decomposer
The Table Decomposer displays the tables that are already connected to the current bounded context. When you start from the legacy graph, the Table Decomposer is already initialized with a set of tables.
Navigate to DB Cutting > Table Decomposer.
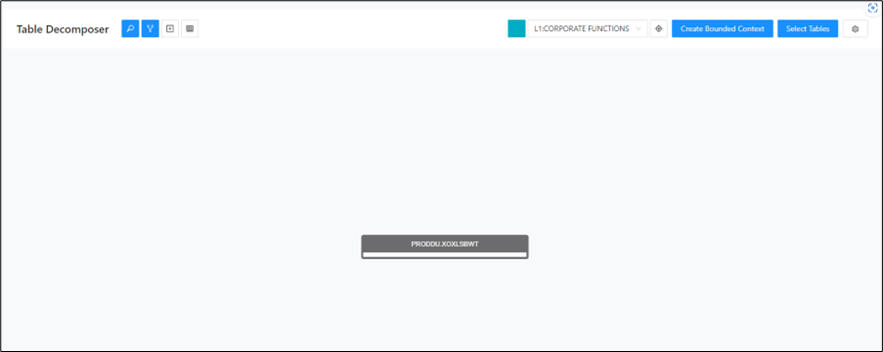
Selecting tables:
Info
The Non-standard Data Access column indicates which tables are in read-only or write-only contexts.
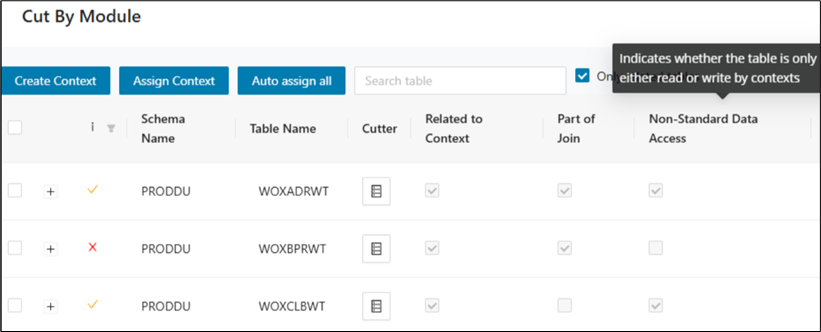
Step 1:
Click Select Tables toward the top right corner of the screen.
Step 2:
Set the filter on Schema Name and the Table Name if required.
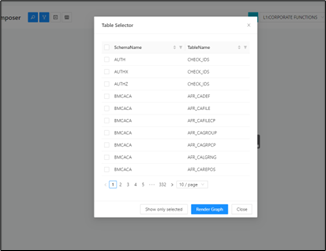
Step 3:
Select the required tables and click Show Only Selected .
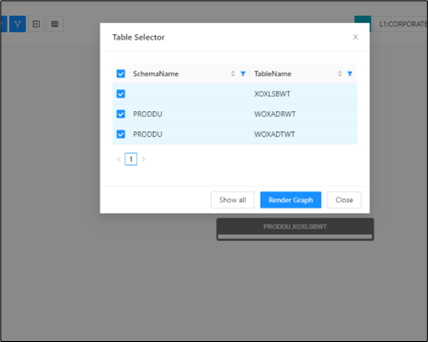
Step 4:
Click Render Graph .
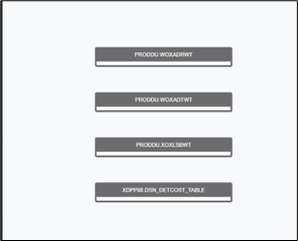
Assign to currently selected Bounded Contexts
Step 1:
Right click on the table and select "Assign to current Bounded Context".
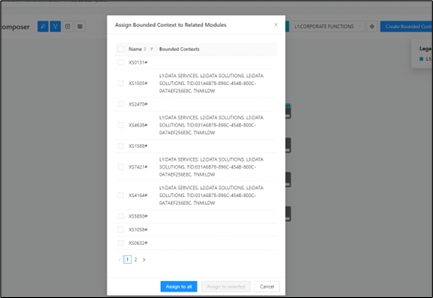
Step 2:
Select the required module that are to be included to the Bounded Context.
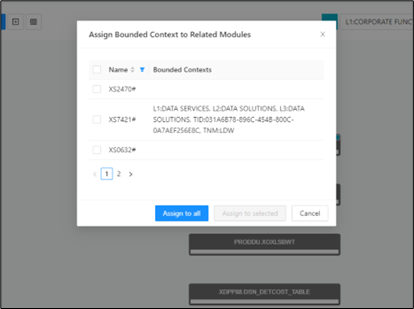
Step 3:
Click Assign to Selected .
Remove Bounded Context:
Step 1:
Right click on the table and select Remove Bounded Context .
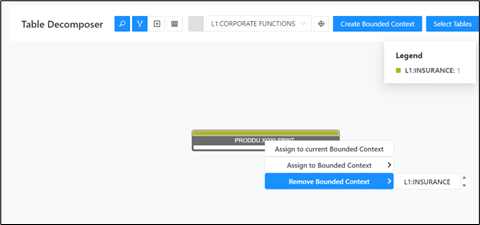
Step 2:
Select the Bounded Context. Bounded Context is successfully removed for the table.
Cut by Module
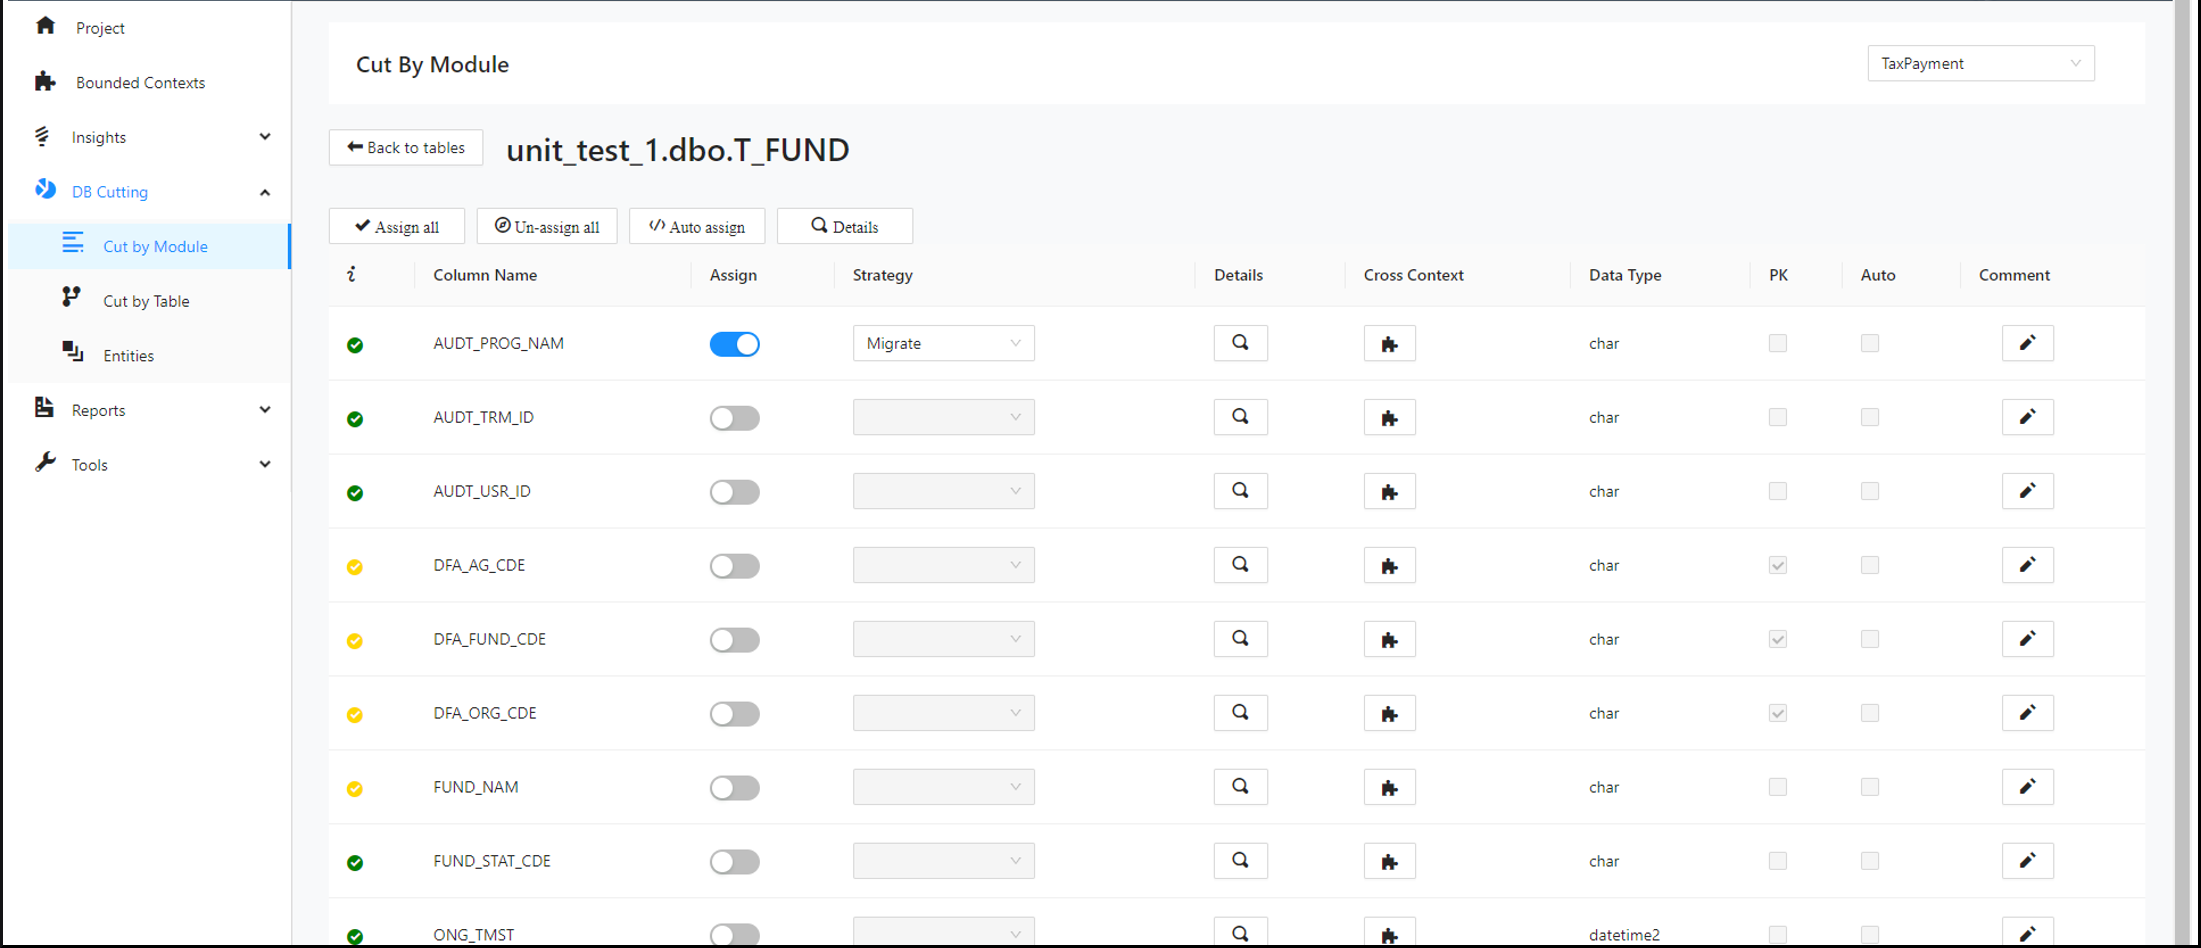
The Cut by Module view helps you review tables in the context of the modules and bounded contexts that use them. It is designed for conflict resolution and migration-strategy assignment at the column level. Use this page when you want to evaluate ownership decisions table by table while keeping application behavior in view.
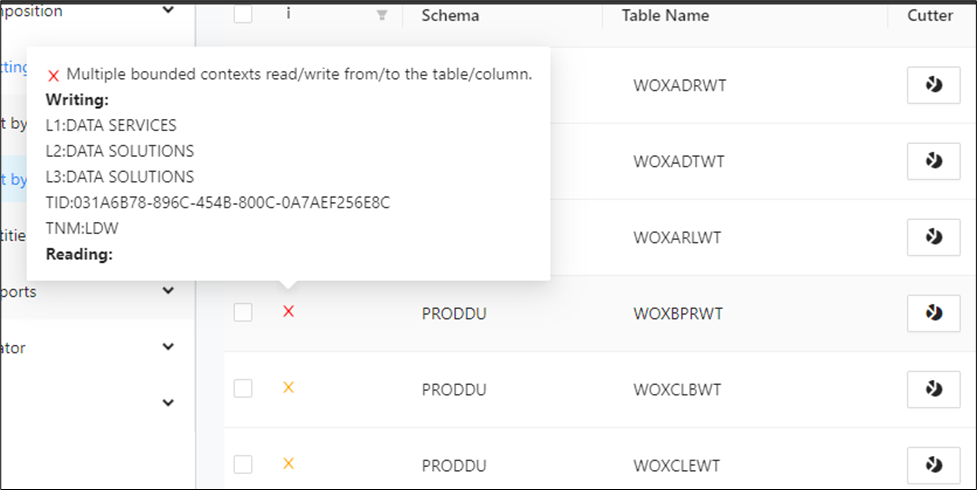
To start cutting by module, import the schema, bounded contexts, modules, and queries, and then resolve conflicts in the Cut by Module view. In that view, review each table and assign the appropriate migration strategy for all columns.
Use Auto Assign All to quickly assign a strategy to the table columns. When you click this button, an appropriate strategy is selected for each column unless the column has conflicts that cannot be resolved automatically. In those cases, you must choose the best strategy.
The general workflow is to first import the schema, then the bounded contexts, modules, and queries, and after that resolve conflicts in the Cut by Module view.
Step 1:
In the left navigation panel, select DB Cutting > Cut by Module.
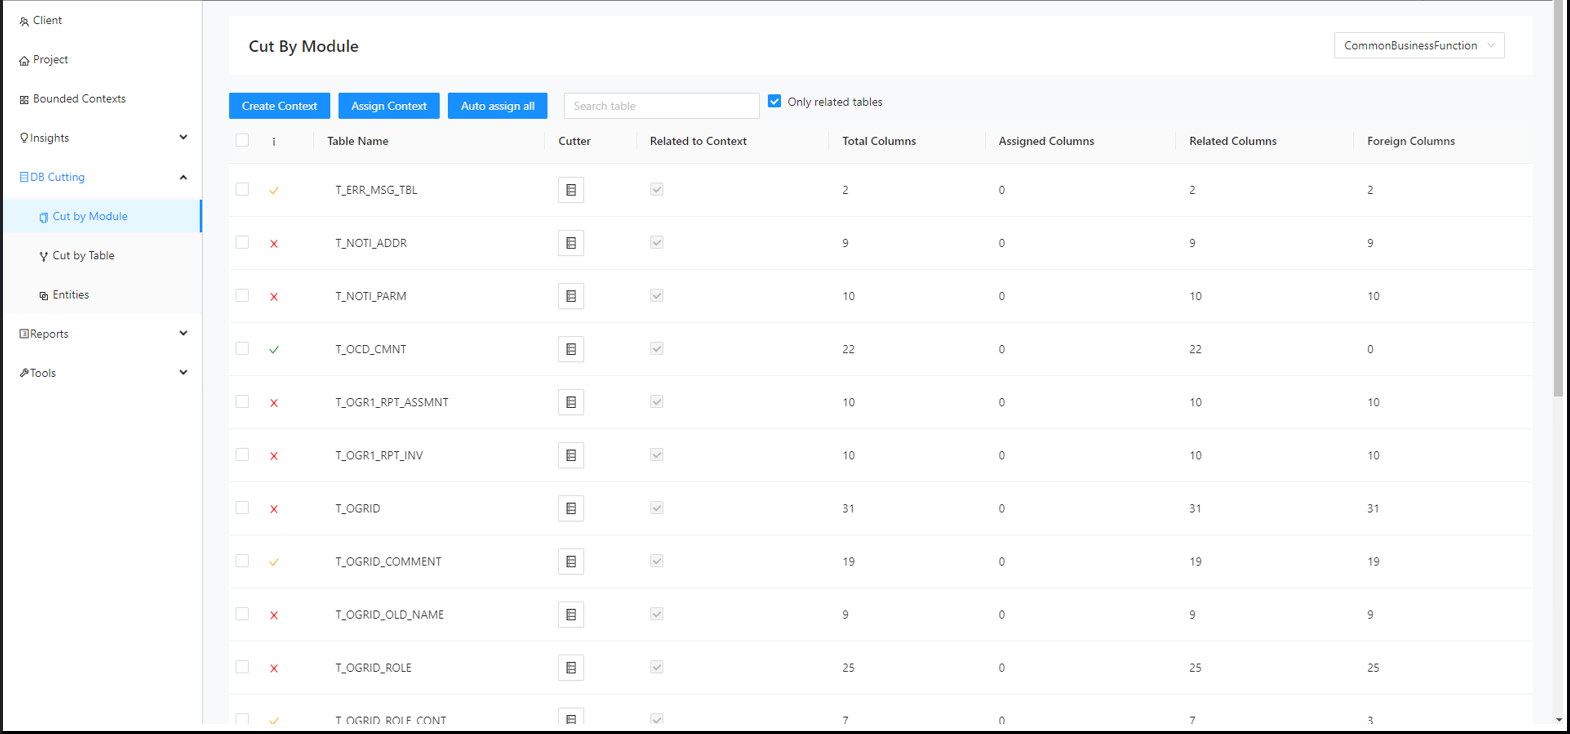
Step 2:
Select a bounded context from the drop-down list in the upper right corner of the page.
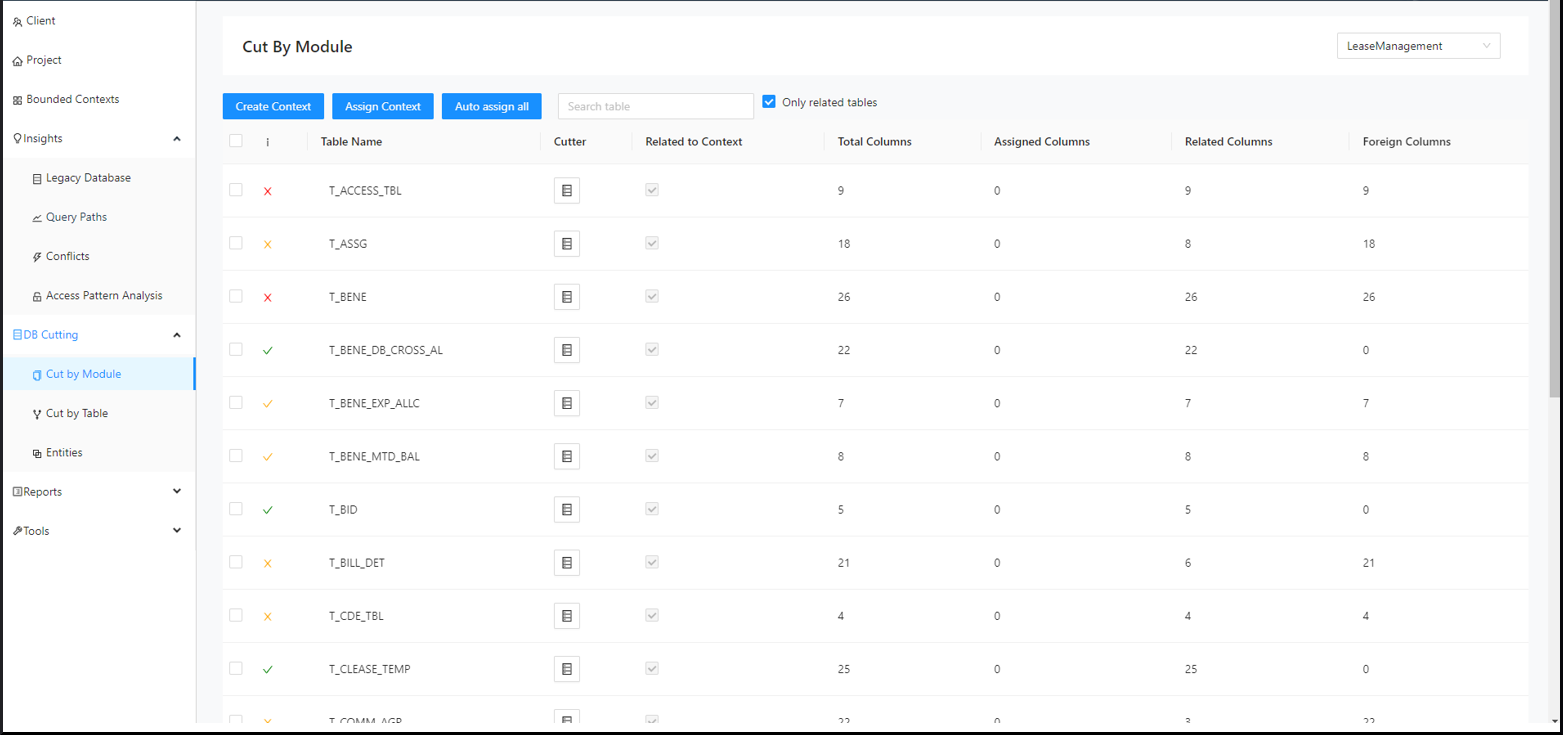
Step 3:
Use the search bar to find the table to cut.
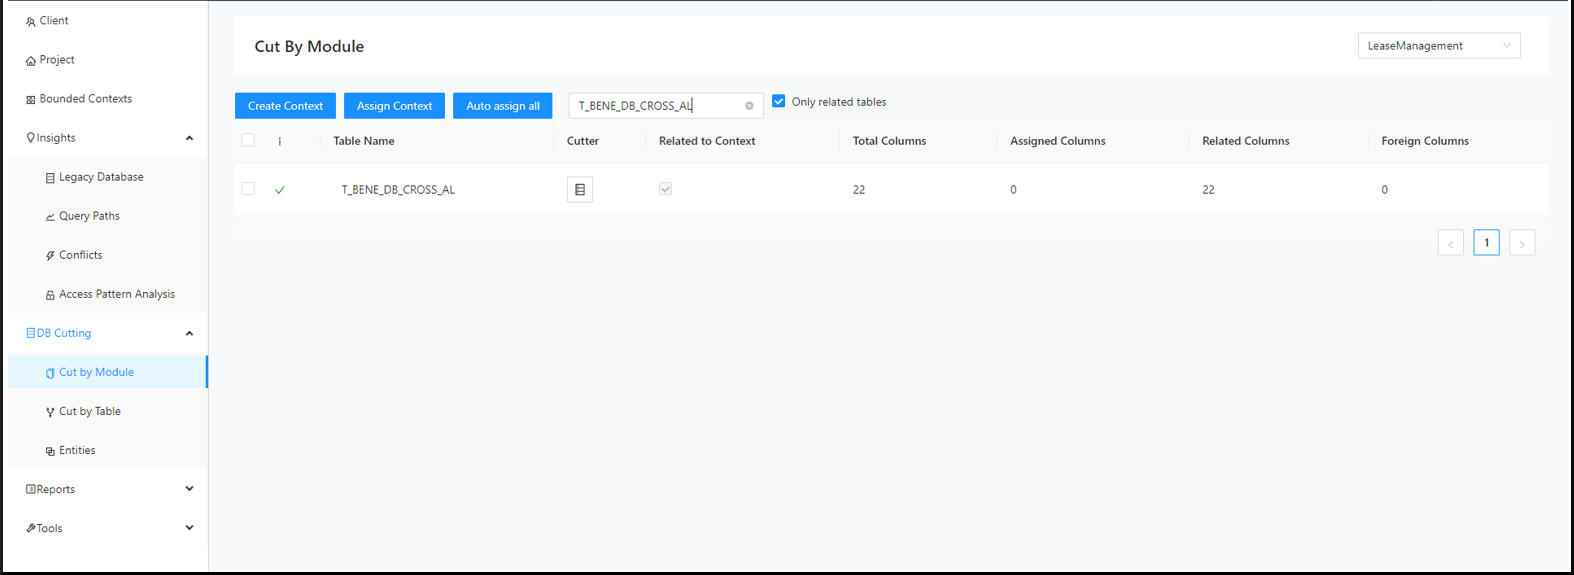
Step 4:
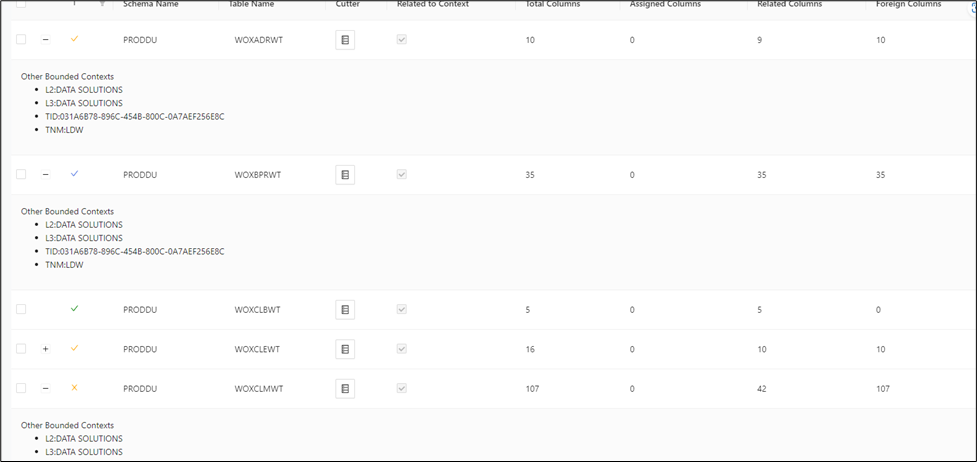
Click on the expand icons beside the tables to display the information about bounded contexts other than the one already selected that are accessing the tables.
Step 5:
Click the Decompose icon of the associated table.
Step 6:
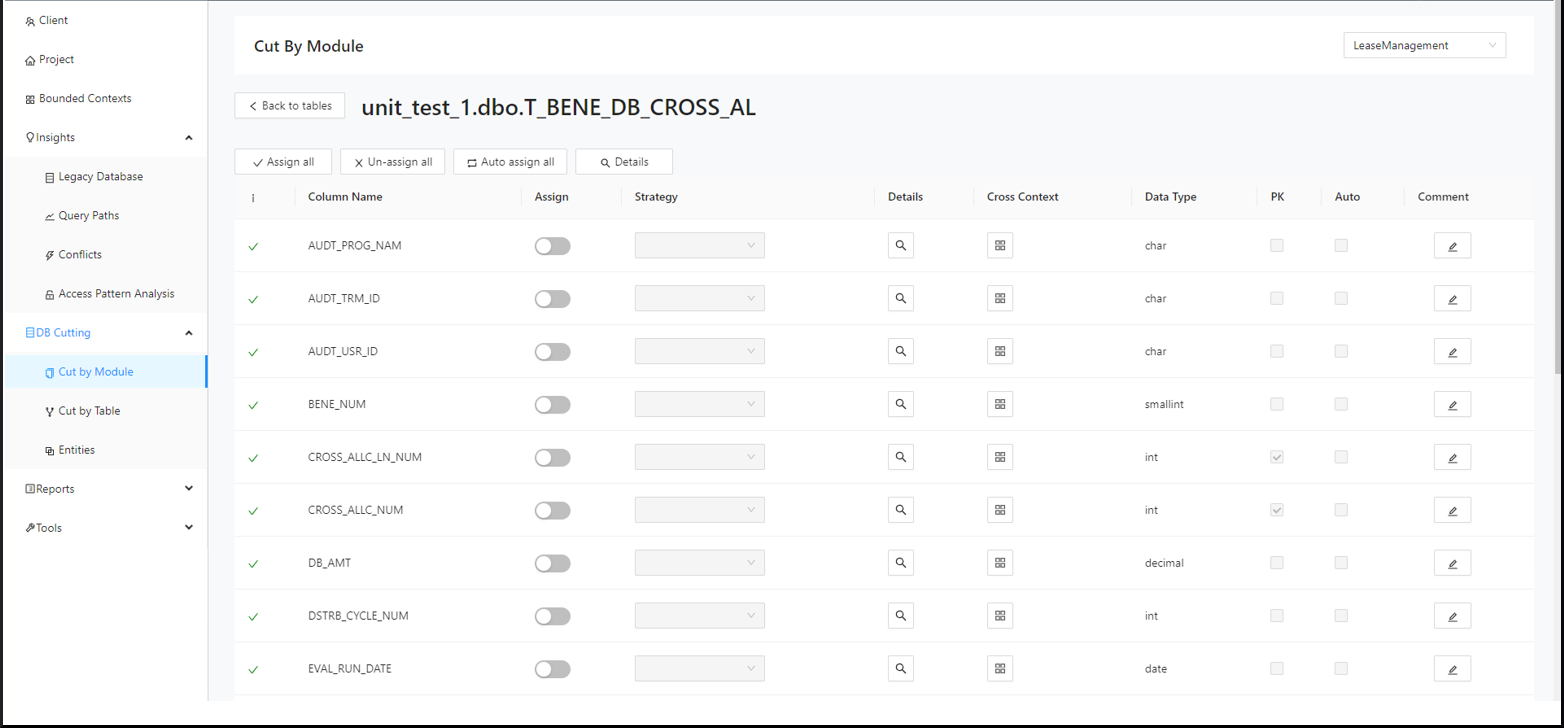
Click Auto Assign All .
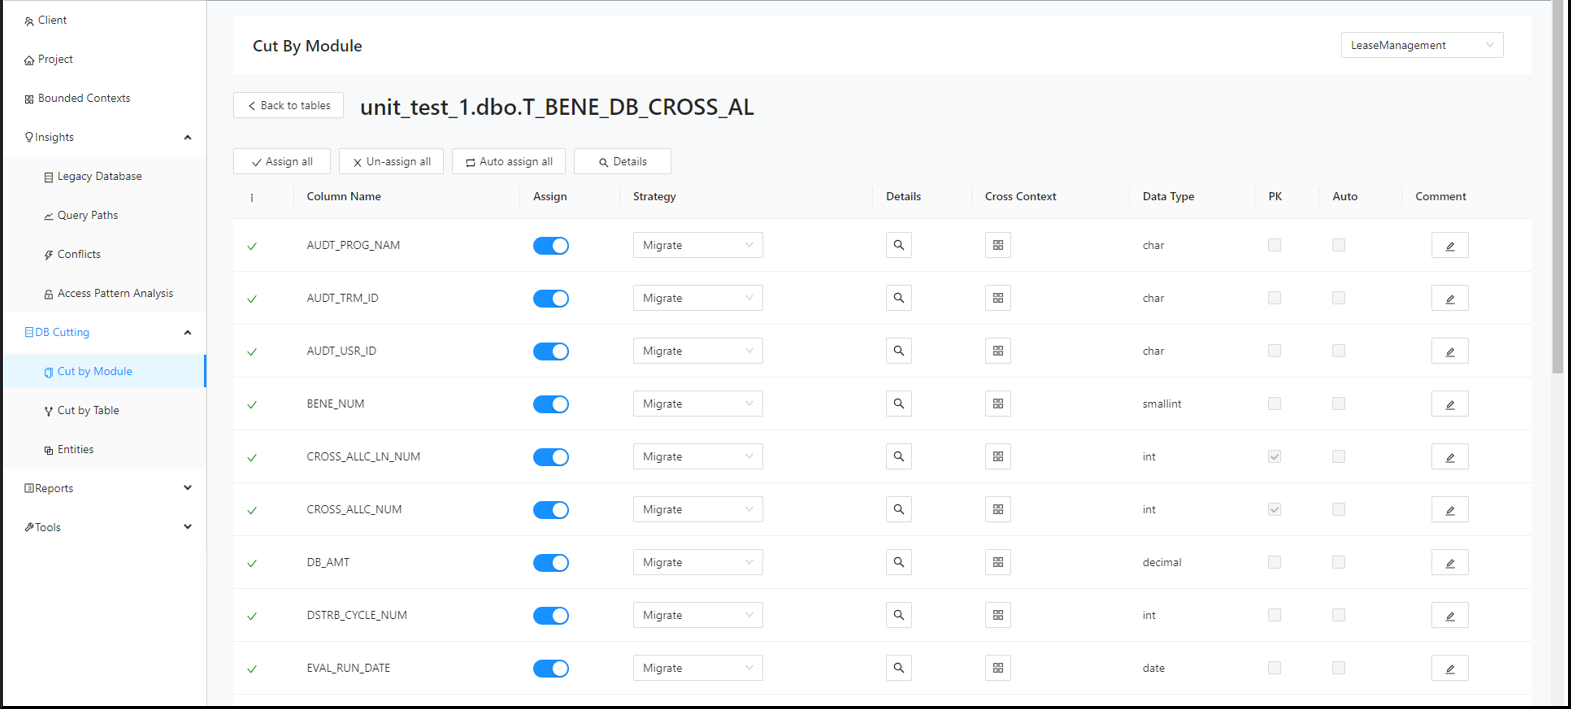
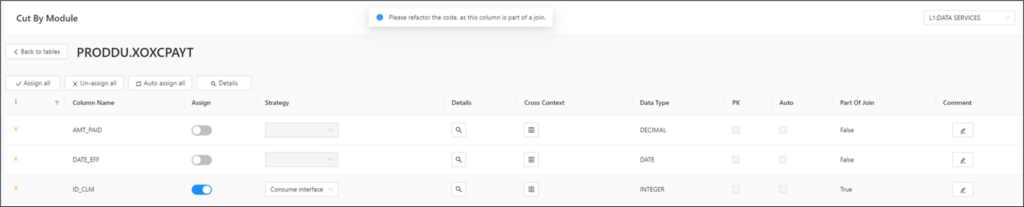
If a column that is part of a join condition is assigned, a warning message will appear.
Columns that are part of a join are clearly marked. If you assign a column that belongs to a join, the page notifies you.
Step 7:
Click Back to Tables .
Step 8:
Click the Decompose icon of the associated table.
Step 9:
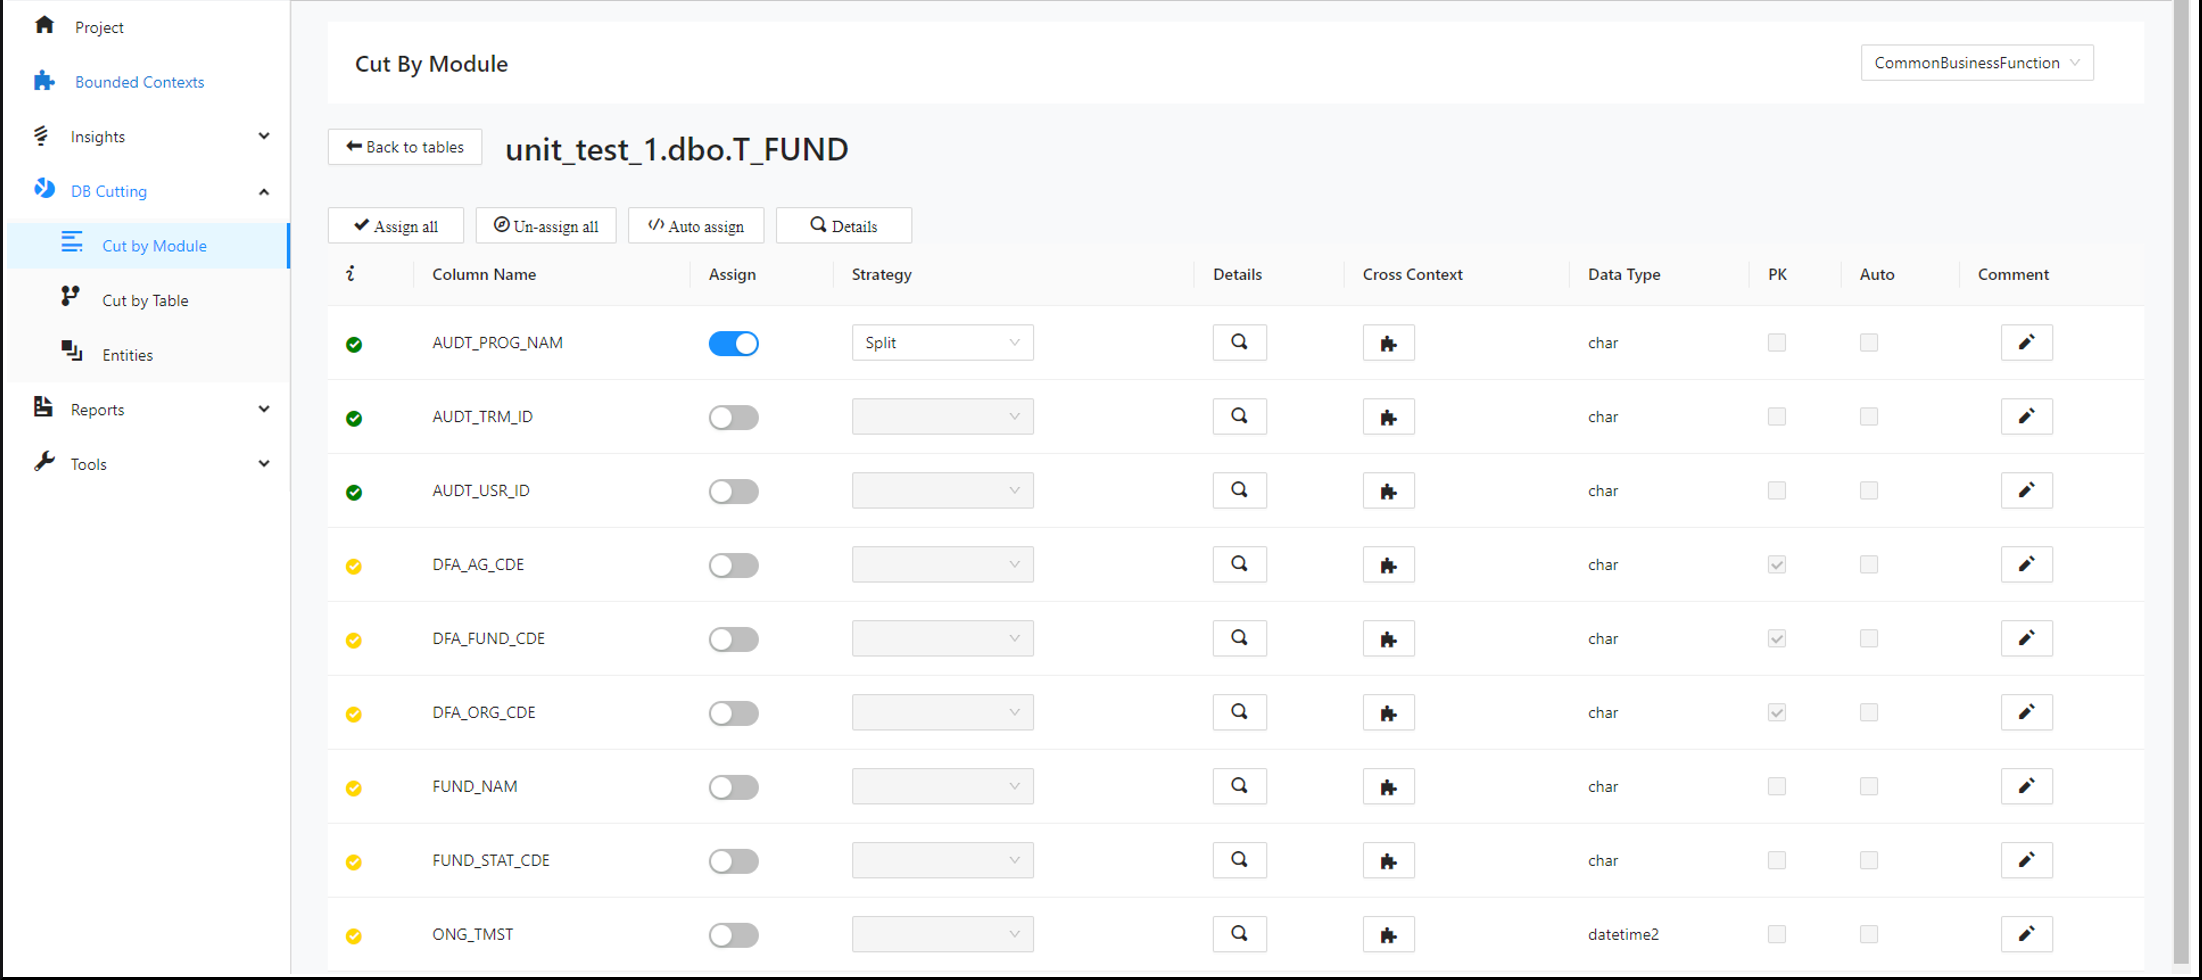
Assign the desired column.
Step 10:
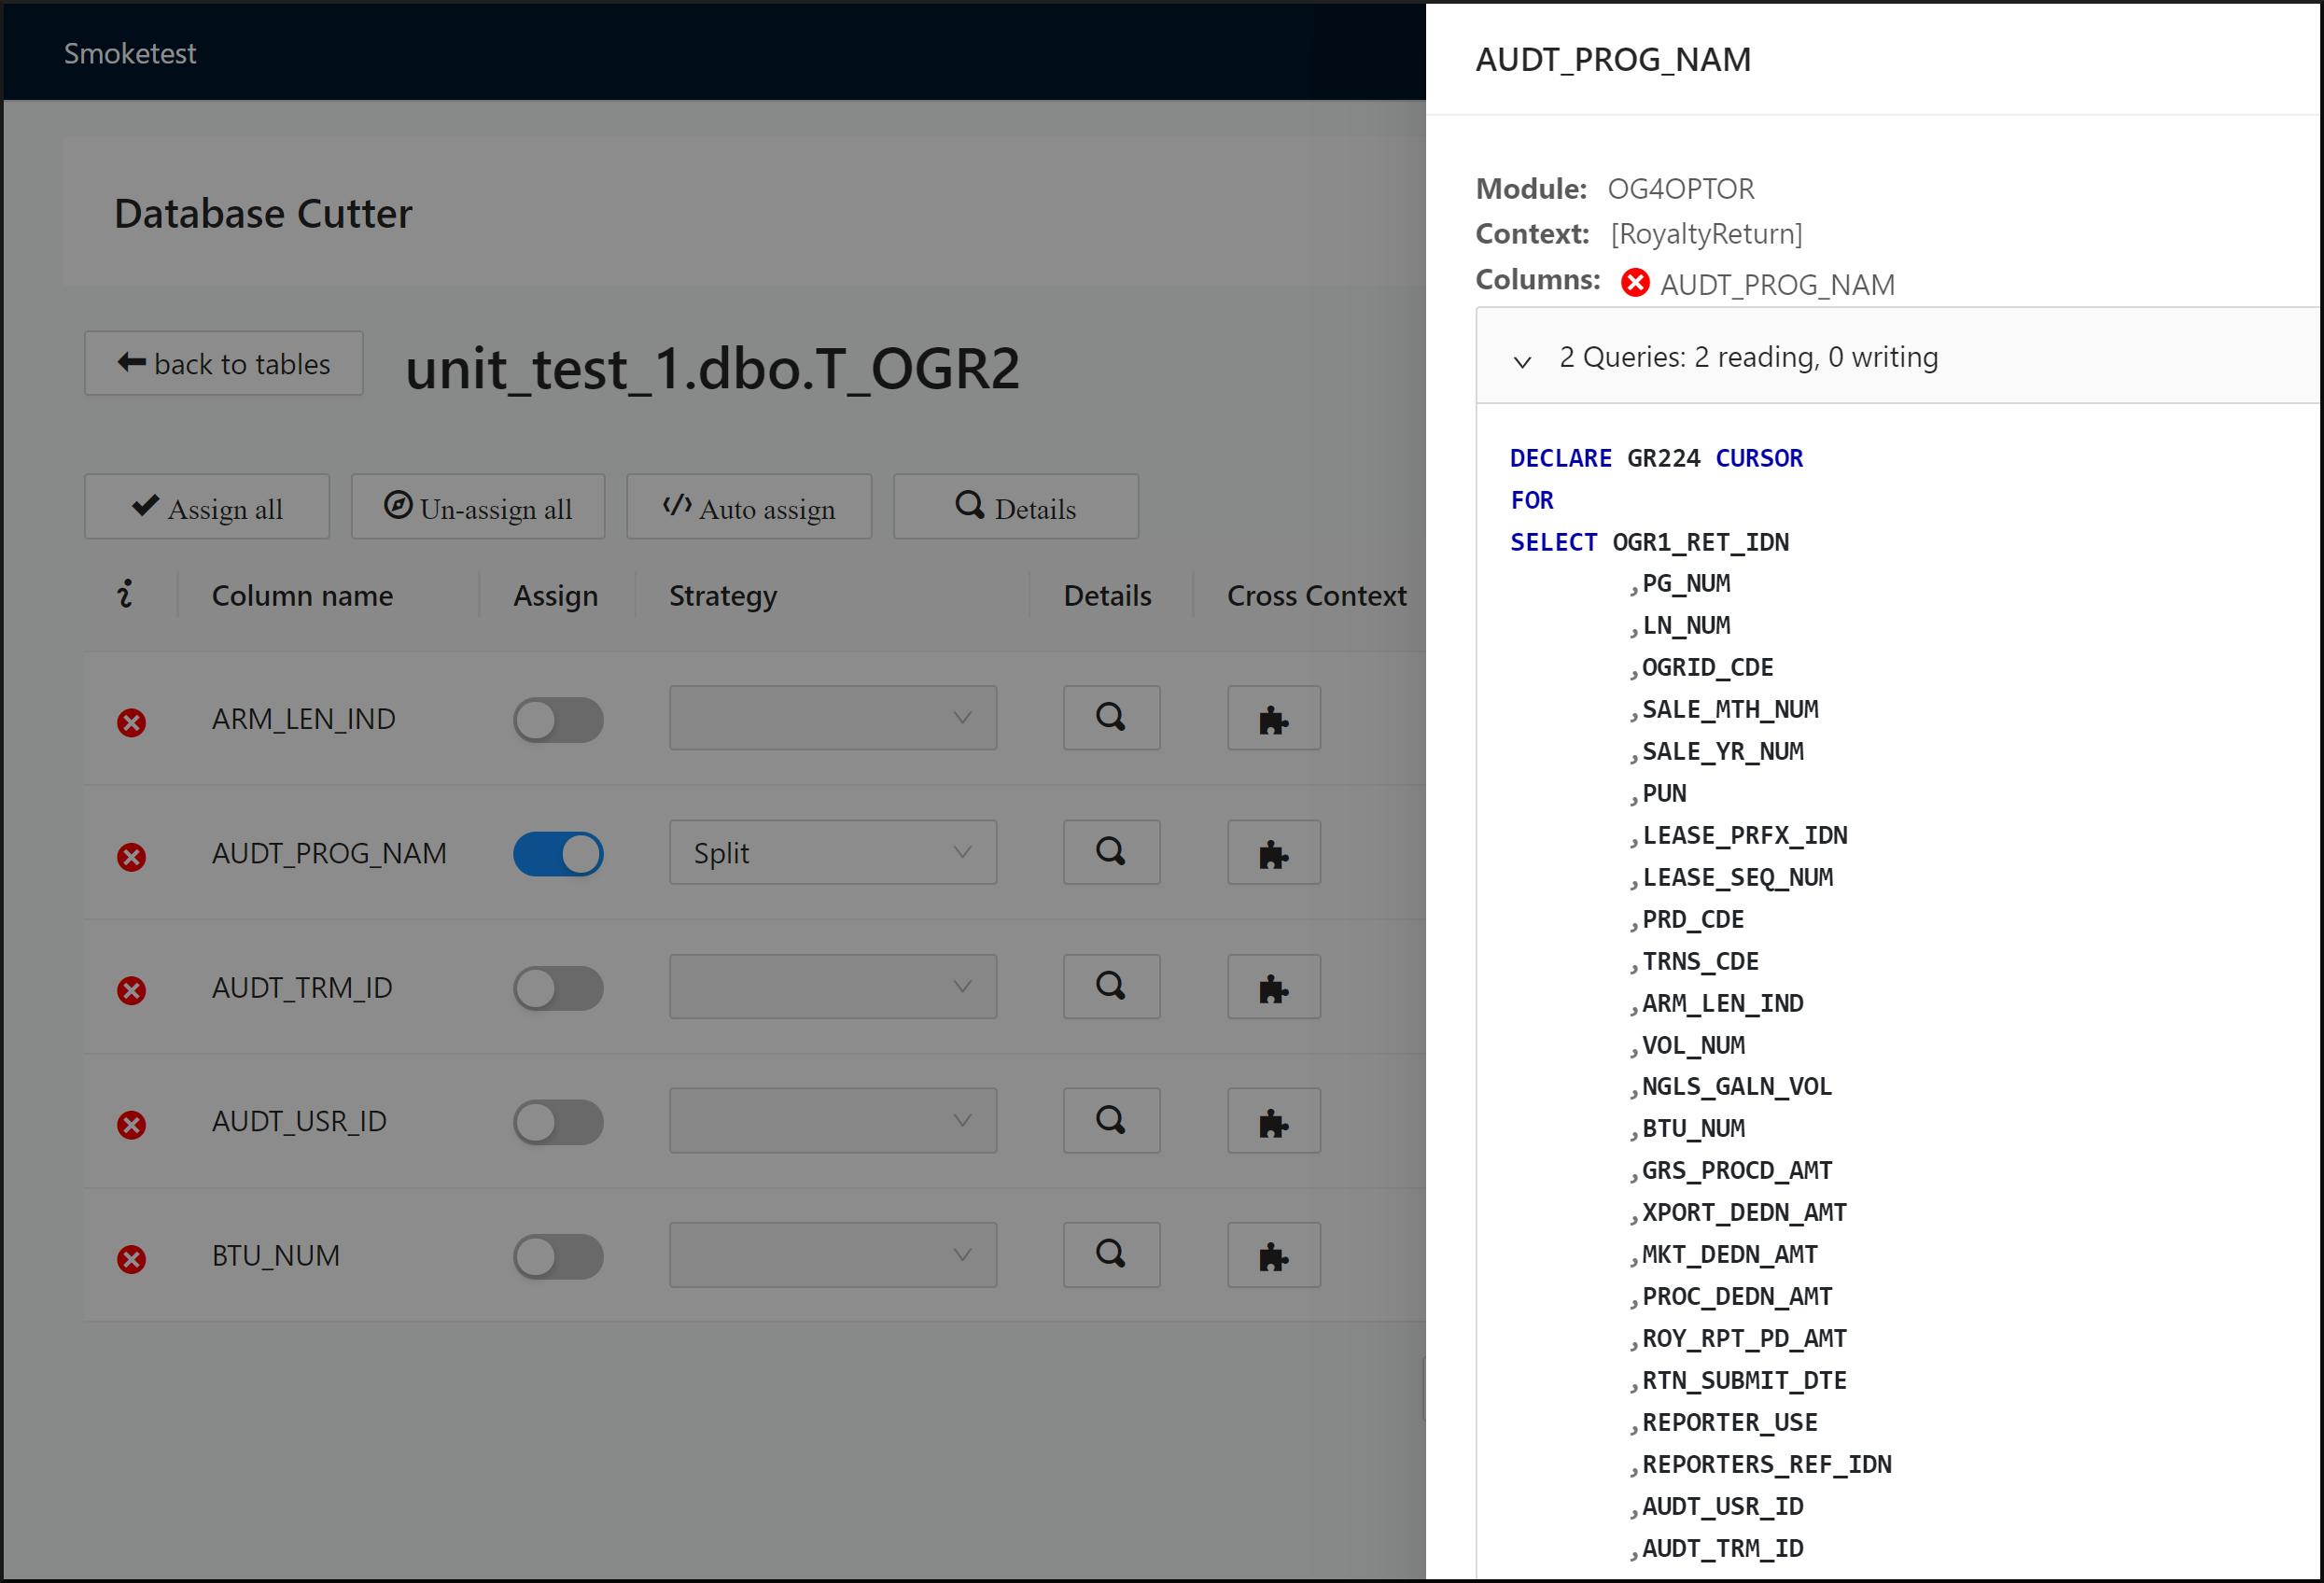
Click the corresponding details icon to learn more details about a specific table column, such as referring modules, referring Bounded Contexts and even the actual query code (read/write) used to query the column.
Step 11:
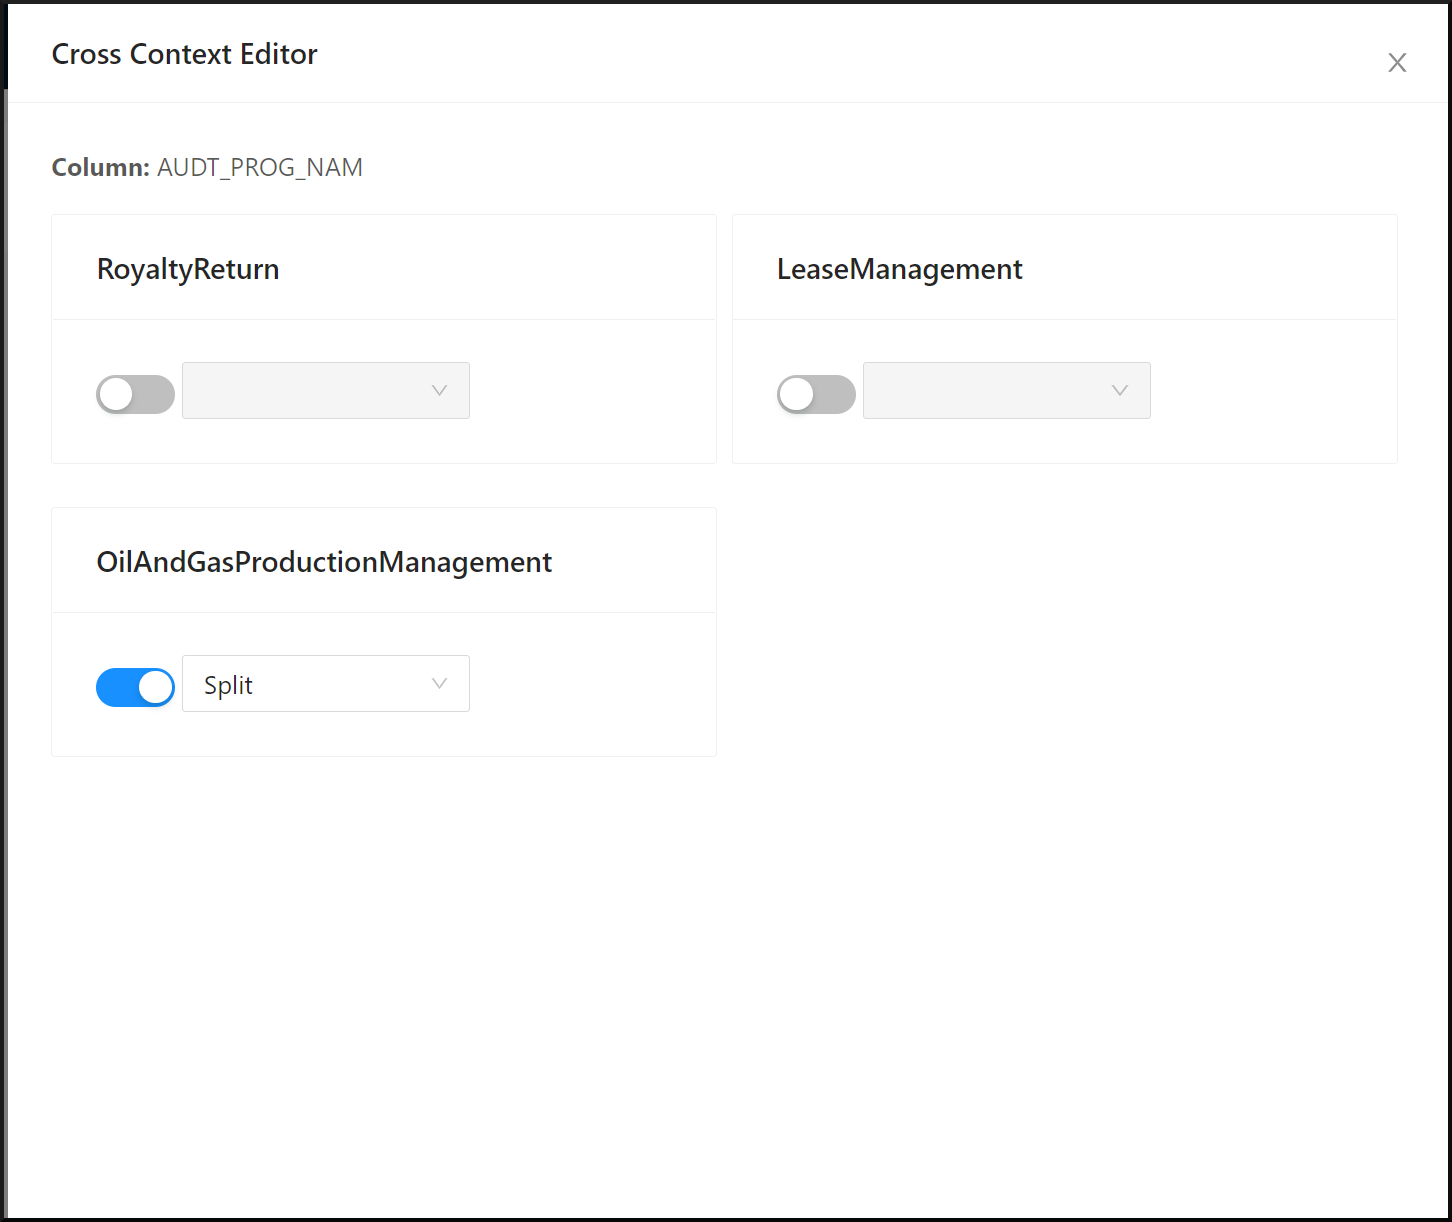
Click the Cross Context puzzle icon. A cross context allows columns/tables to be assigned to multiple bounded contexts. This means that they are not necessarily tied to only one bounded context.
DB Cutting strategies
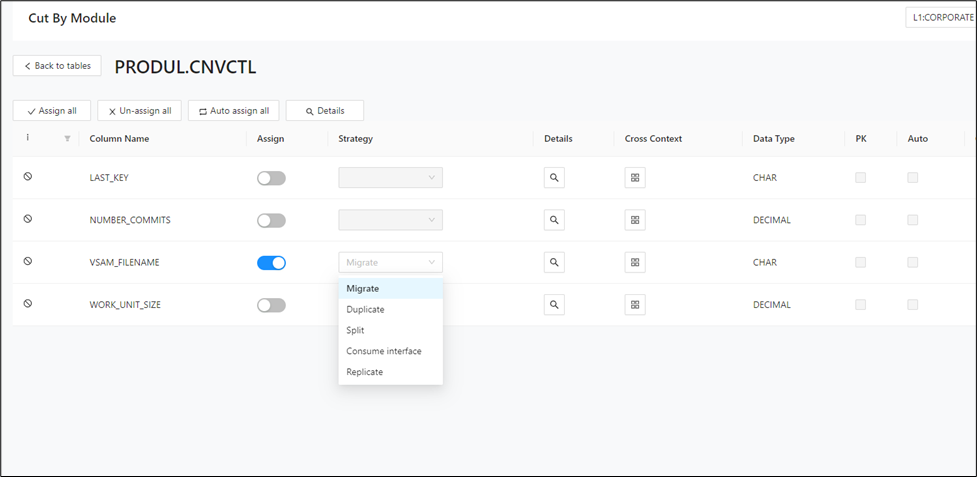
For cutting a database and designing a suitable target database, it is required to migrate the tables and columns correctly. Decompose provides 5 strategies for cutting a database:
-
Migrate: This is the default strategy when there are no conflicts or if the conflicts can be easily resolved. This means that the column is going to stay as-is in the currently selected bounded context.
-
Split: If a table is part of more than one bounded context, creating a conflict, you can decide which bounded context the table should eventually belong to or split the table's columns across both bounded contexts. In this case, the table would still be part of multiple contexts, but not all columns will be present in all of them. The columns can be split as required. For example, you can have column1/column2 within context1 and column3/column4 within context2.
-
Duplicate: This strategy is used when the column needs to be added to the currently selected bounded context as well as the other bounded contexts where it is present. Changes made to a duplicated context will not reflect on the other. This is the difference between the Duplicate and Replicate strategies.
-
Consume Interface: This strategy can be used when a column is not part of the assigned context and is part of another context which needs to provide an API to access the column. If the same column is present in different bounded contexts then one will be migrate and the other will be consume interface.
-
Replicate: This strategy is similar to the Duplicate strategy, except that changes in one of the replicated contexts will also be reflected in the other.
Cut by Table
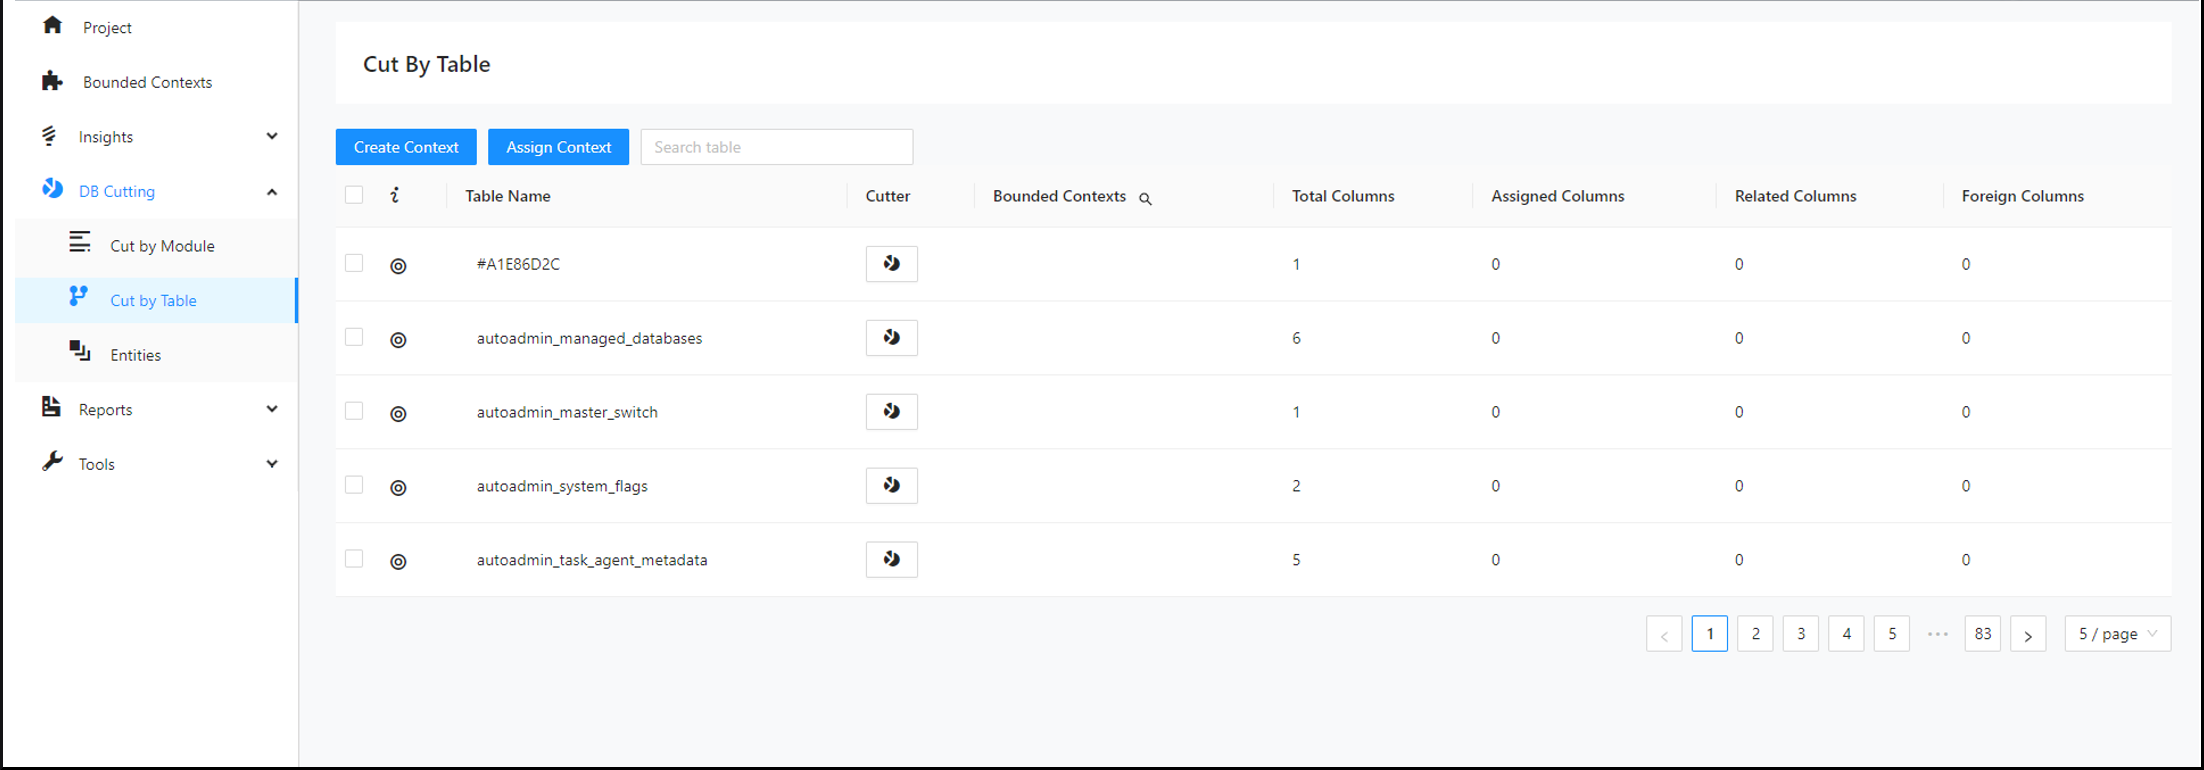
The Cut by Table feature lets you cut the database based on the available table structure. You can select a table from the full database table list and filter that list by table name.
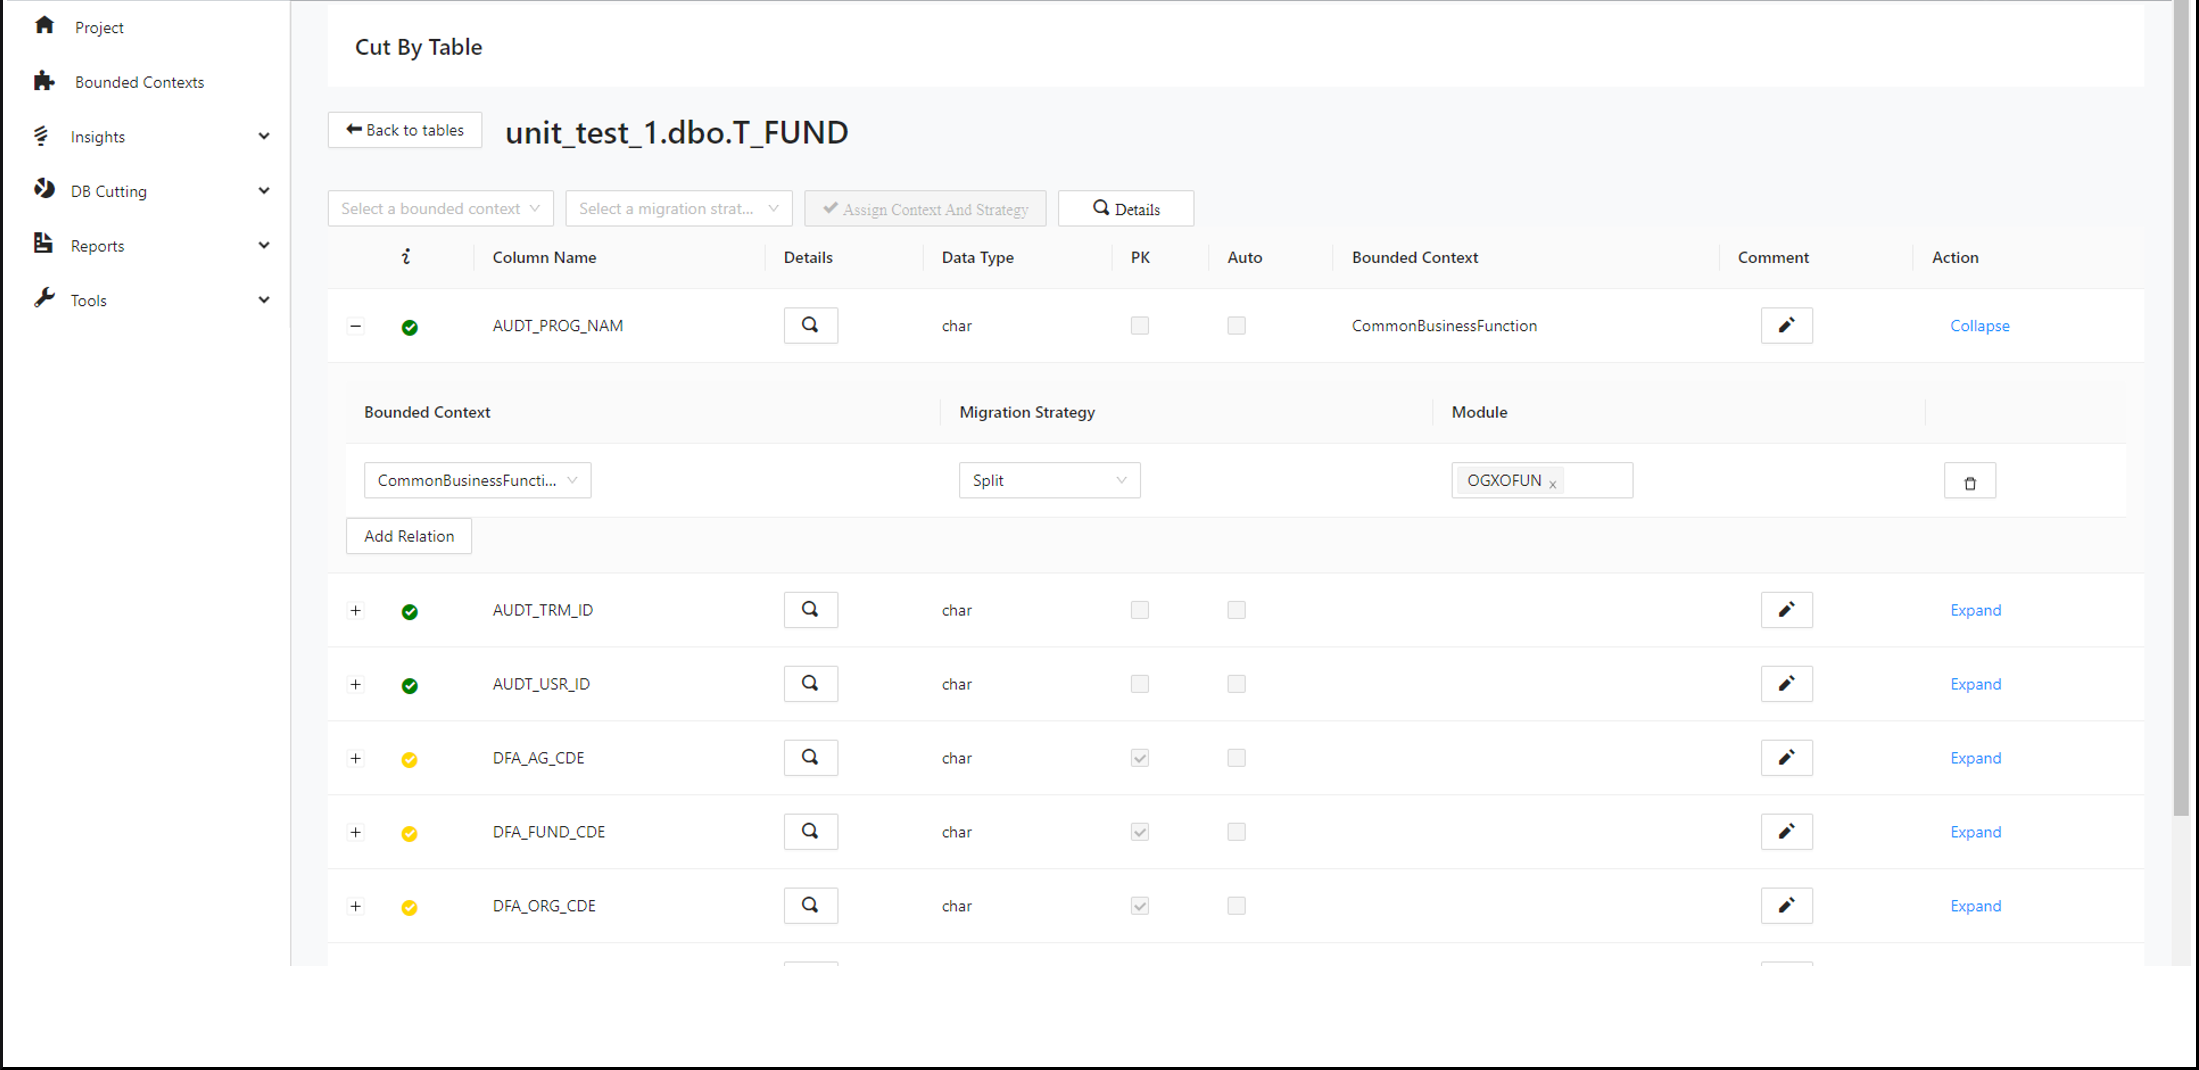
In the details view of a table, users can select multiple bounded contexts for each column and assign the selected column/context combination according to the modernized database of the context. Additionally, a migration strategy can be selected for each column/context combination.
Bounded contexts can be created and assigned to multiple columns and tables.
To start cutting by table, import the schema, bounded contexts, modules, and queries, and then select the table to cut from the Cut by Table view.
To use the Cut by Table feature, perform the following steps:
Step 1:
In the left navigation panel, select DB Cutting > Cut by Table.
Step 2:
Use the Search bar to find the table you would like to cut.
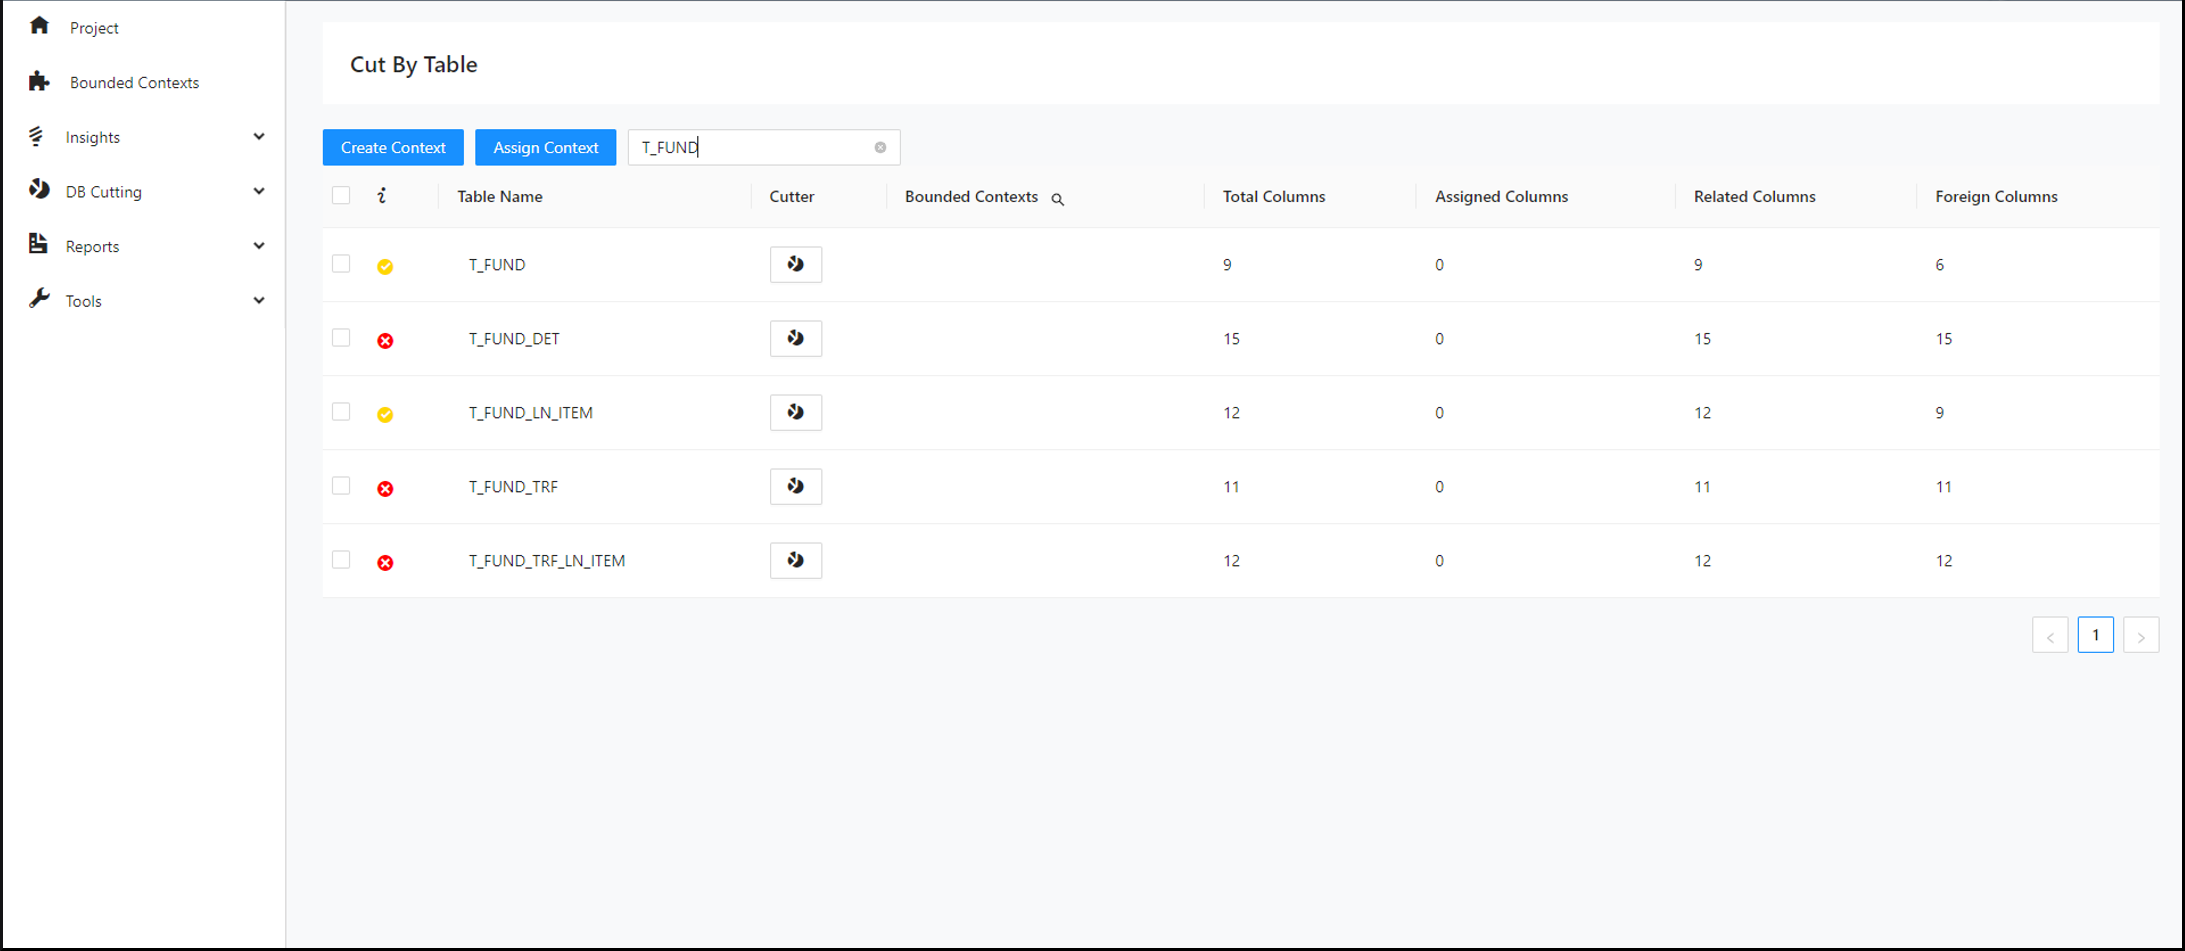
Hovering over the icons beside the tables displays information about all the bounded contexts accessing the table.
Step 3:
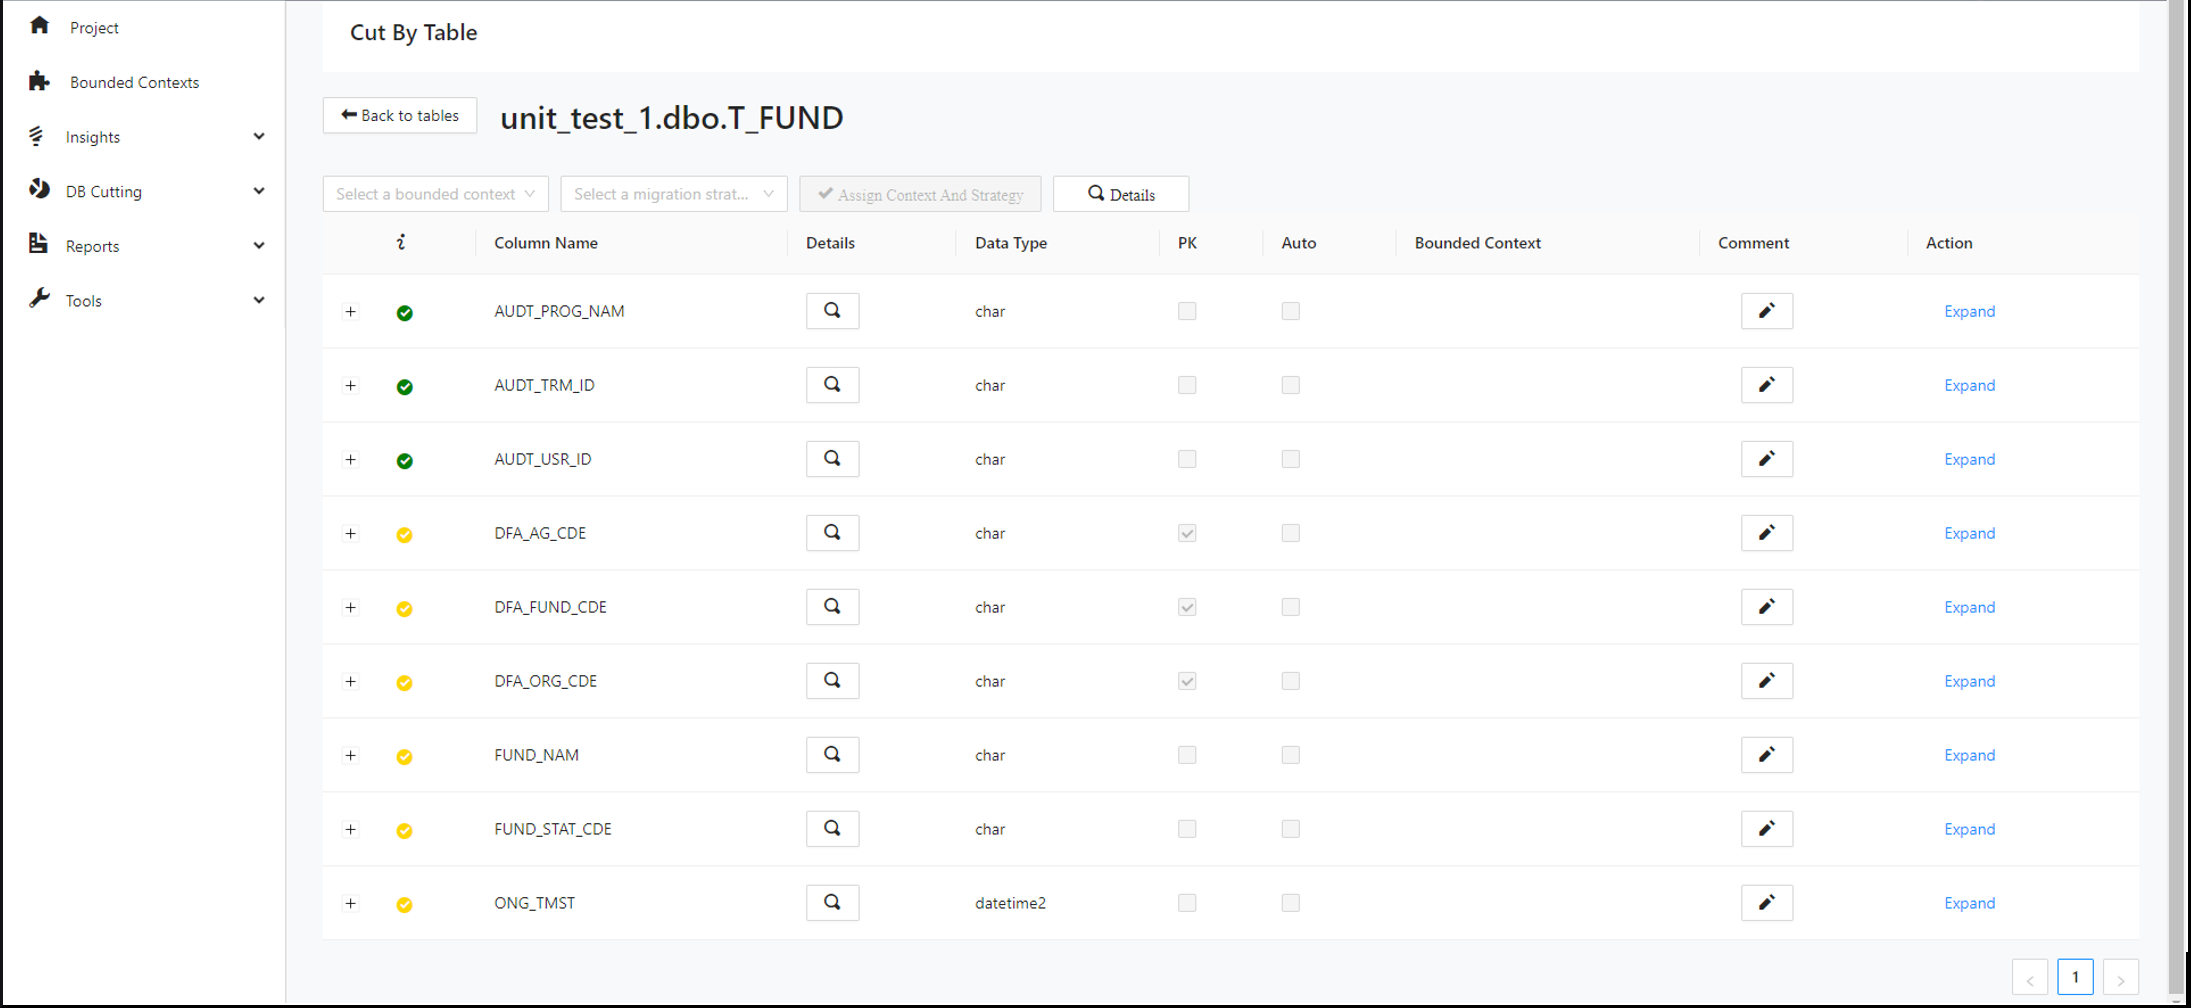
Click the Decompose icon next to your selected table.
Step 4:
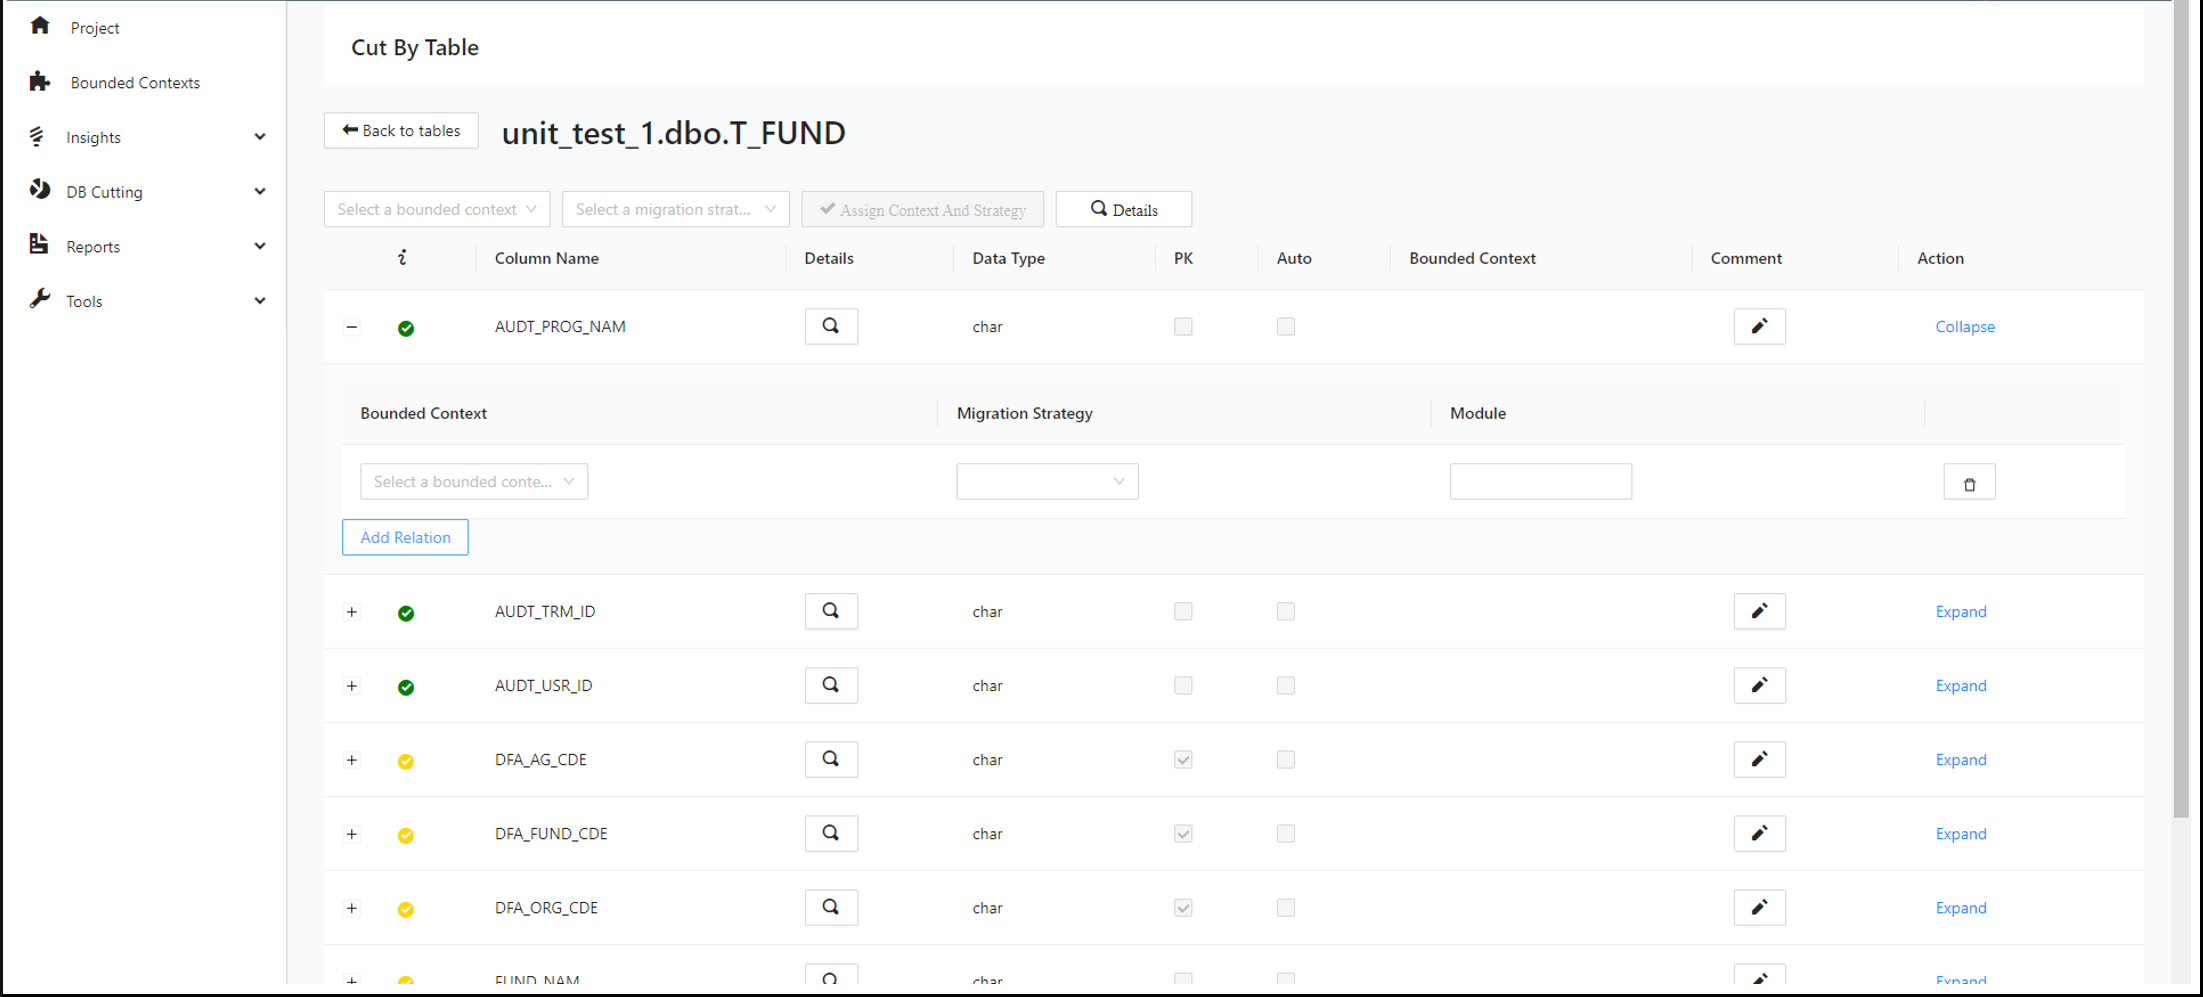
Expand the first column of the table and click Add Relation .
Step 5:
Select the desired bounded context, migration strategy and module.
Search for assigned tables and columns
Users can search for the assigned tables and columns on the Cut by Module page.
Step 1:
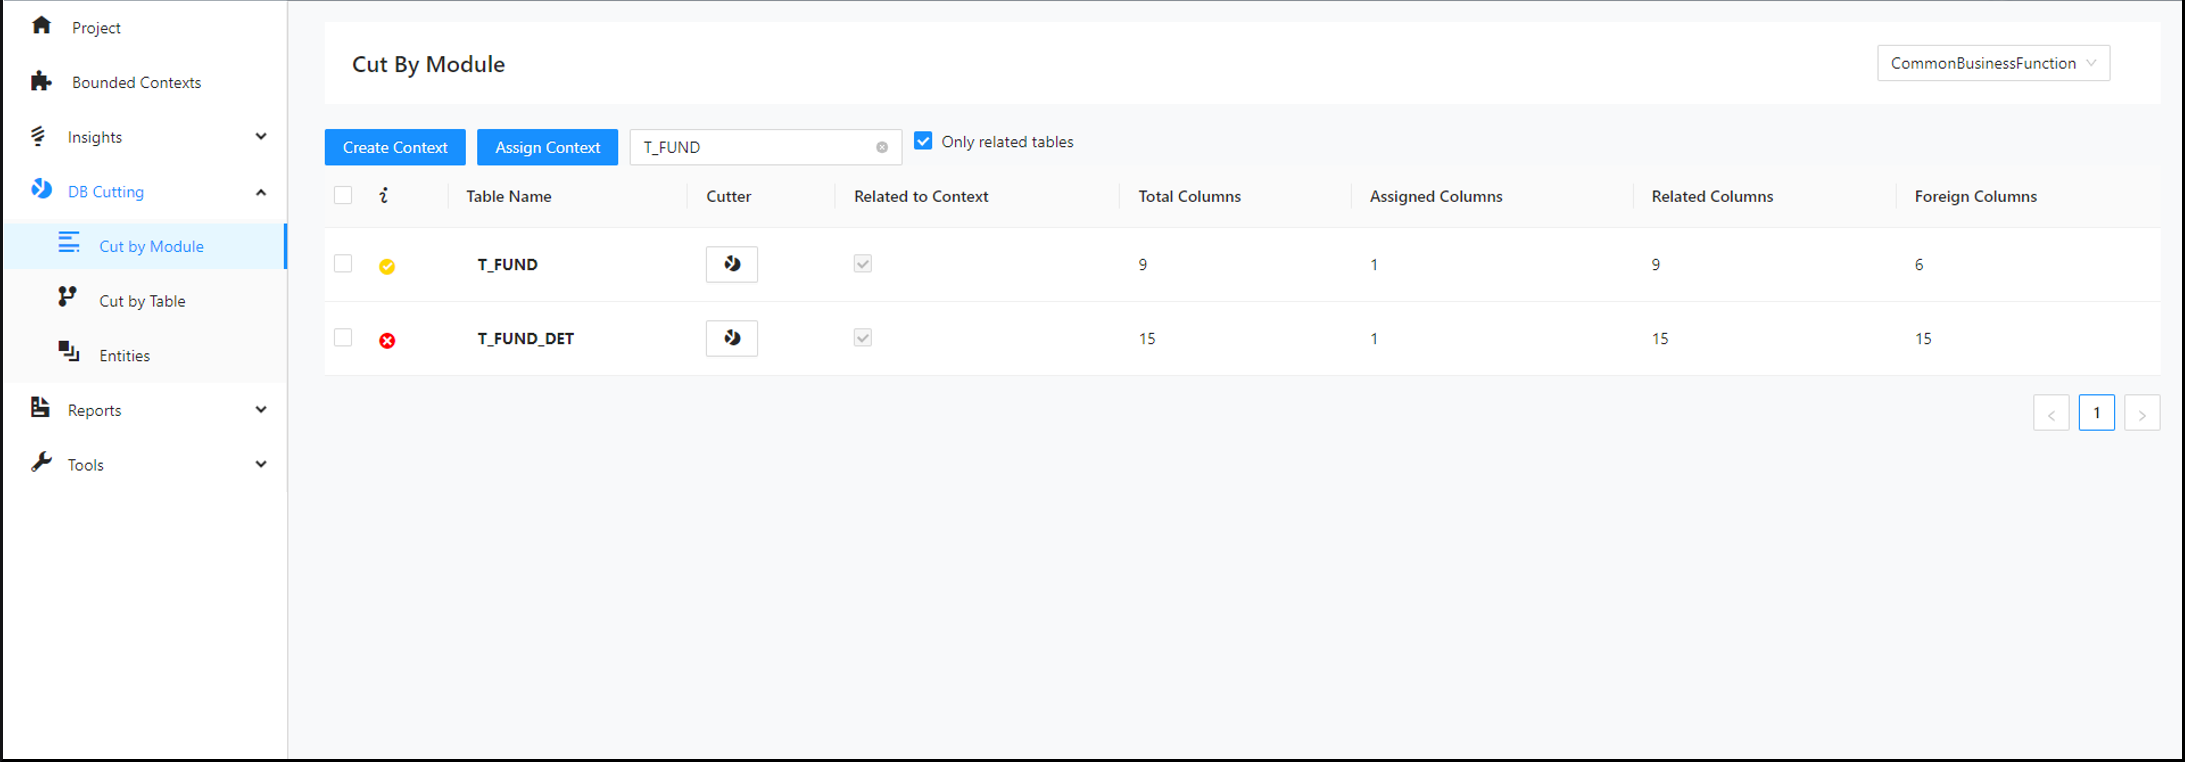
In the left navigation panel, navigate to Cut By Module and search for the desired table by its bounded context.
Step 2:
Click the Decompose icon next to your selected table.
Step 3:
Click Back to tables and select the desired context.
Step 4:
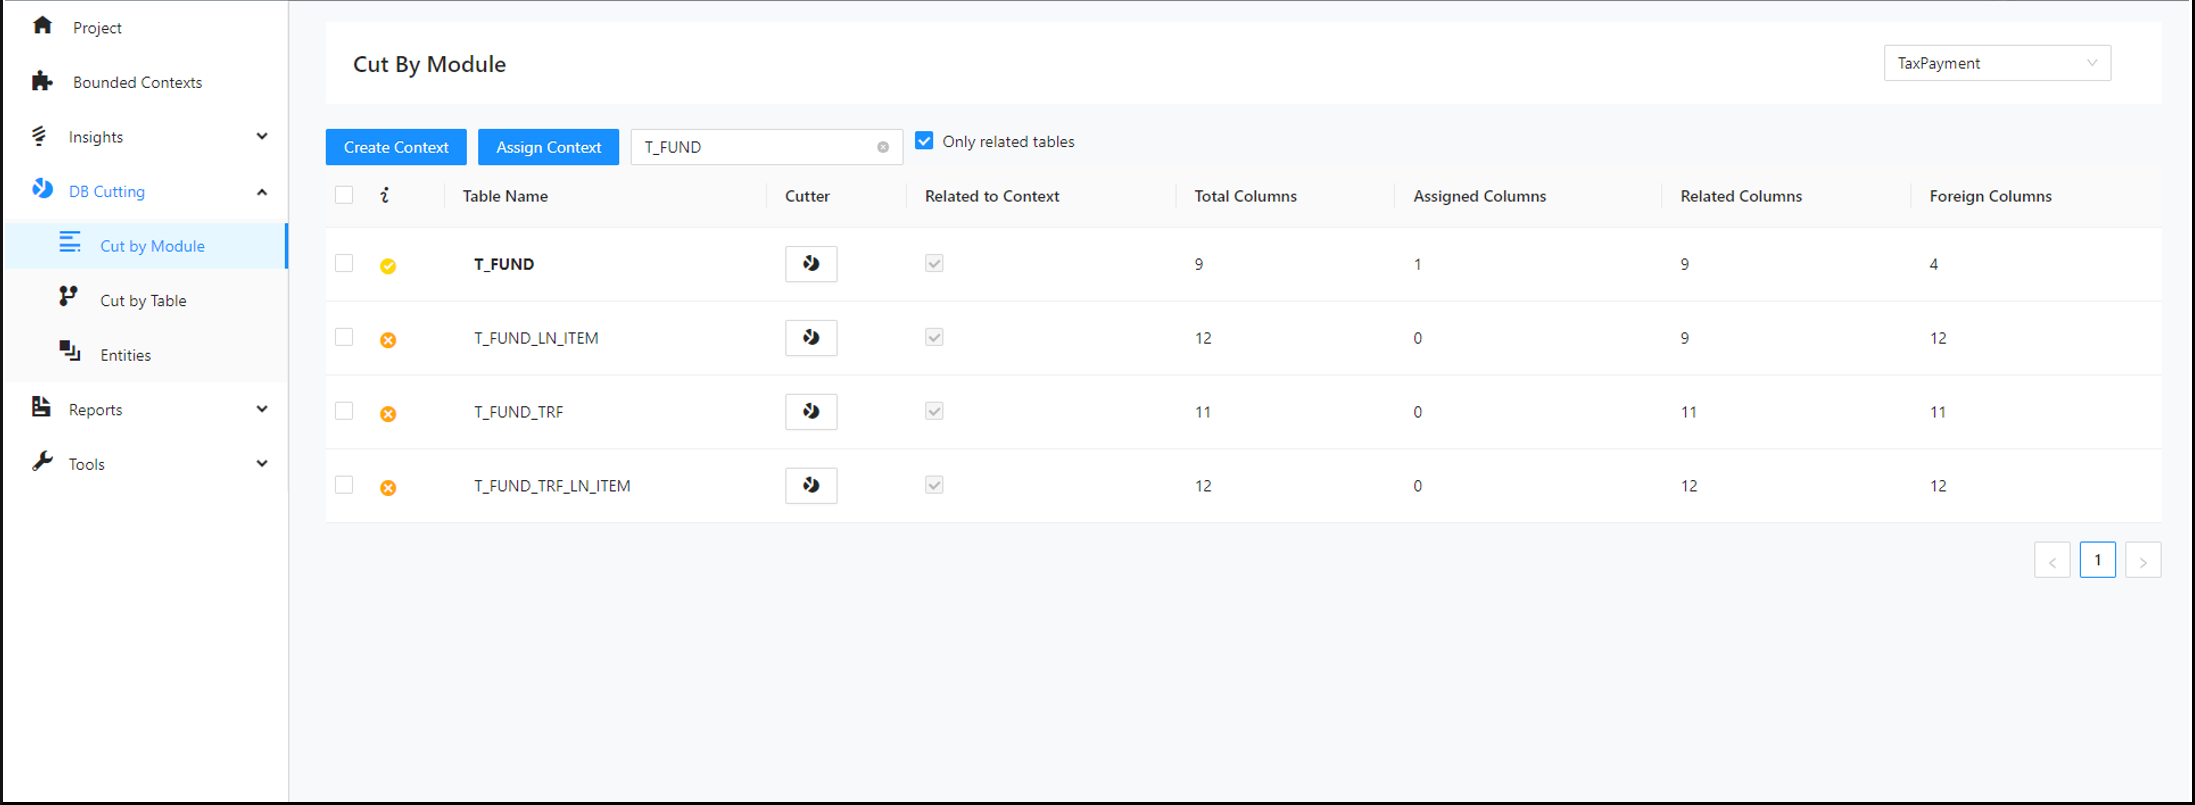
Search for the table you would like to cut and click the Decompose icon next to your selected table.
Add relations to all columns of a table simultaneously
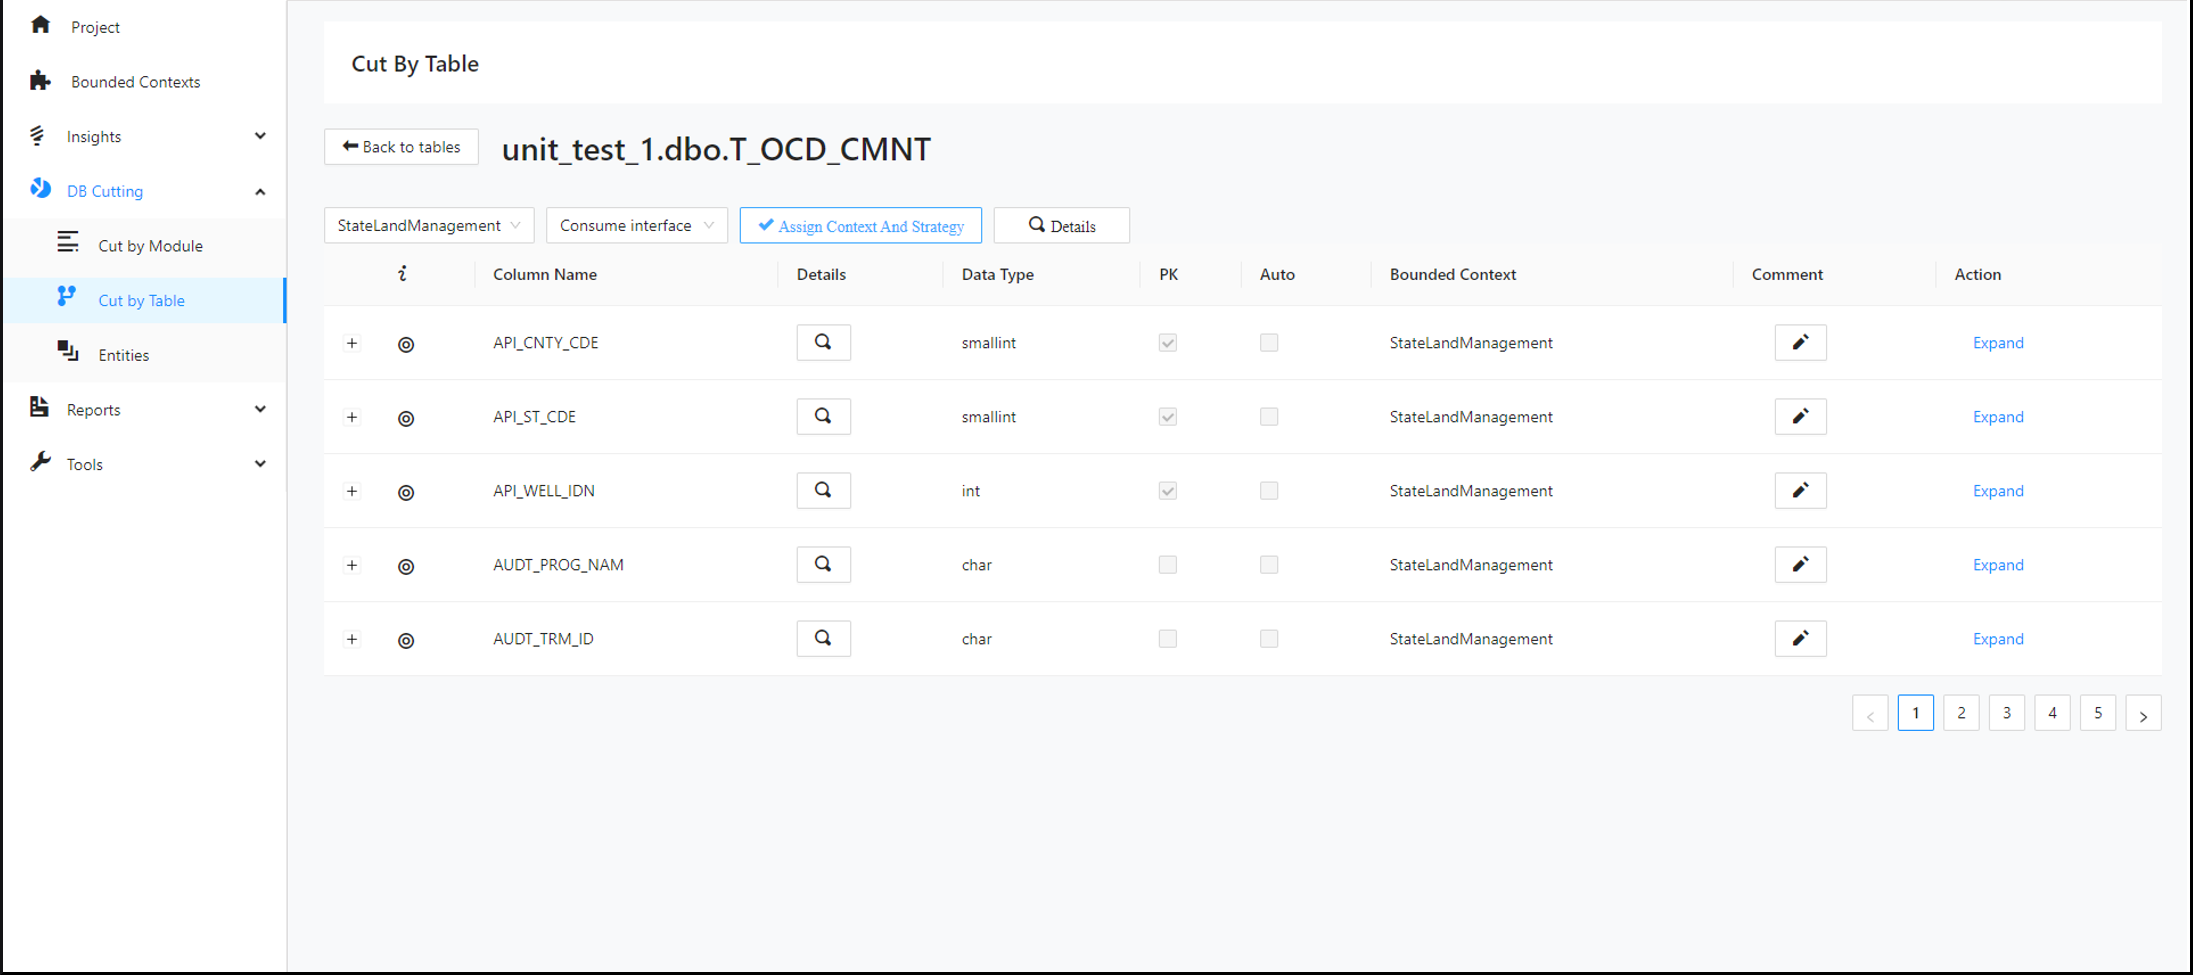
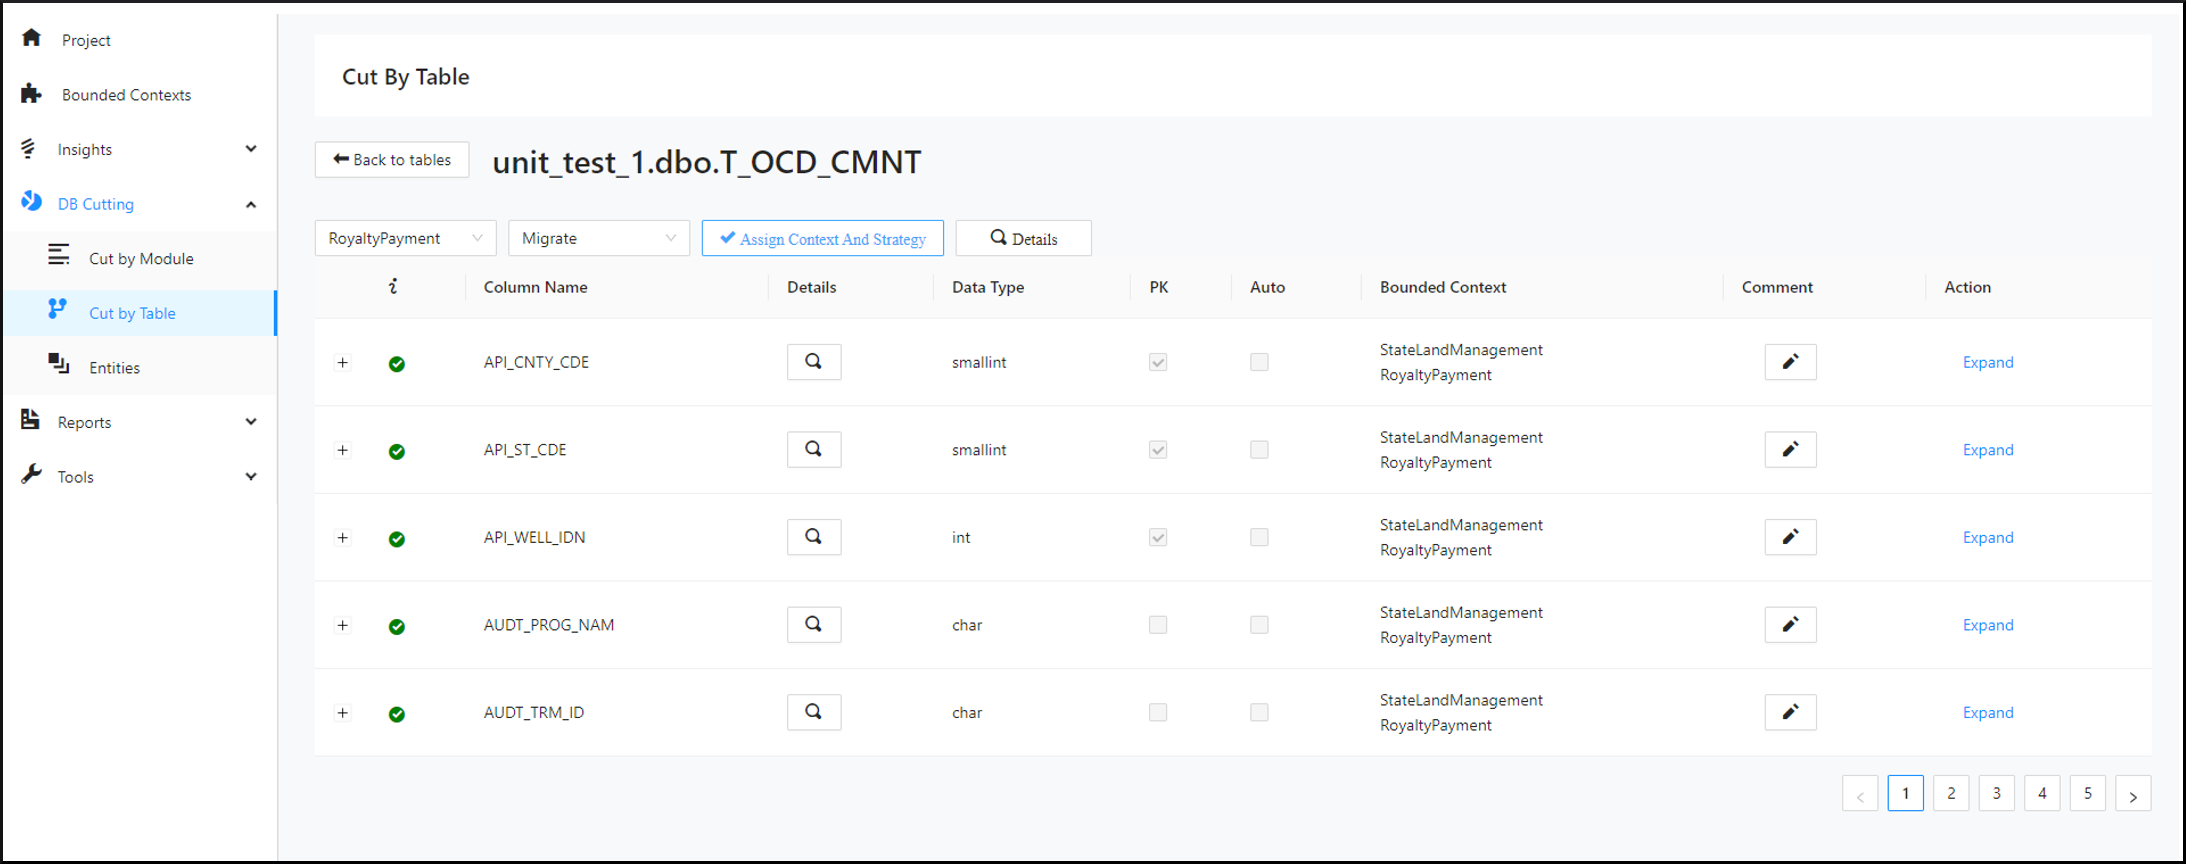
Users can add relations to all columns of a table at the same time.
Step 1:
Navigate to the Cut by Table page and search for a table. In the search results, click the Decompose icon. From the dropdowns in the upper part of the page, select a bounded context and the desired migration strategy. Then click Assign Context and Strategy .
Step 2:
Again, select another bounded context and another desired migration strategy from the dropdowns. Then click Assign Context and Strategy .
Assign Bounded Contexts to multiple tables simultaneously
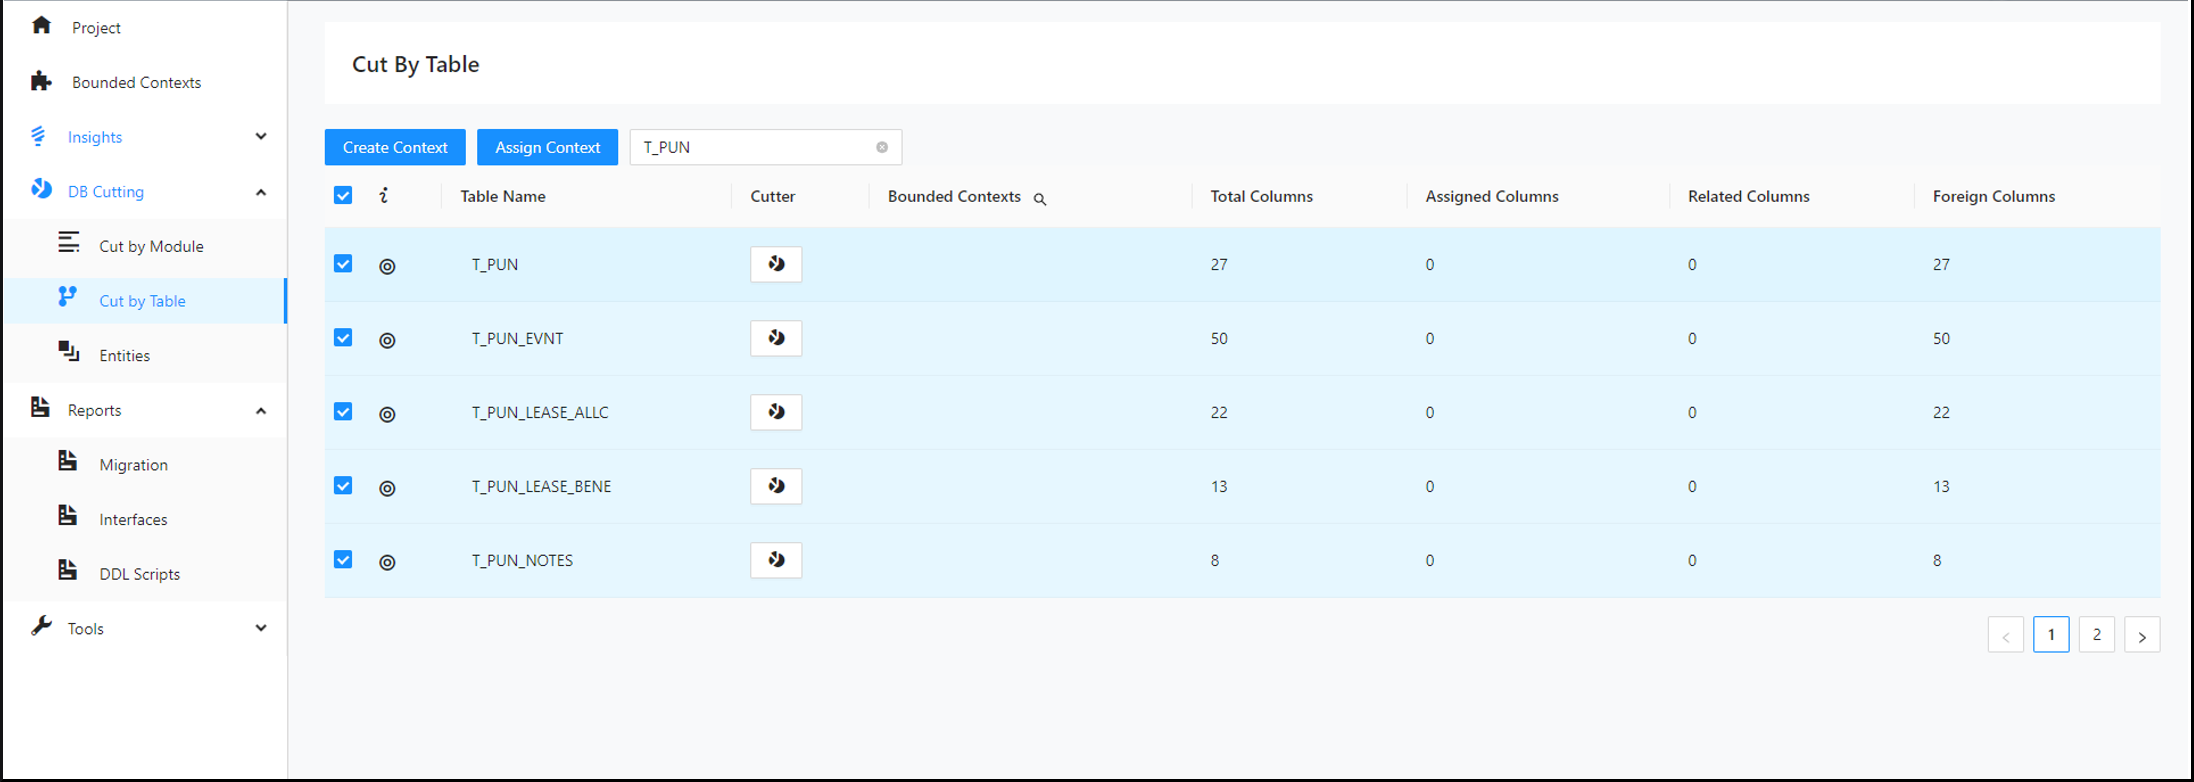
Users can assign bounded contexts to multiple tables at once.
Step 1:
Search for a desired table. Select all tables at once by clicking the checkbox in the table header.
Step 2:
Click Assign Context . From the pop-up menu, select the desired context and migration strategy and click Assign Context and Strategy .
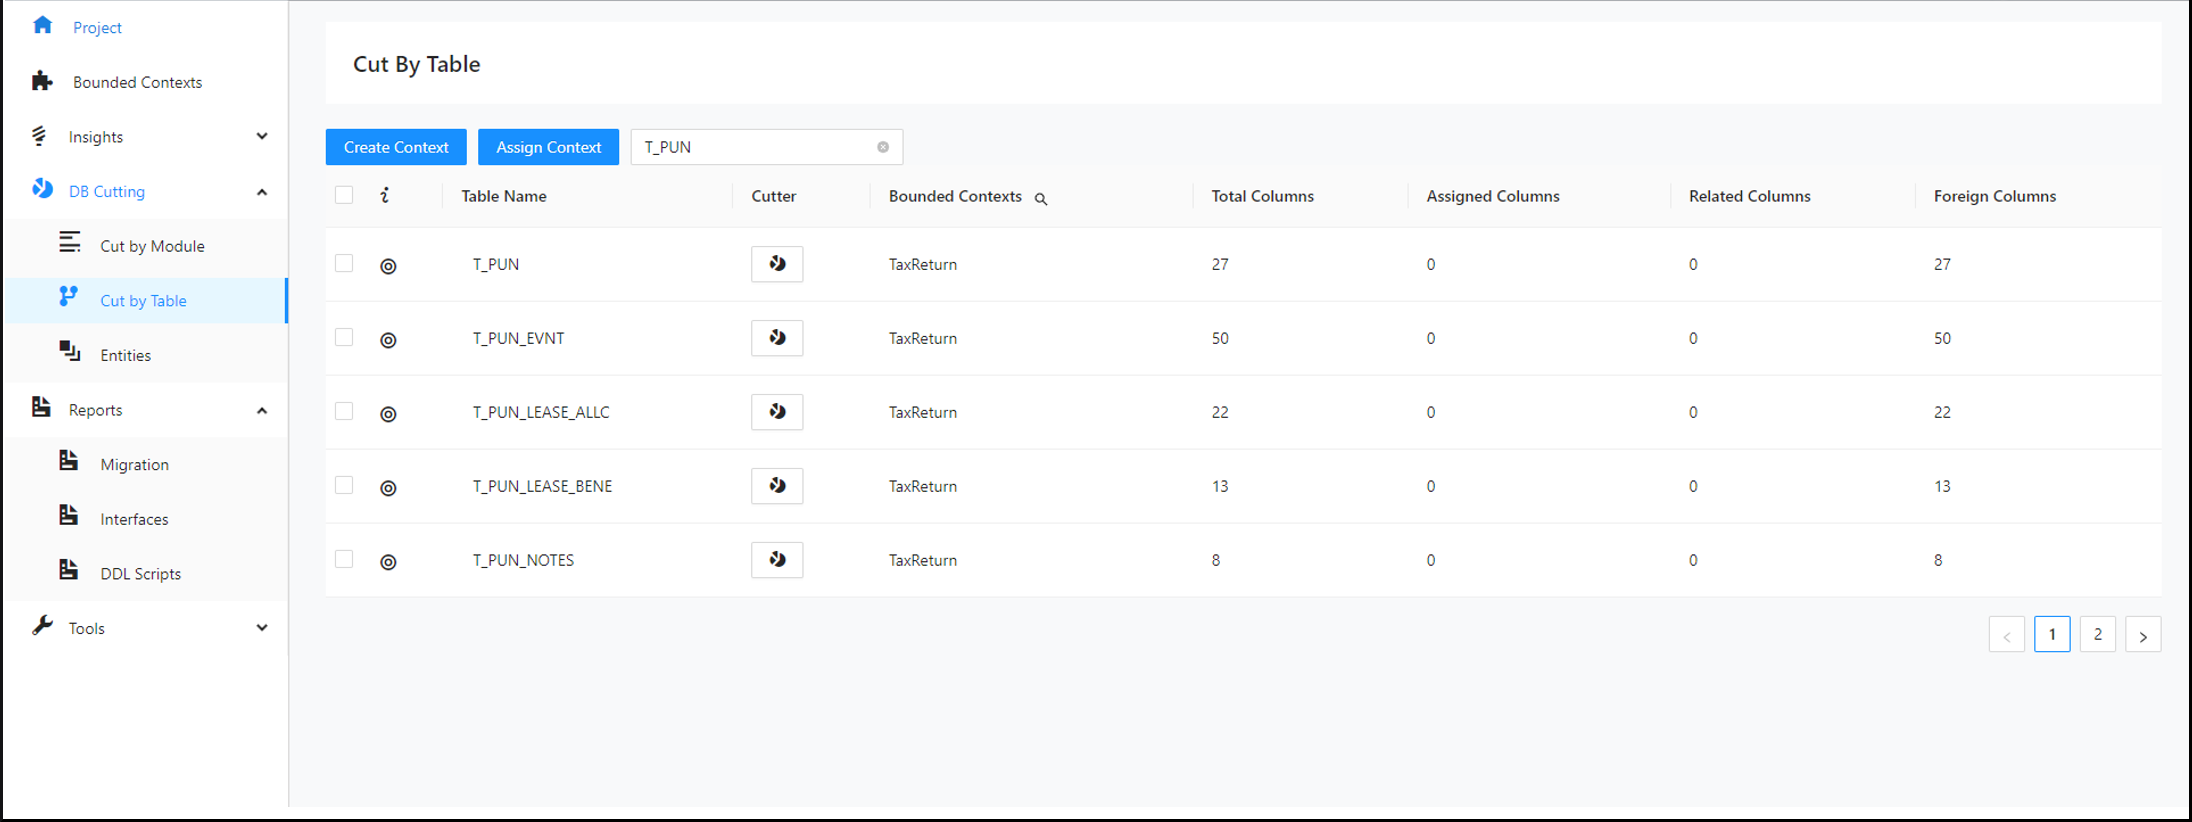
Assign multiple tables simultaneously to a context
You can assign multiple tables at one time to a defined context.
Step 1:
Click Create Context . Set a desired name and click Create .
Step 2:
Search for a desired table and select it. Click Assign Context . From the pop-up menu, select the context you created and click Assign Context and Strategy .
Entities Designer
After you assign columns to a bounded context on the Decompose page, the tool can identify the tables and columns that will become part of the new microservice database for that bounded context. You can then edit the design of the new microservice database, including renaming tables and columns, adding or removing tables, adding relationships, and changing the target database.
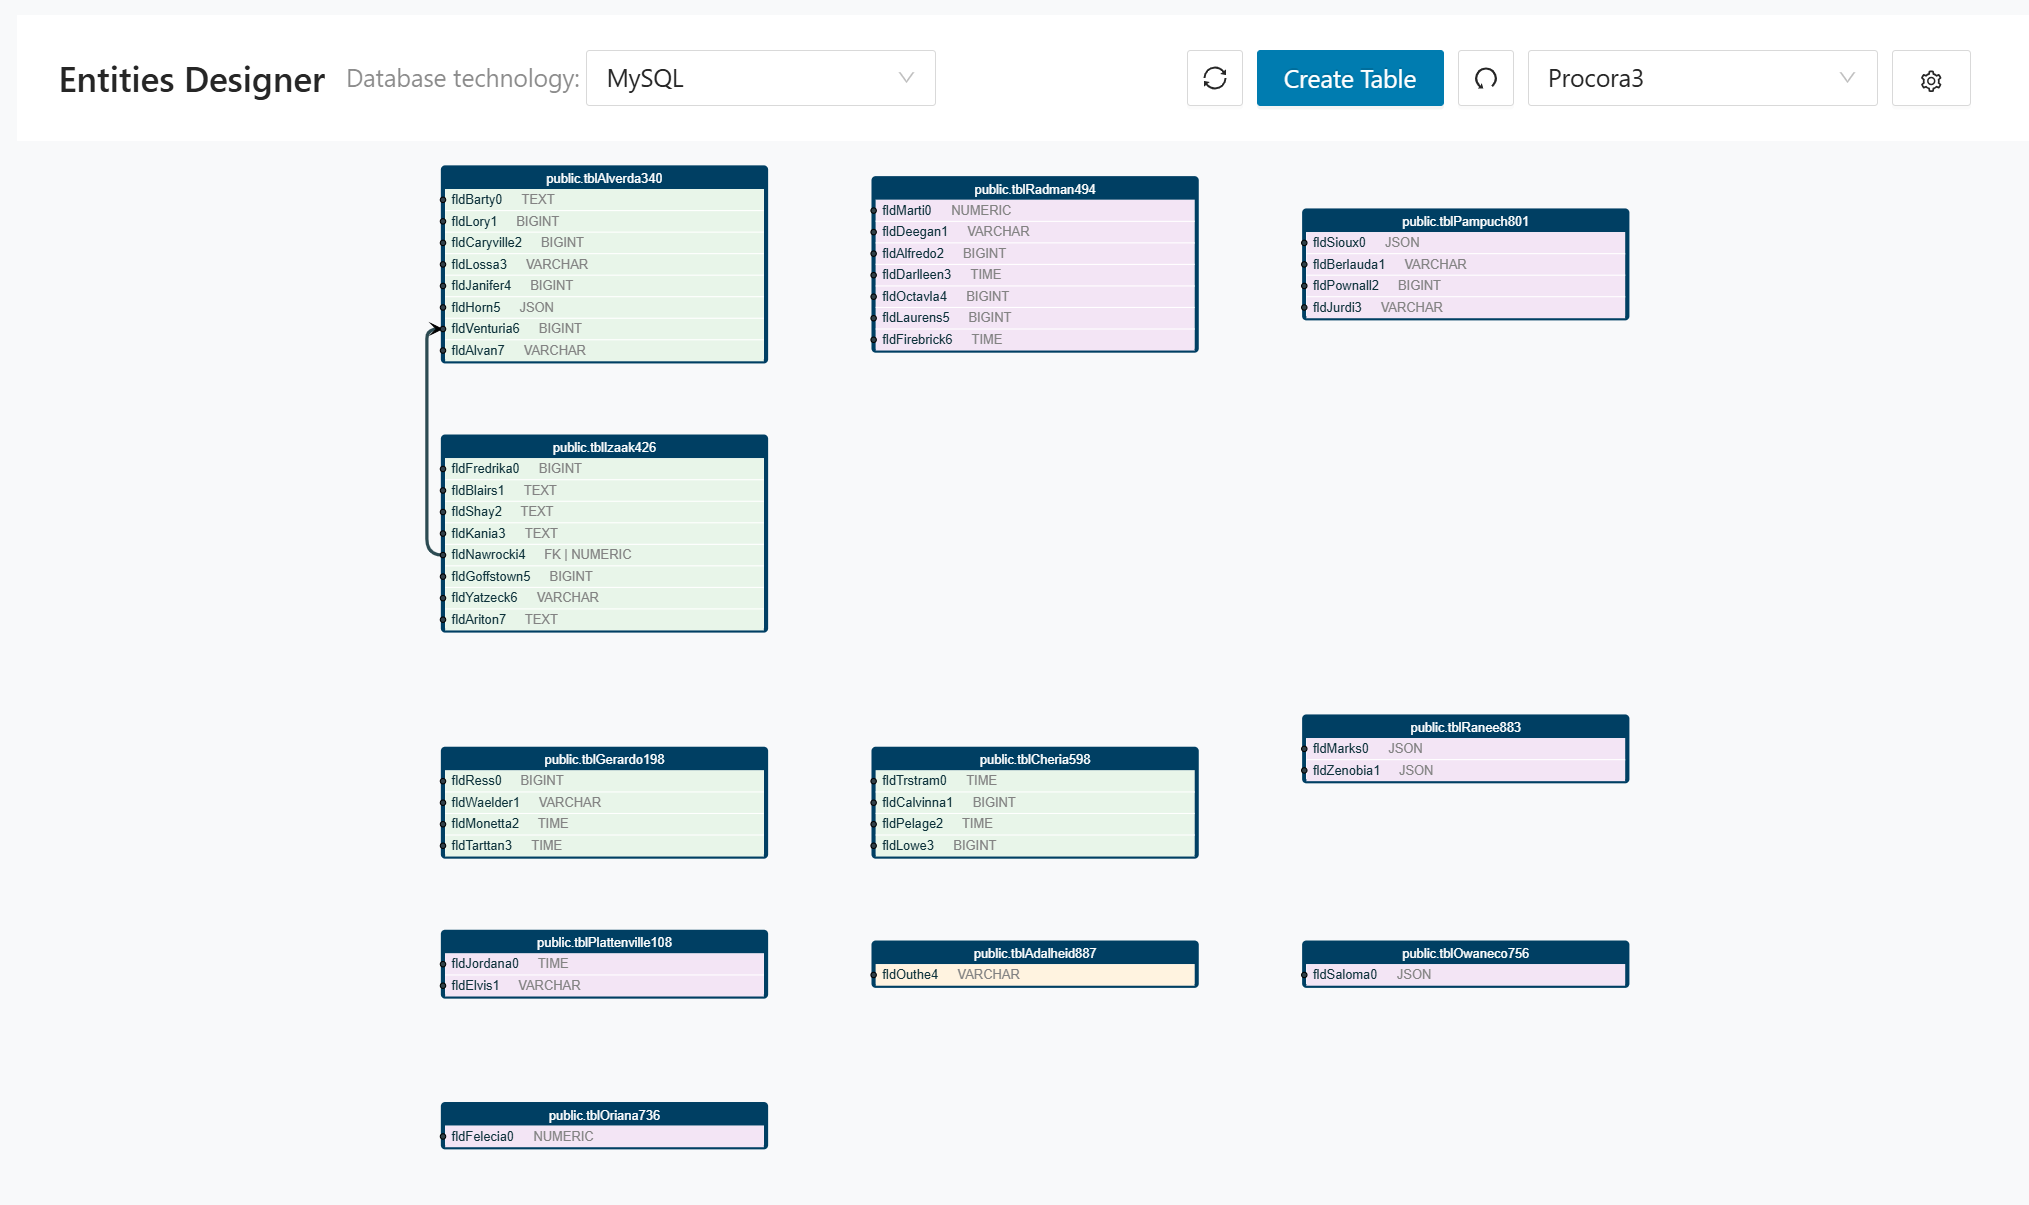
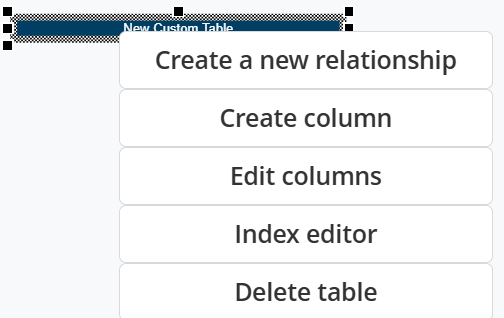
Right-click in the editor area to display the available options. When you are finished, click Save to store your changes in the Decompose database. The next time the Entities Designer opens, it uses the stored database design instead of generating a new diagram from the assigned columns.
To create a relationship between two databases (entities), click Create New Relationship and complete the form shown below.
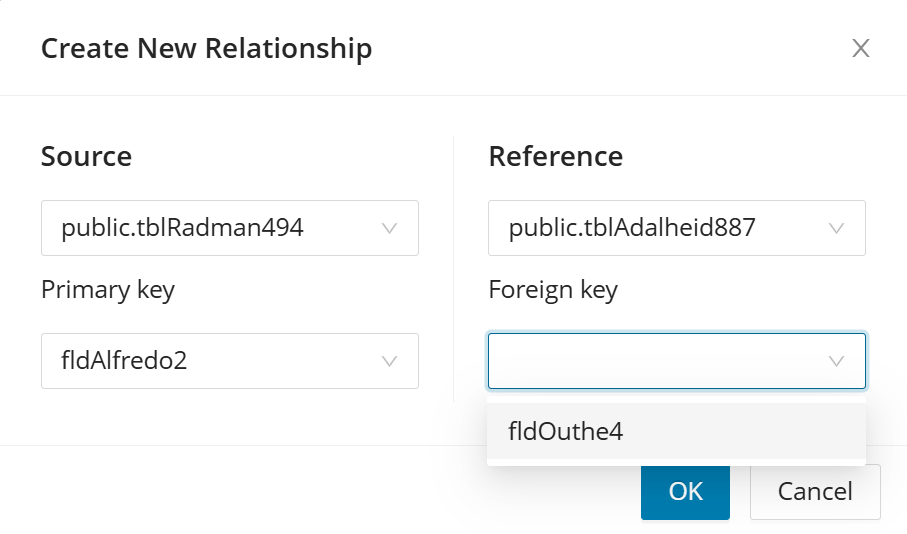
Select the source and target entities (and the fields to join), set the relationship type (for example, one-to-one, one-to-many), then click OK. The tool will add the relationship and visually connect the two entities in the diagram.
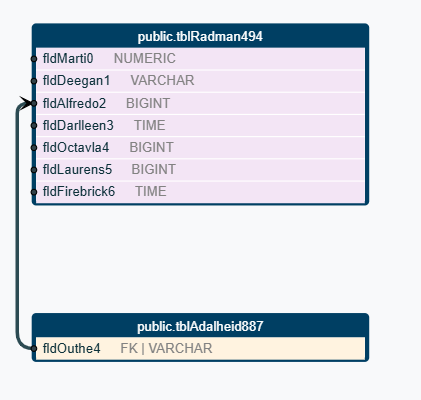
Saving is also necessary to generate the DDL script that can be used to generate the MicroService database.
ER Diagram
The ER Diagram area gives you several visual and tabular ways to inspect the target schema for a bounded context. These views help you review relationships, validate structural details, and prepare downstream implementation artifacts. Use the mode that best matches whether you are discussing the design, editing metadata, or exporting SQL artifacts.
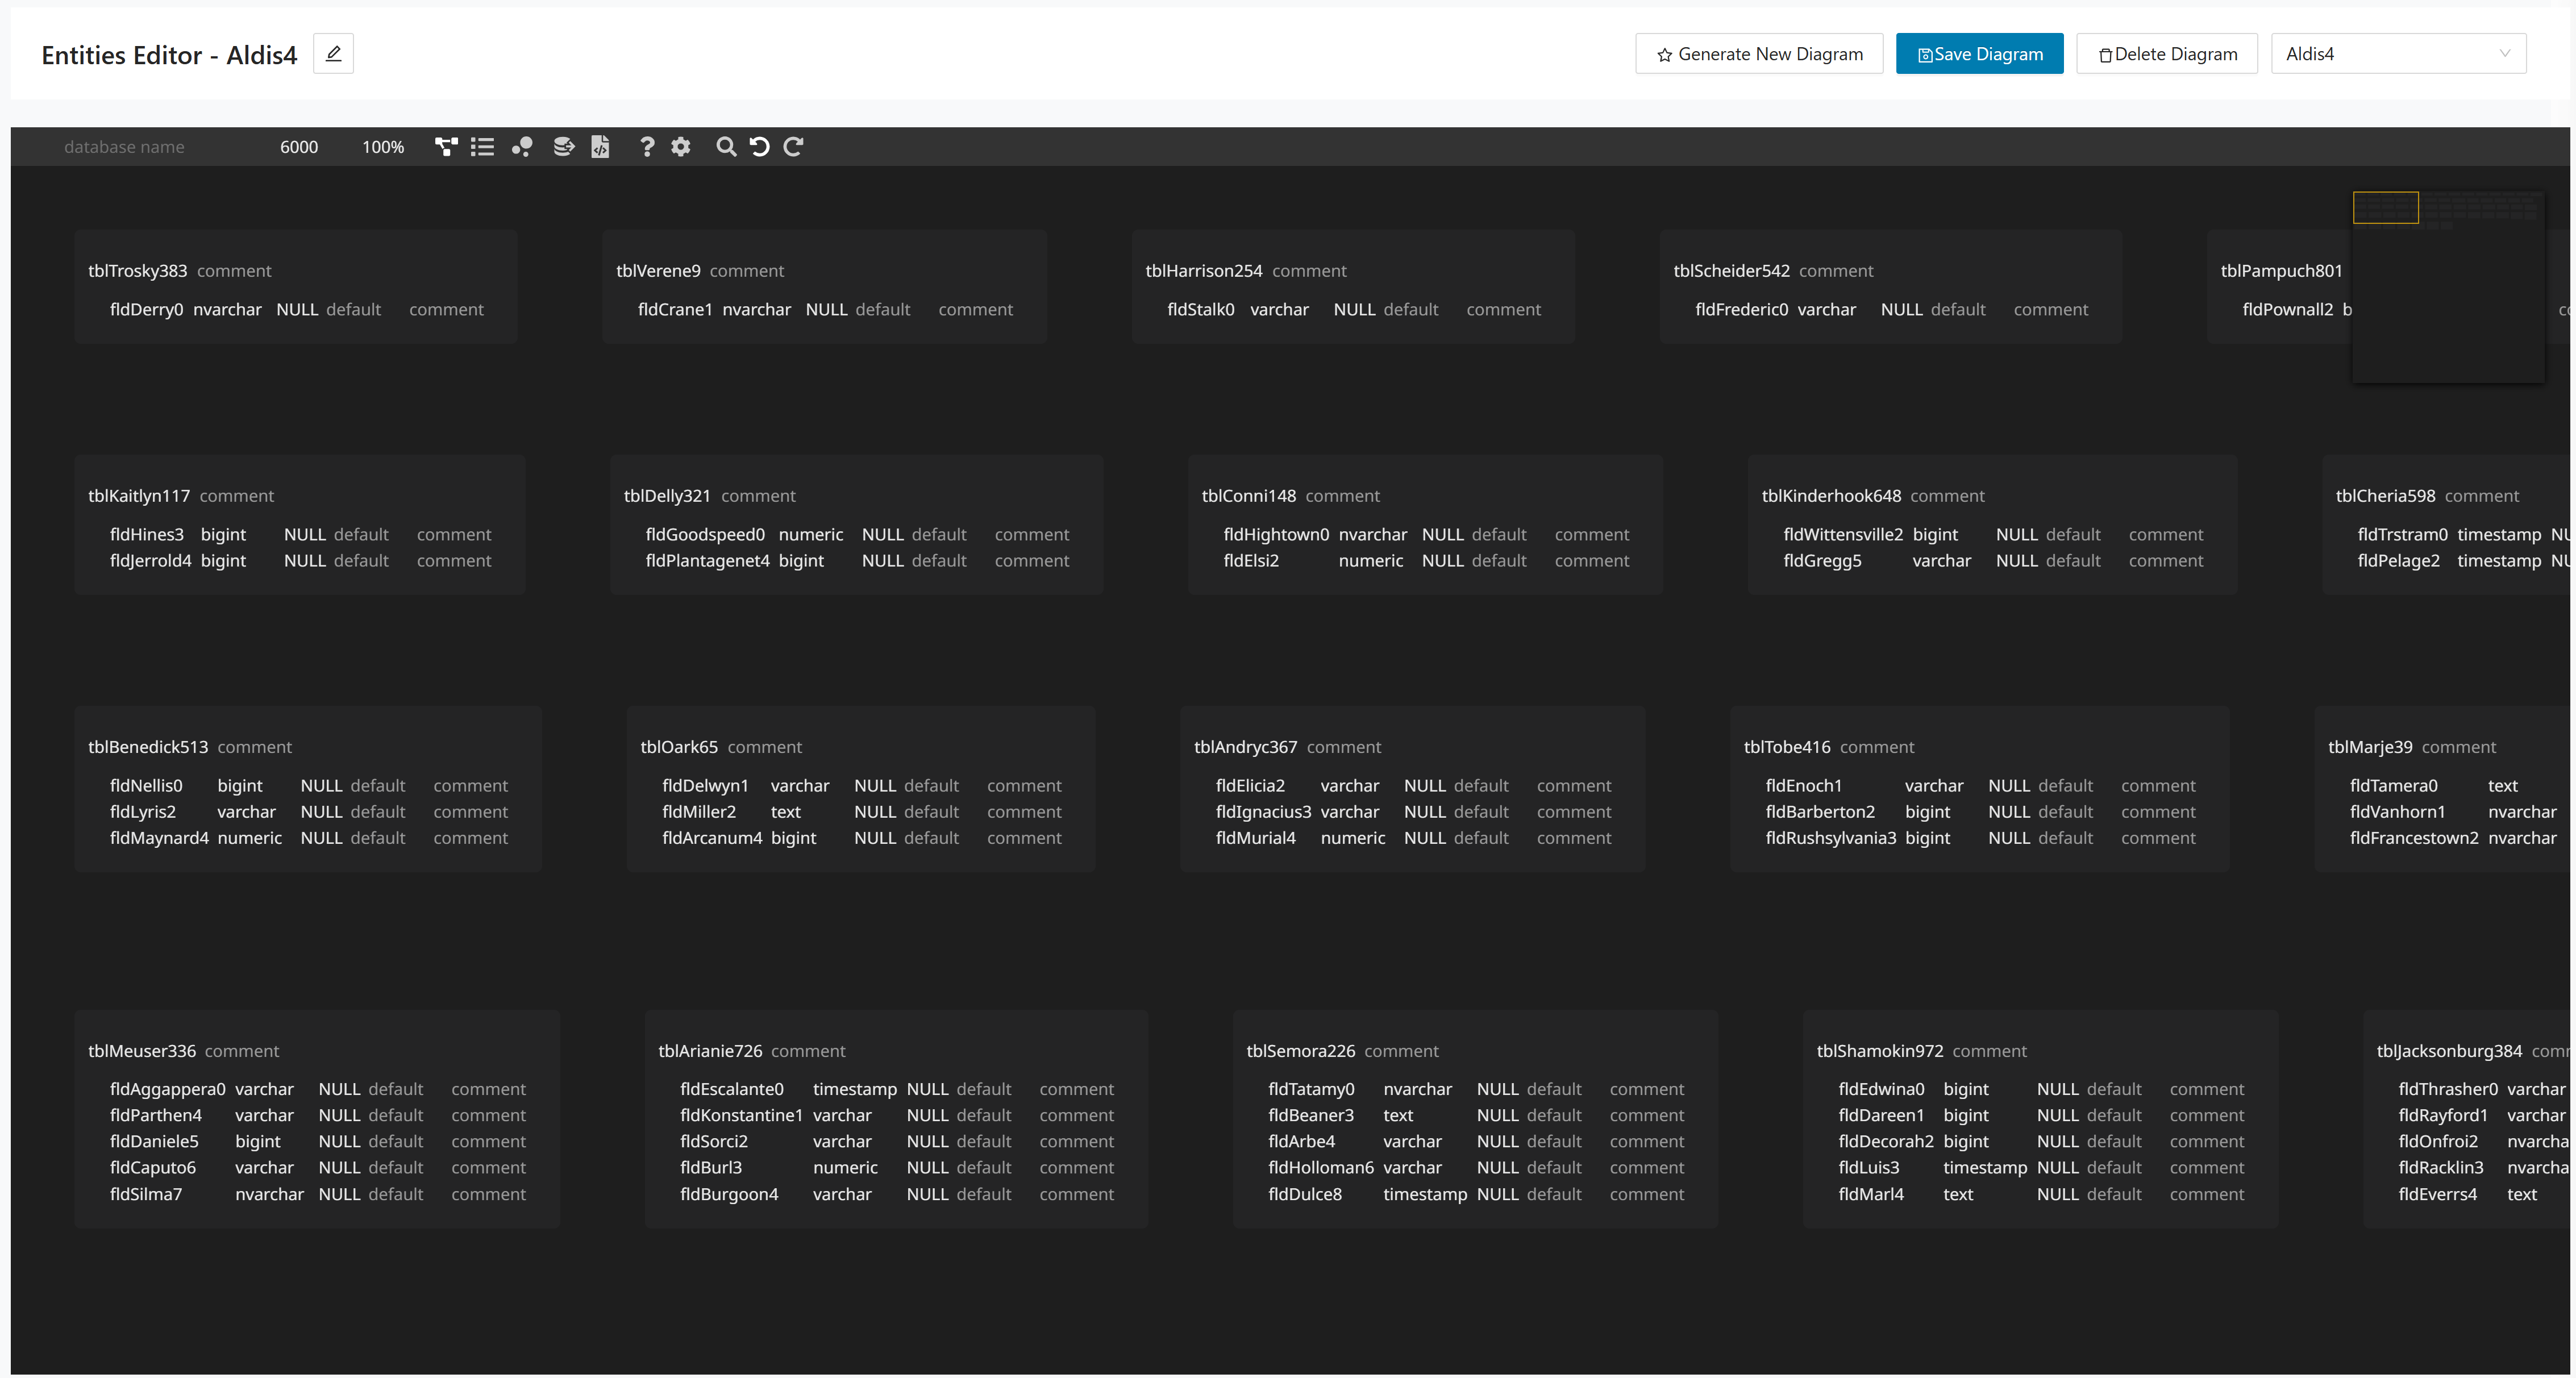
Entity Relationship Diagram
Tables are rendered as “cards” showing table name plus key columns/attributes (and typically relationships when enabled).
Best for: human-friendly schema review, discussing structure with stakeholders, and spotting missing/duplicated entities or attributes.
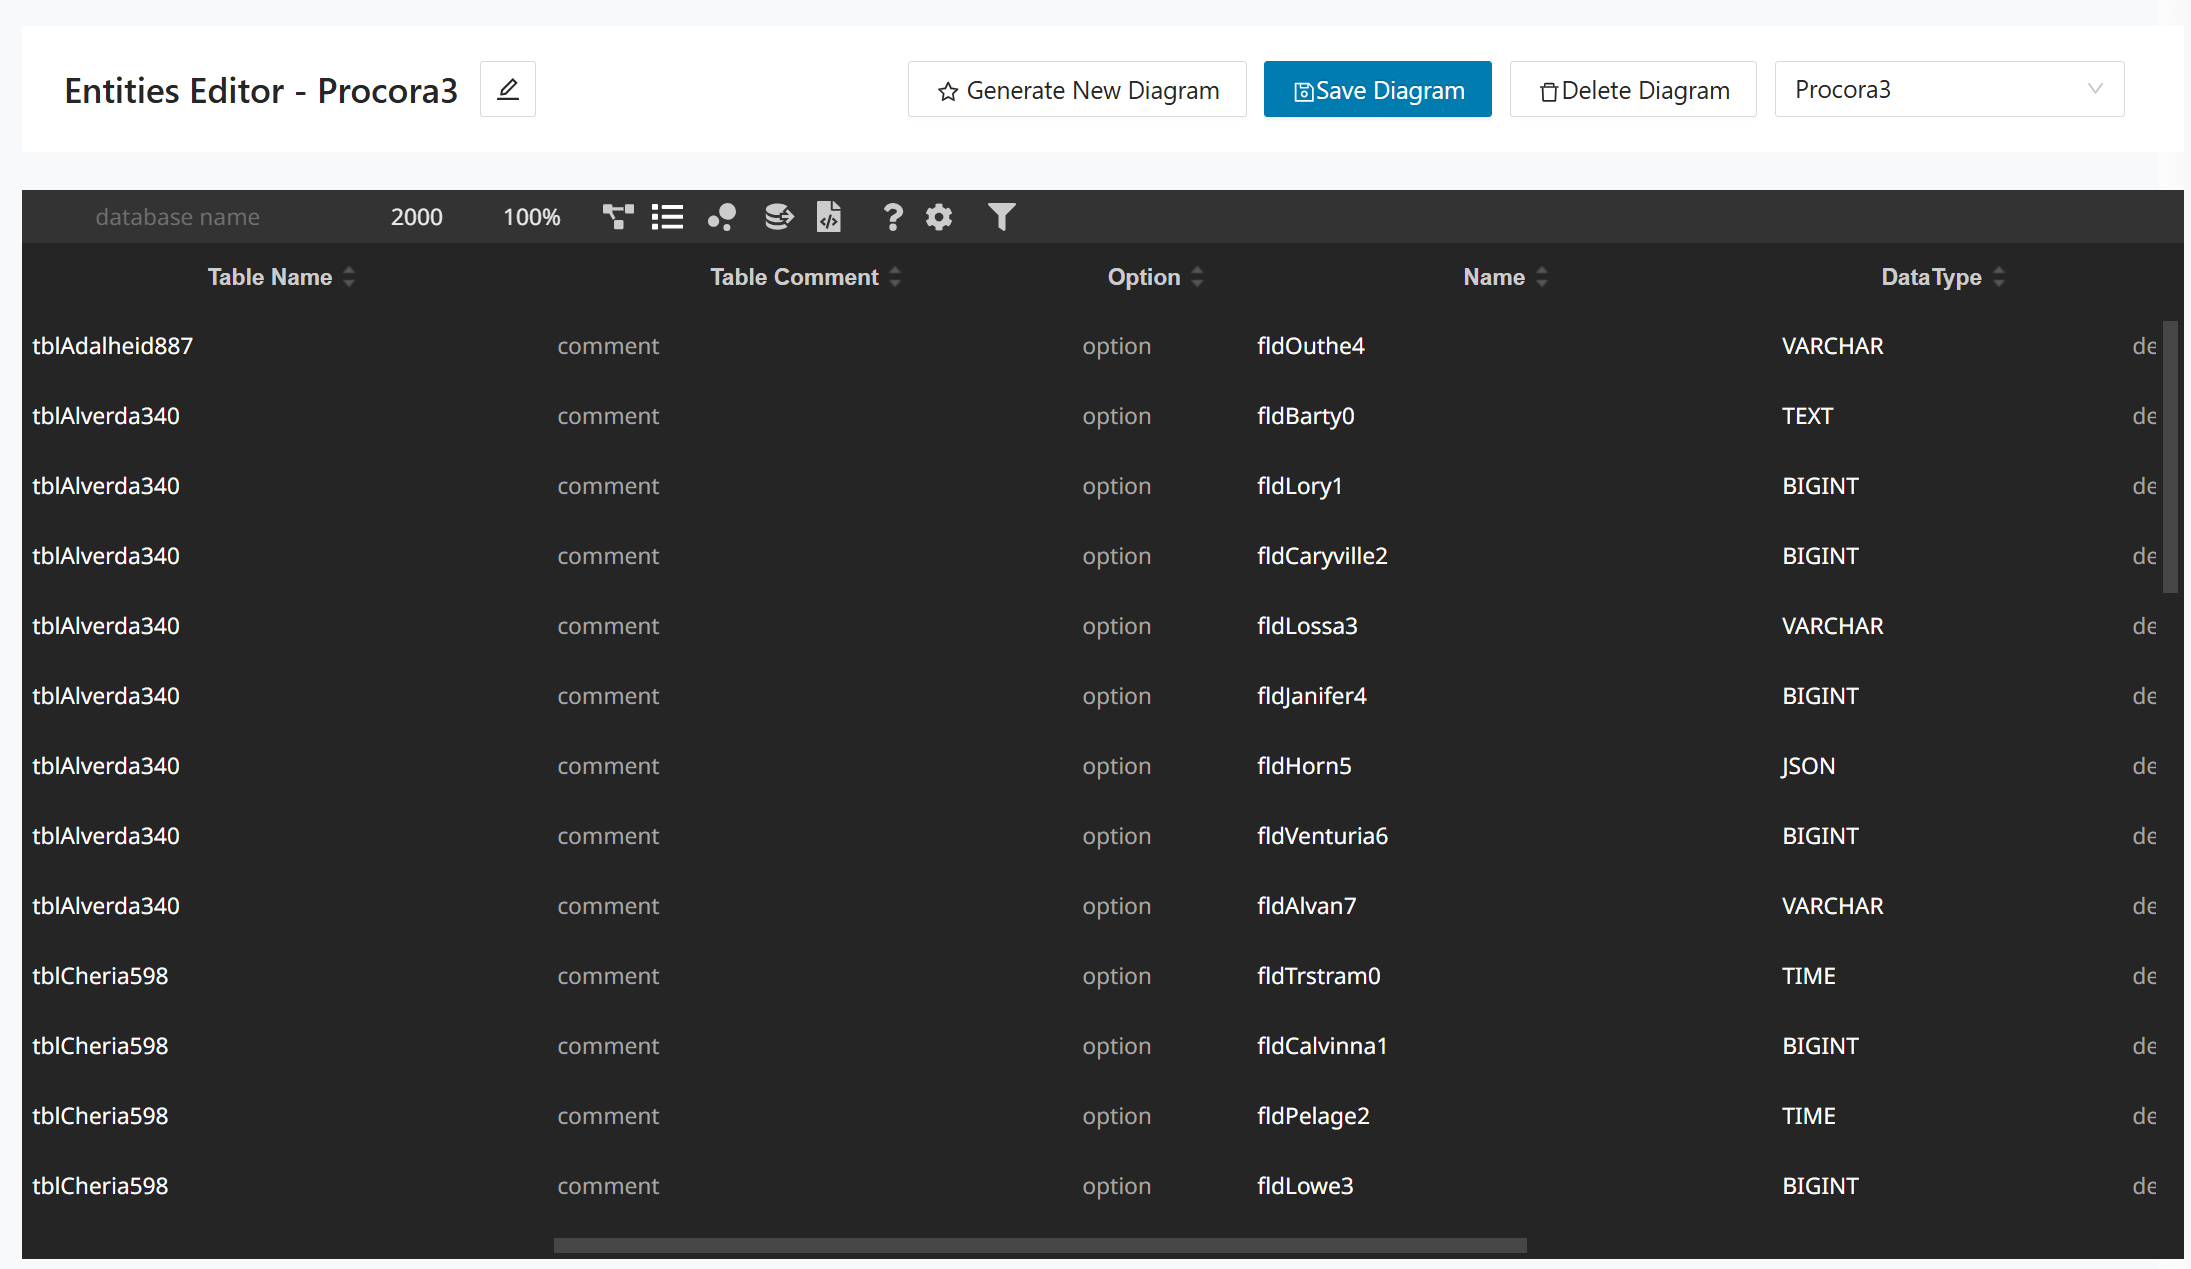
Grid
A spreadsheet-like grid listing Table Name, Table Comment, column/field Name, DataType, and options/metadata.
Best for: bulk edits (rename fields, change data types, update comments), sorting/filtering, and fast QA of column definitions.
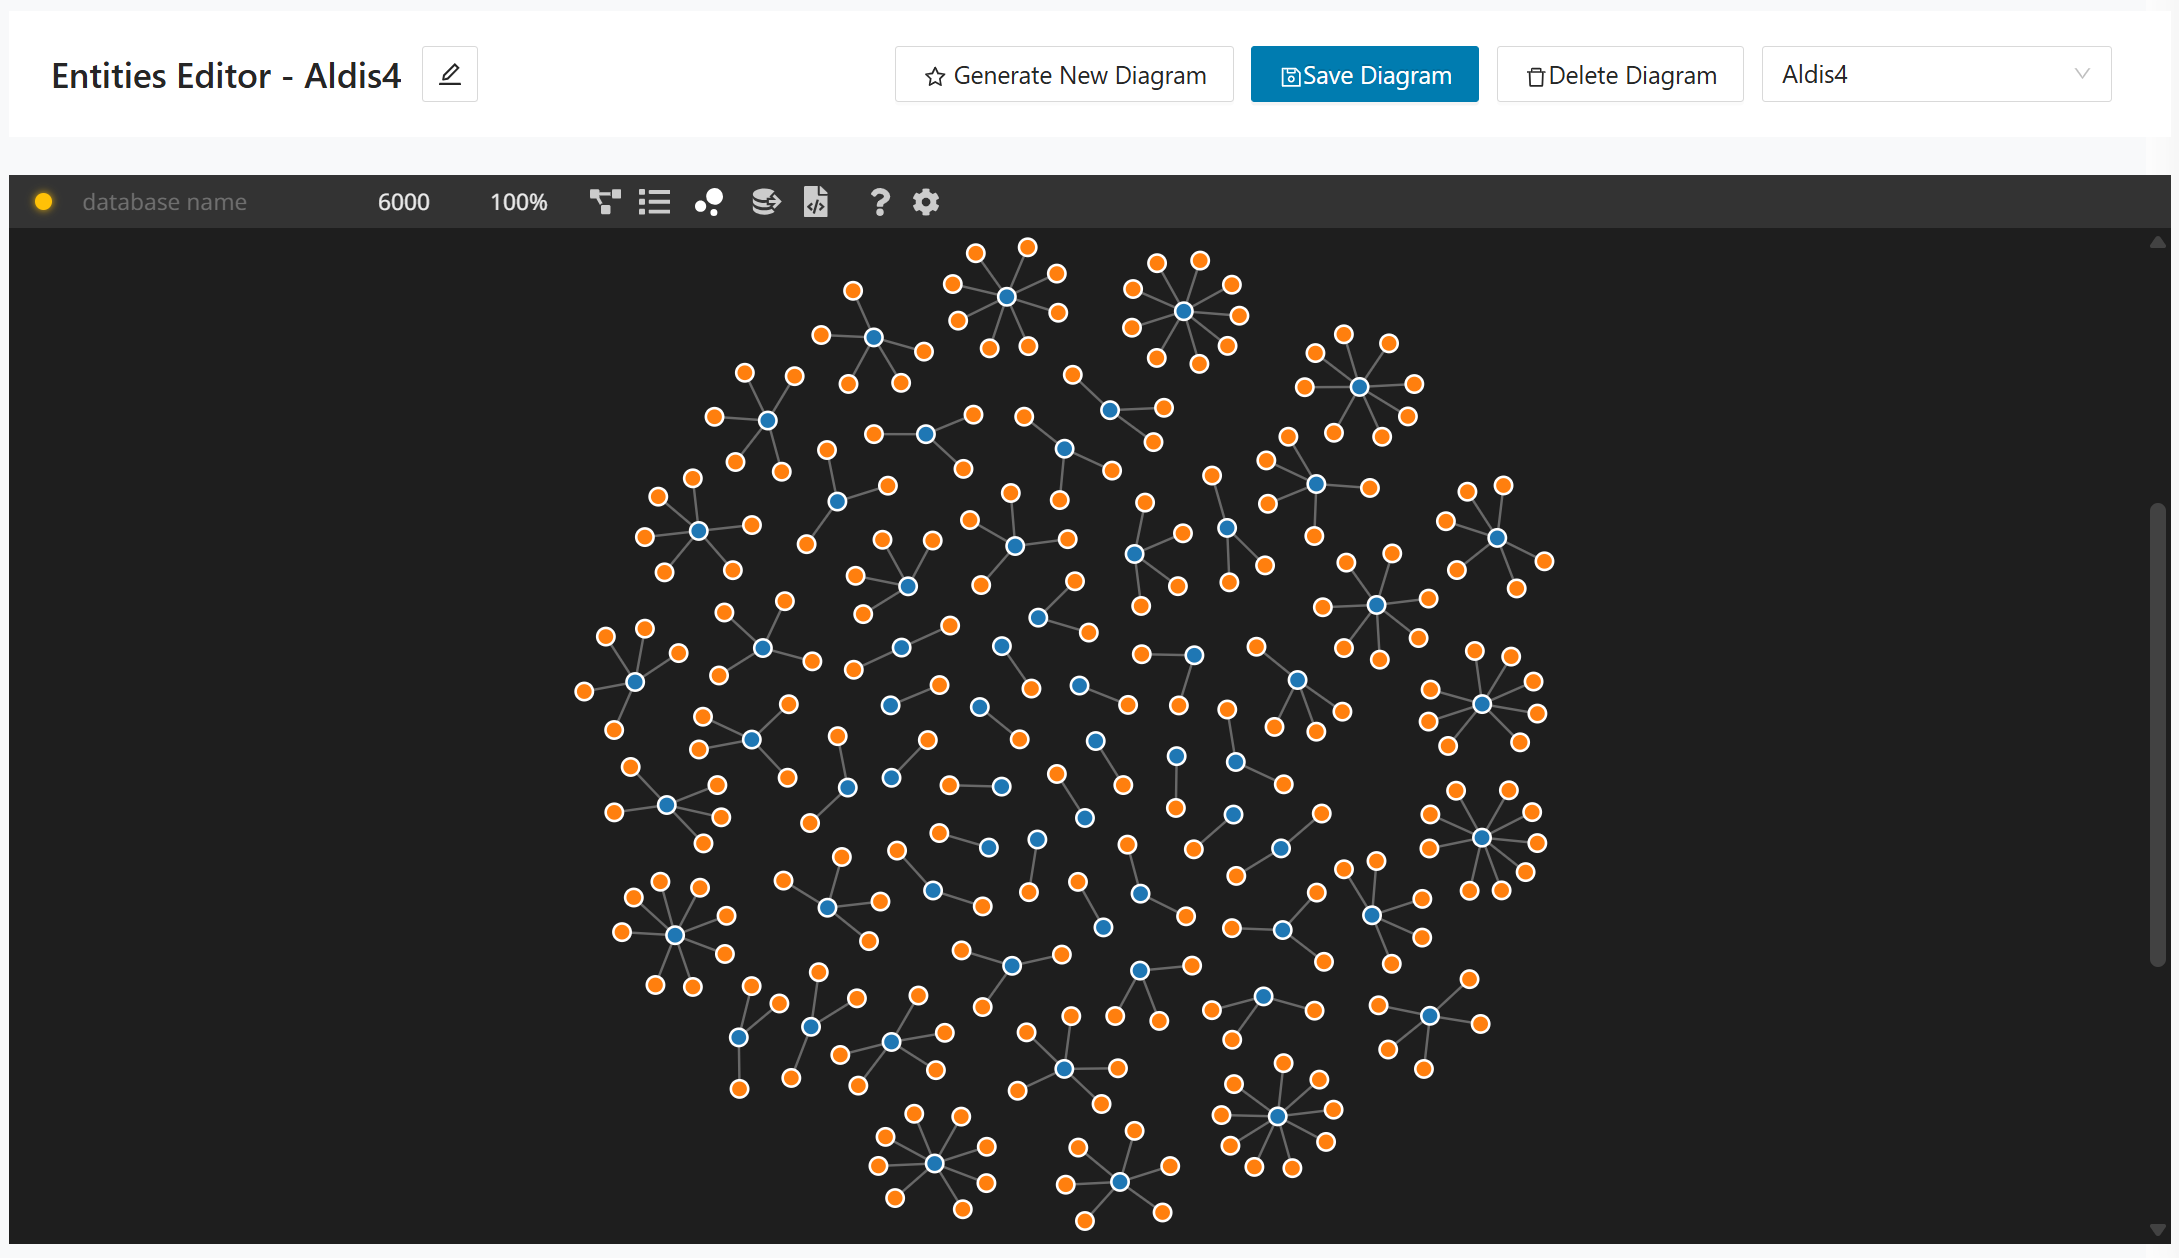
Visualization
A force-directed graph where nodes and links show connectivity (commonly tables and their relationships; sometimes columns/keys as leaf nodes).
Best for: understanding clusters, highly-connected “hub” entities, and the overall complexity/shape of the bounded context.
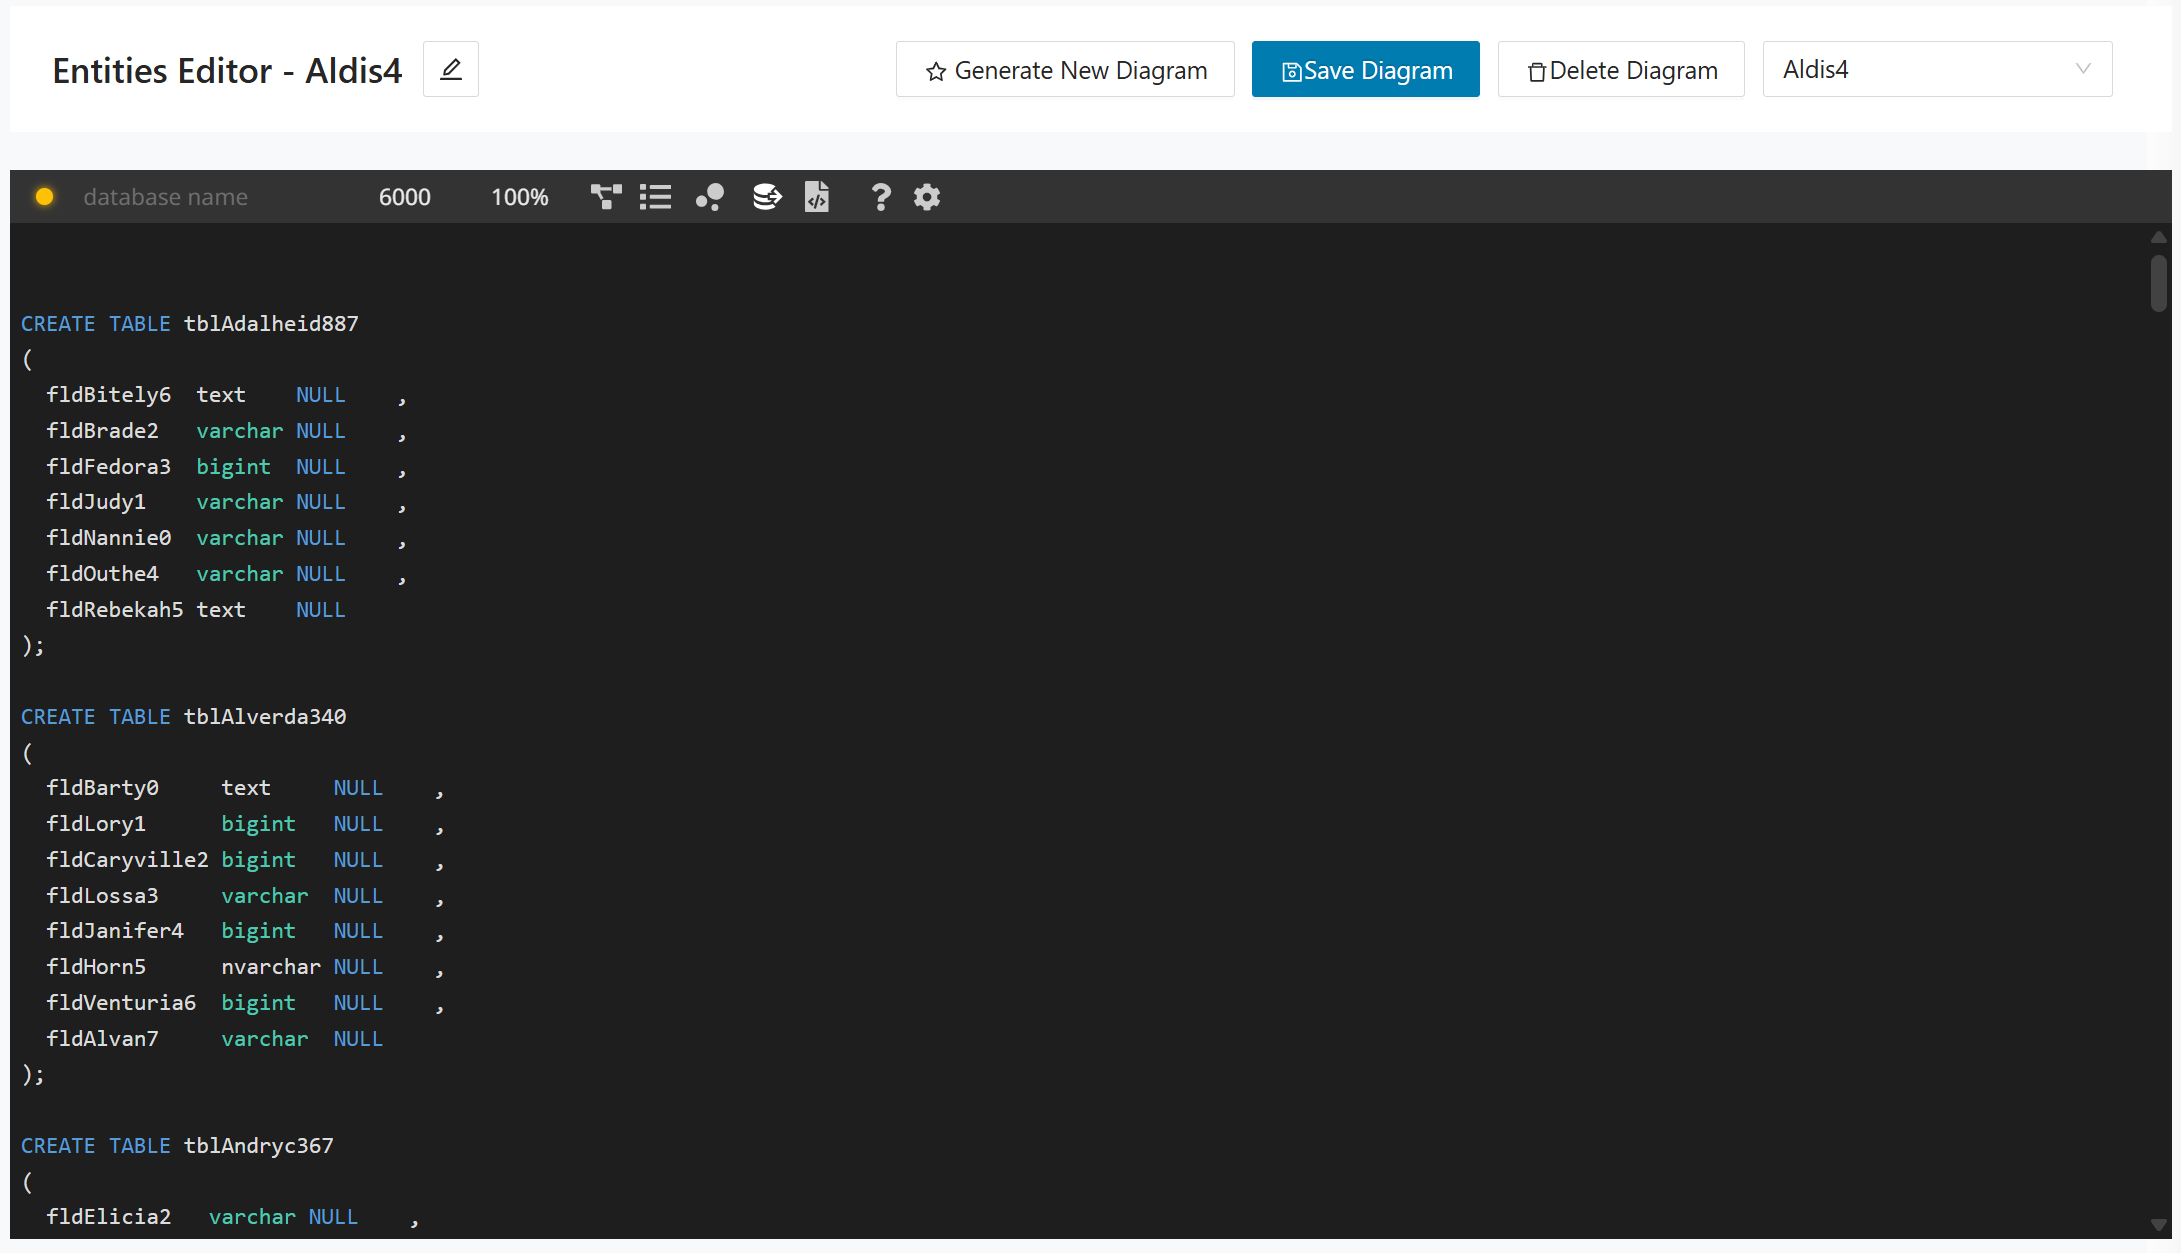
SQL DDL
Generates CREATE TABLE ... statements with columns, data types, and constraints (for example, NULL).
Best for: applying changes to a database, sharing with DBAs, and validating that the modeled schema maps cleanly to SQL.
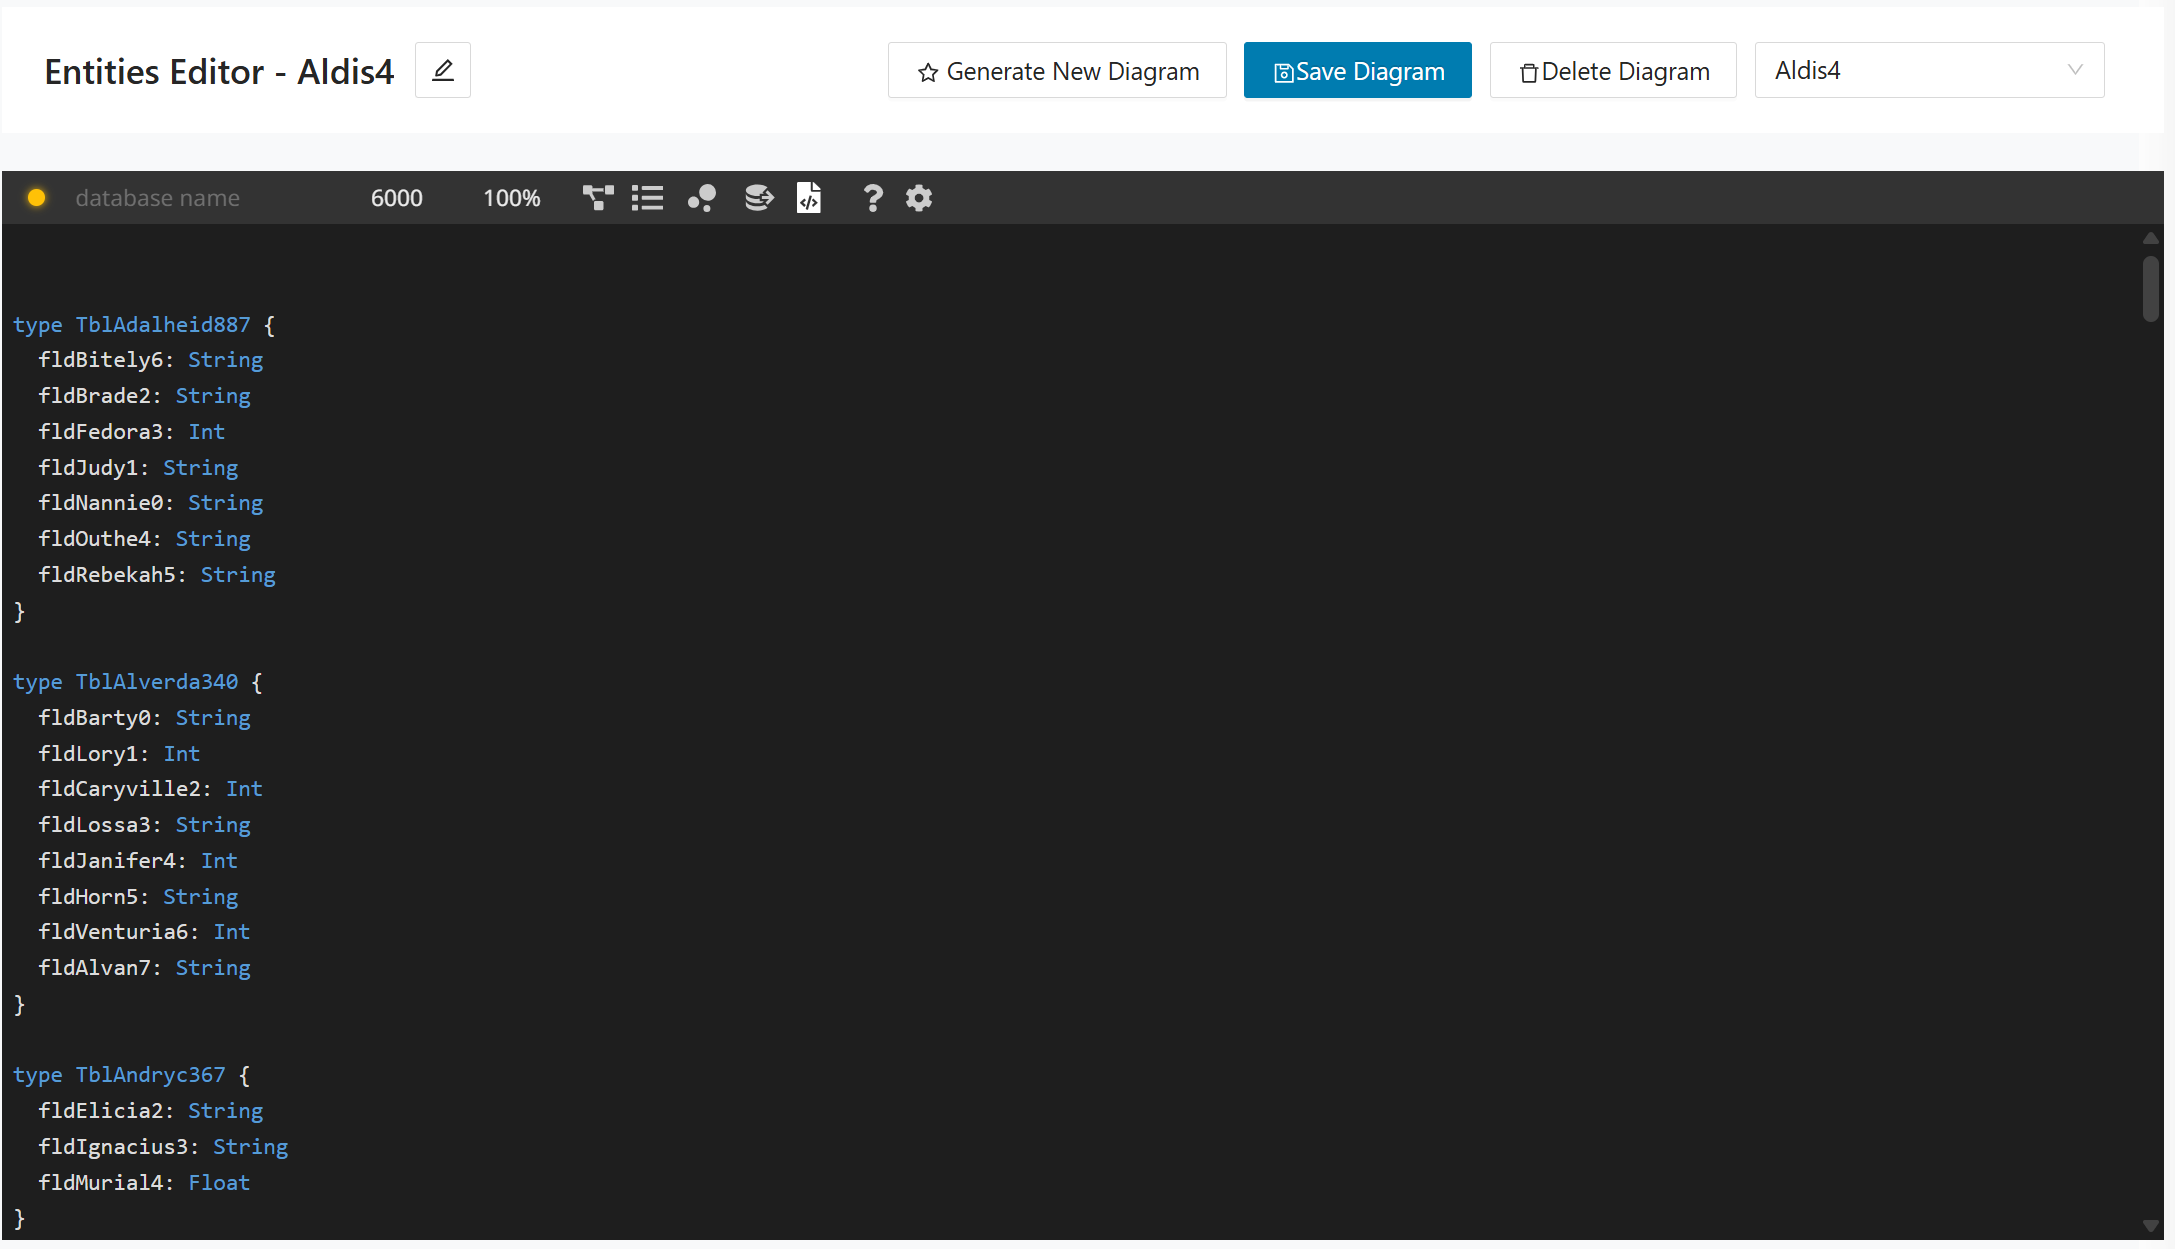
Generator Code
Shows table/entity definitions in a code/DSL format (for example, type Tbl... { field: Type }).
Best for: quick copy/paste into source control, reviewing names/types at speed, and generating downstream artifacts from a single definition.
DDL Generator
The DDL Generator creates SQL DDL statements for the selected bounded context based on the database design saved in the Entities Designer. Use this page when you want to review the generated schema, copy it for implementation work, or export the generated DDL for multiple target dialects.
If no entities have been saved for the selected bounded context, the page shows a No DDL Generated message. In that case, define the required tables in Entities Designer, save the model, and then generate the DDL again.
To generate DDL, perform the following steps:
Step 1:
In the left navigation panel, select DB Cutting > DDL Generator.
Step 2:
Select the bounded context whose target schema you want to generate.
Step 3:
Select the target database dialect, for example, MySQL.
Step 4:
Click Generate DDL to generate the script for the selected dialect, or click Generate All Dialects to generate all supported dialect variants.
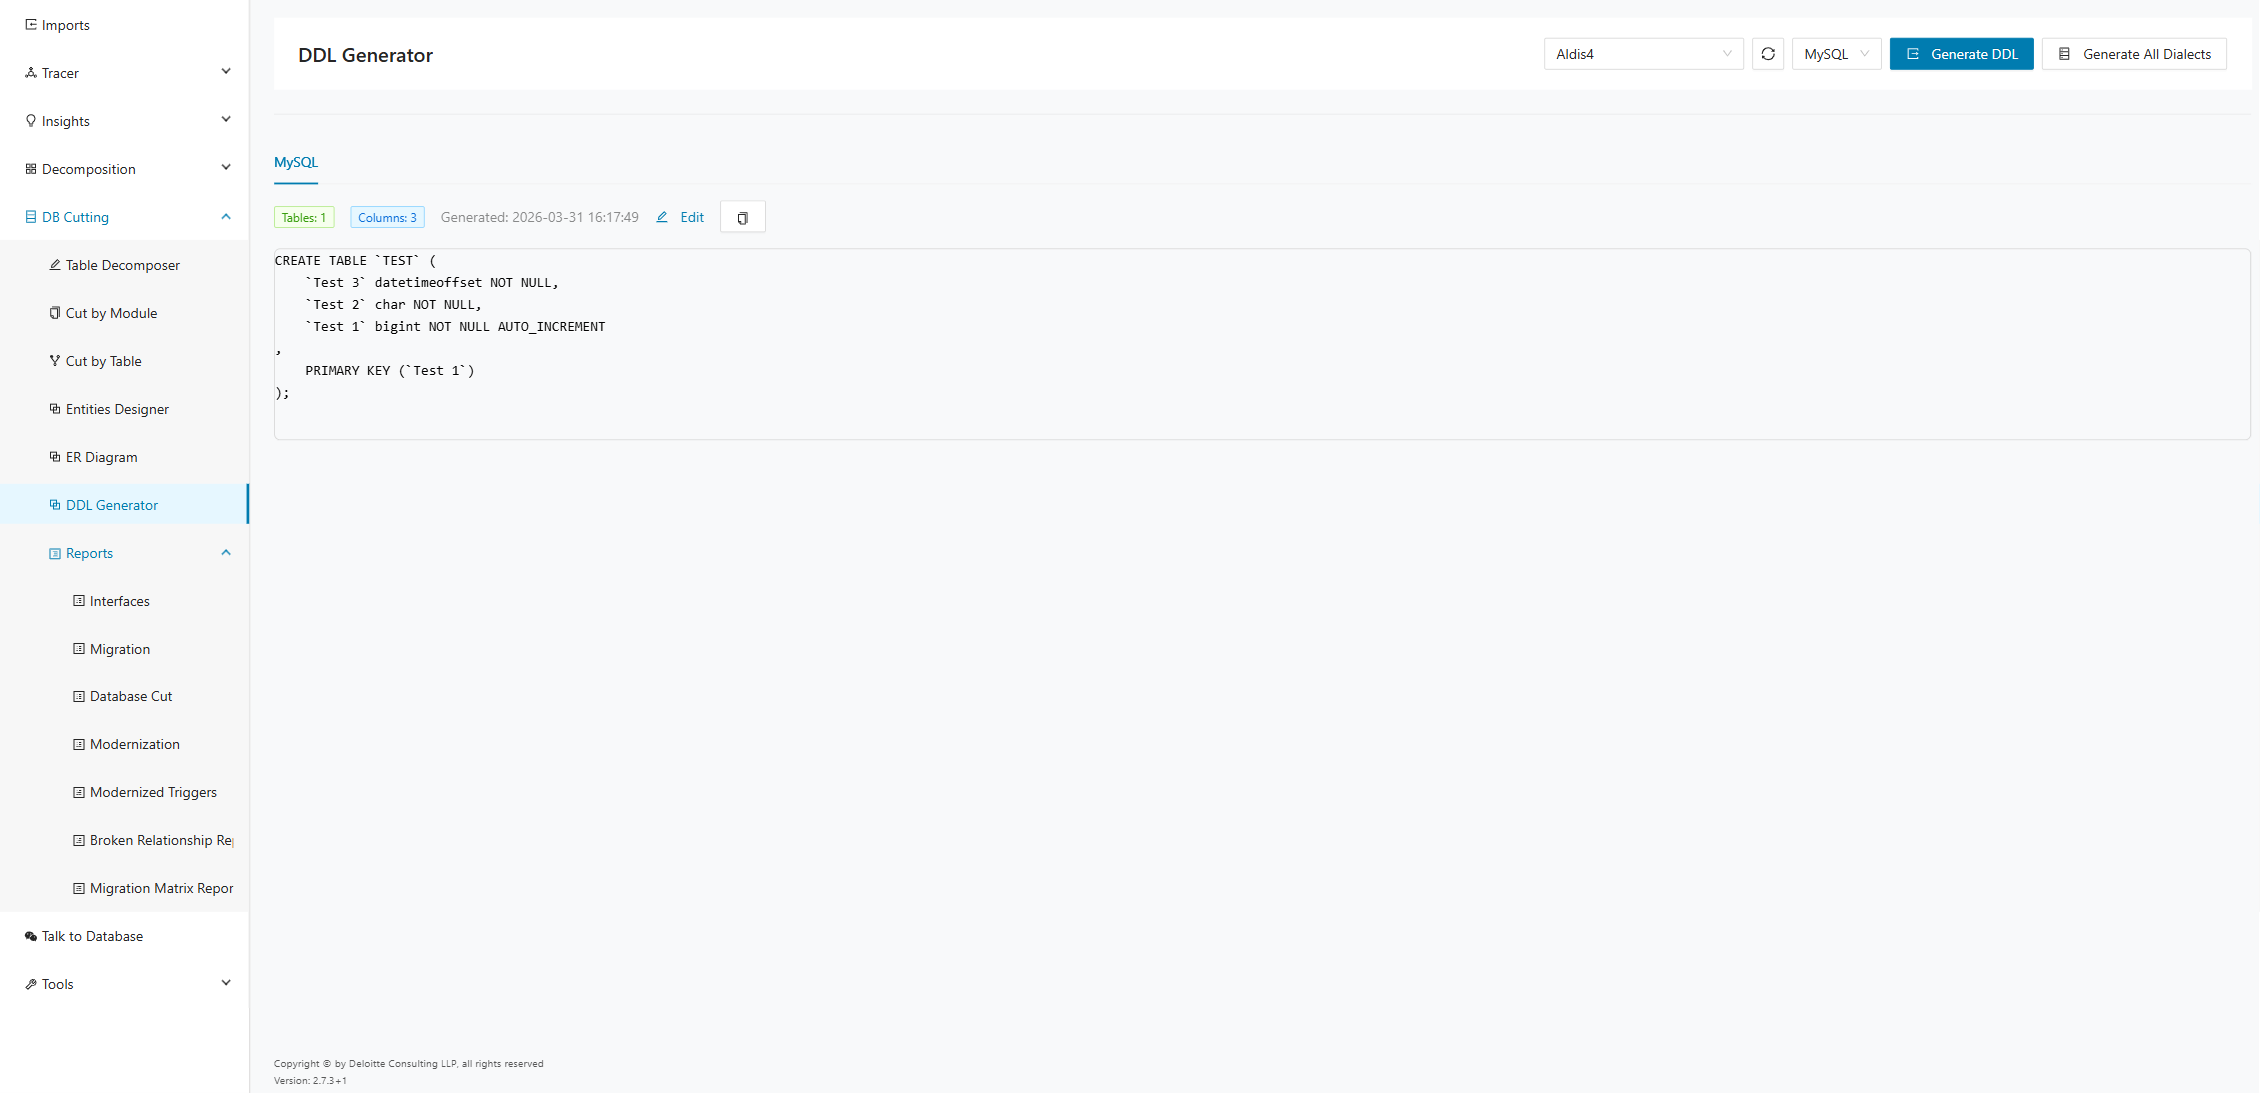
After generation, the page displays the generated dialect in a tab, together with the number of tables and columns included in the script and the generation timestamp. Use Edit to adjust the generated DDL before copying it, or use the copy action to copy the SQL text to the clipboard.
Reports
Use the Reports tab to create and run reports on migrations, interfaces, DDL-related outputs, and cross-context dependencies. The available reports include Interfaces, Migration, Database Cut, Modernization, Modernized Triggers, Broken Relationship Report, and Migration Matrix Report.
Interfaces
The interface report shows which bounded contexts provide interfaces to data that has been migrated to their microservice database. It also shows which other contexts are consuming these interfaces. You can download the report data as a CSV file for automated use in other tools. It shows the necessary connections between microservices, that is, if one microservice holds data that another requires, there must be an interface between them.
The API team (developers) needs this report to provide the interfaces. Run it at least once per microservice.
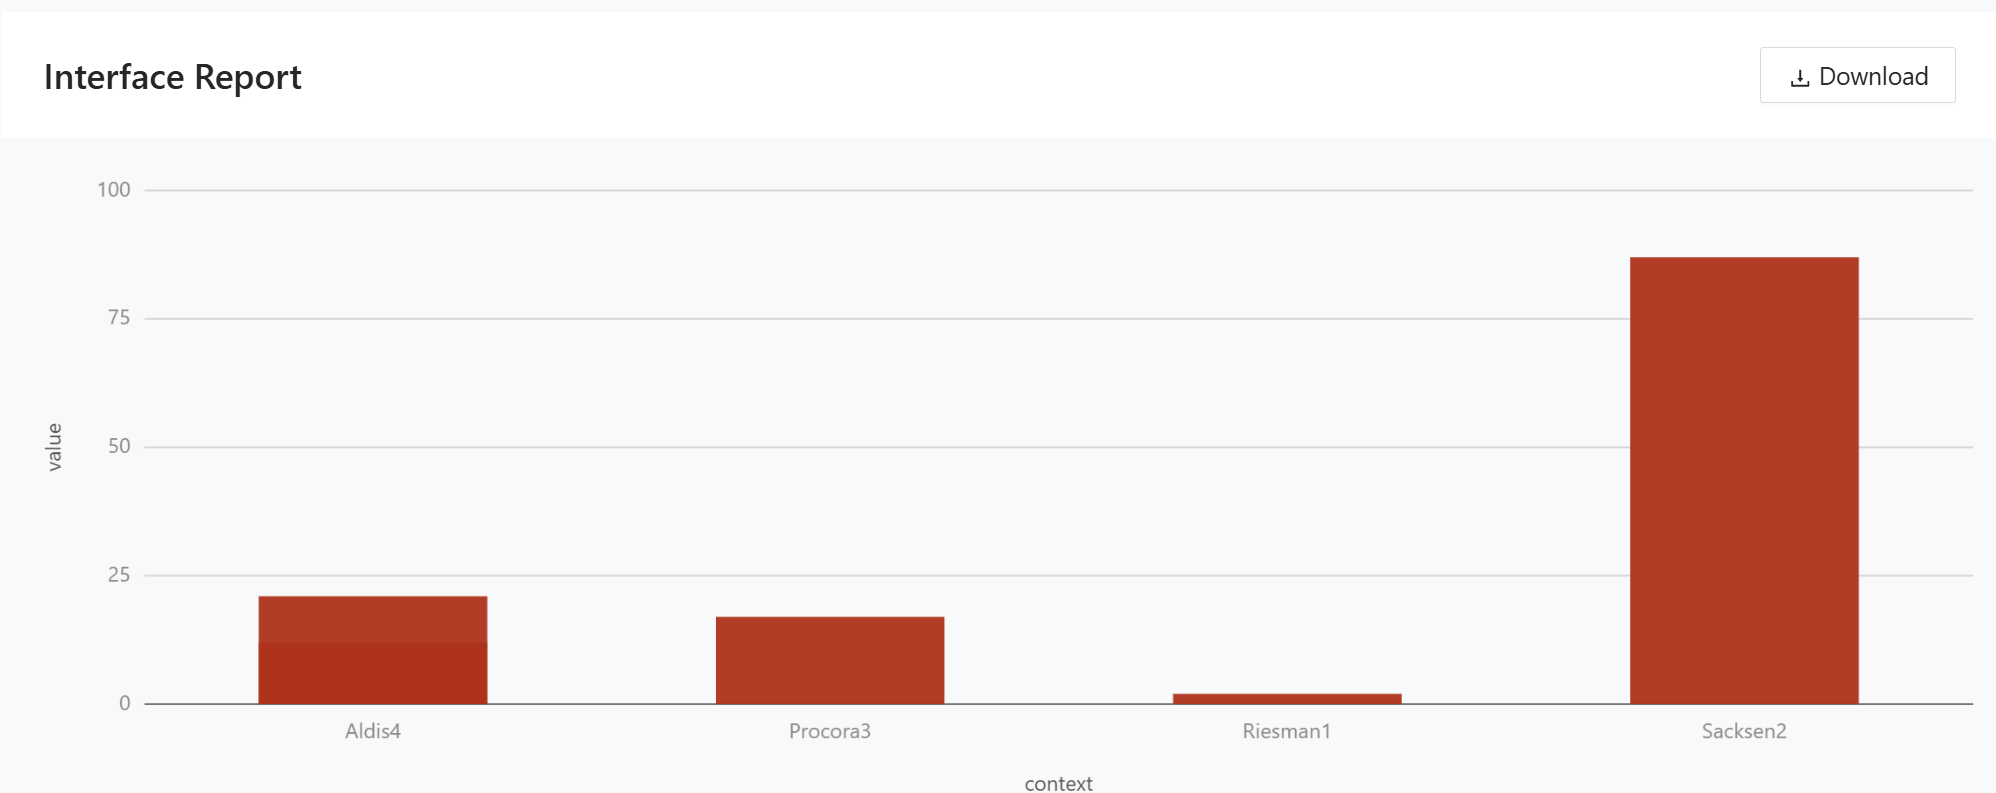
The chart shows the number of tables per bounded context that use the Consume Interface strategy when cutting a module.
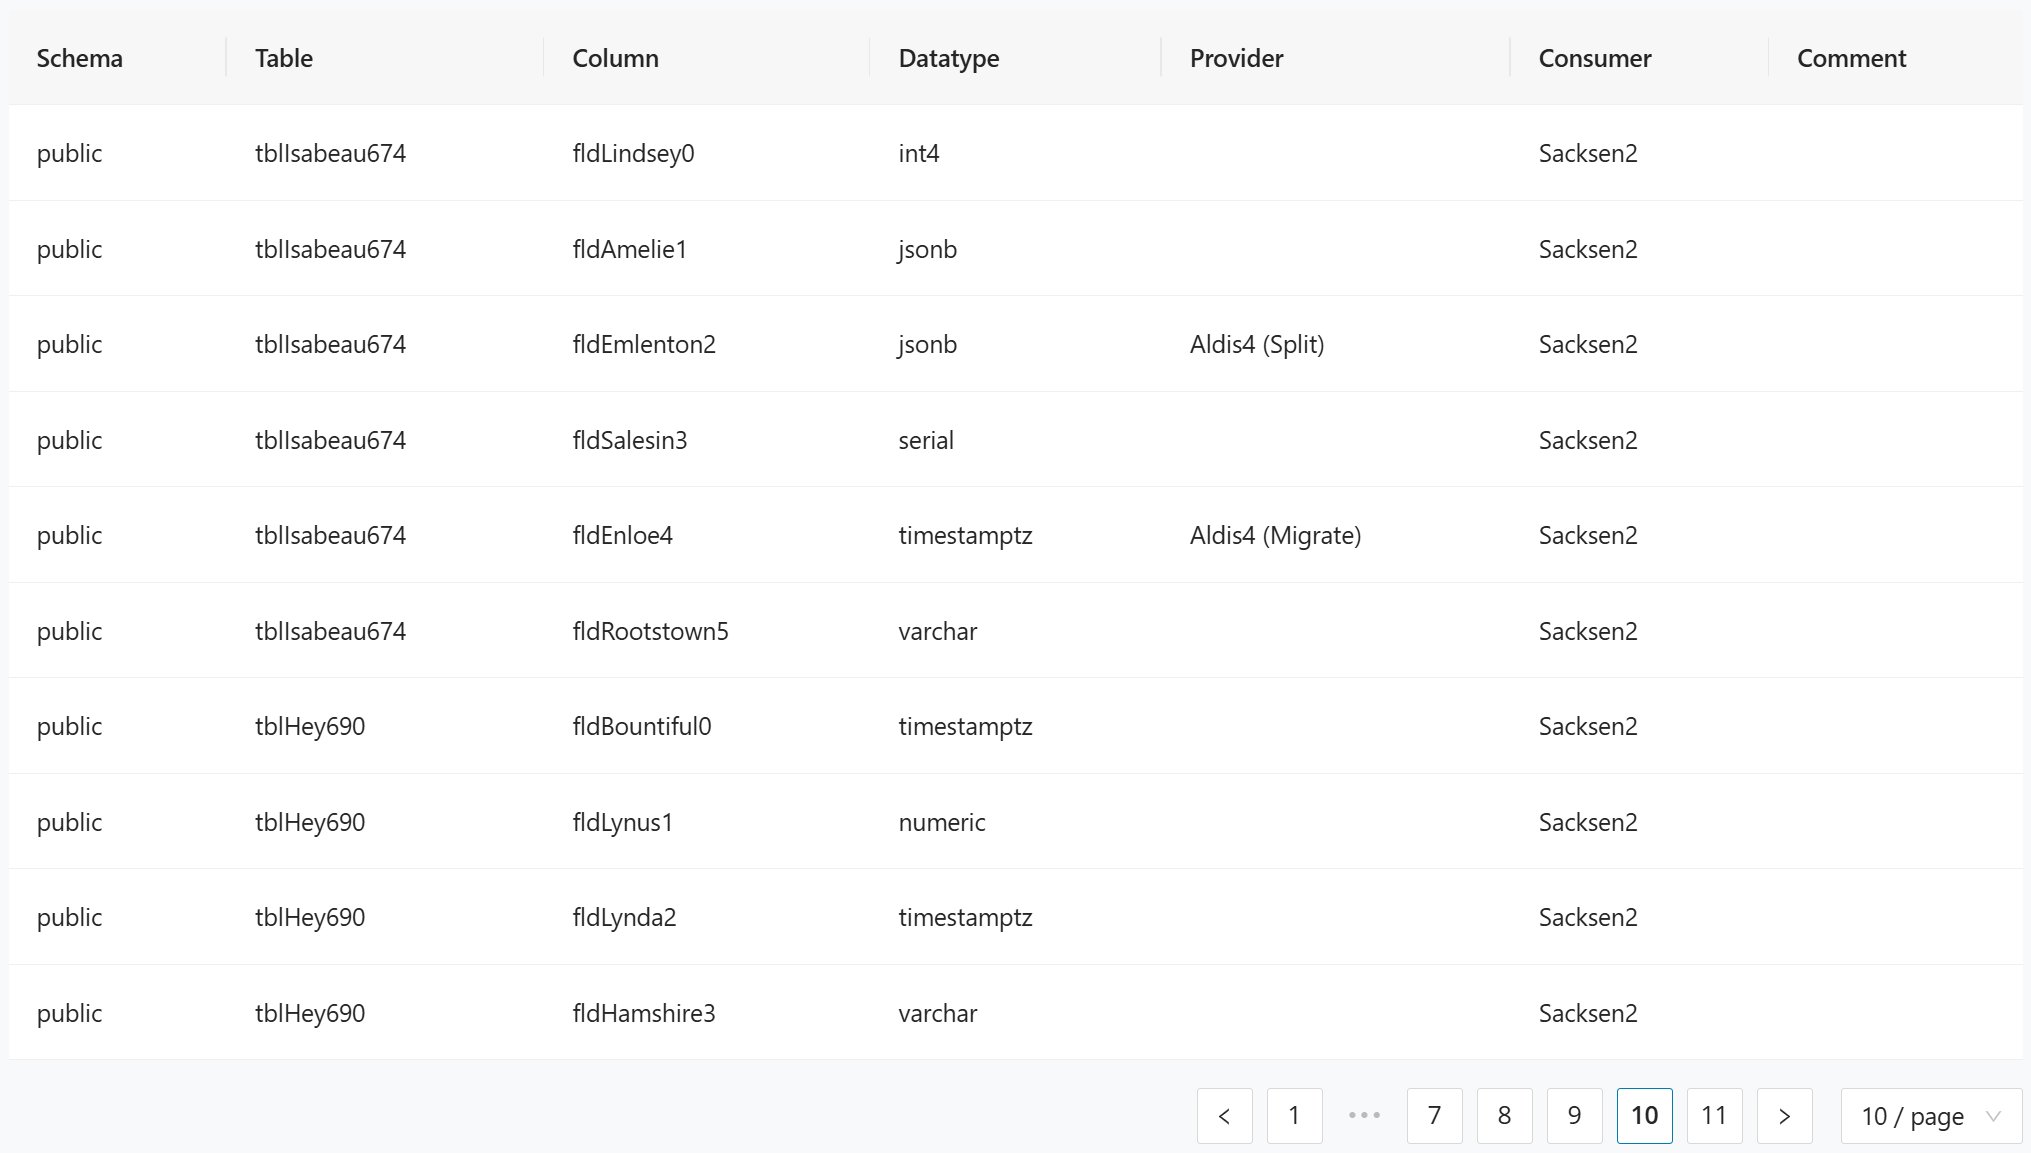
The table lists each interface relationship at the column level:
- Schema identifies the database schema.
- Table identifies the source table.
- Column identifies the source column within the table.
- Datatype shows the column's data type.
- Provider identifies the bounded context that owns the data and its assigned migration strategy (for example, Split or Migrate).
- Consumer identifies the bounded context consuming the interface.
- Comment provides optional notes.
Migration
The migration report shows which data is migrated from specific tables and columns and which bounded context they are associated with. Use the data from this report to jump-start an ETL implementation. You can download it as a CSV file for automated use in other tools.
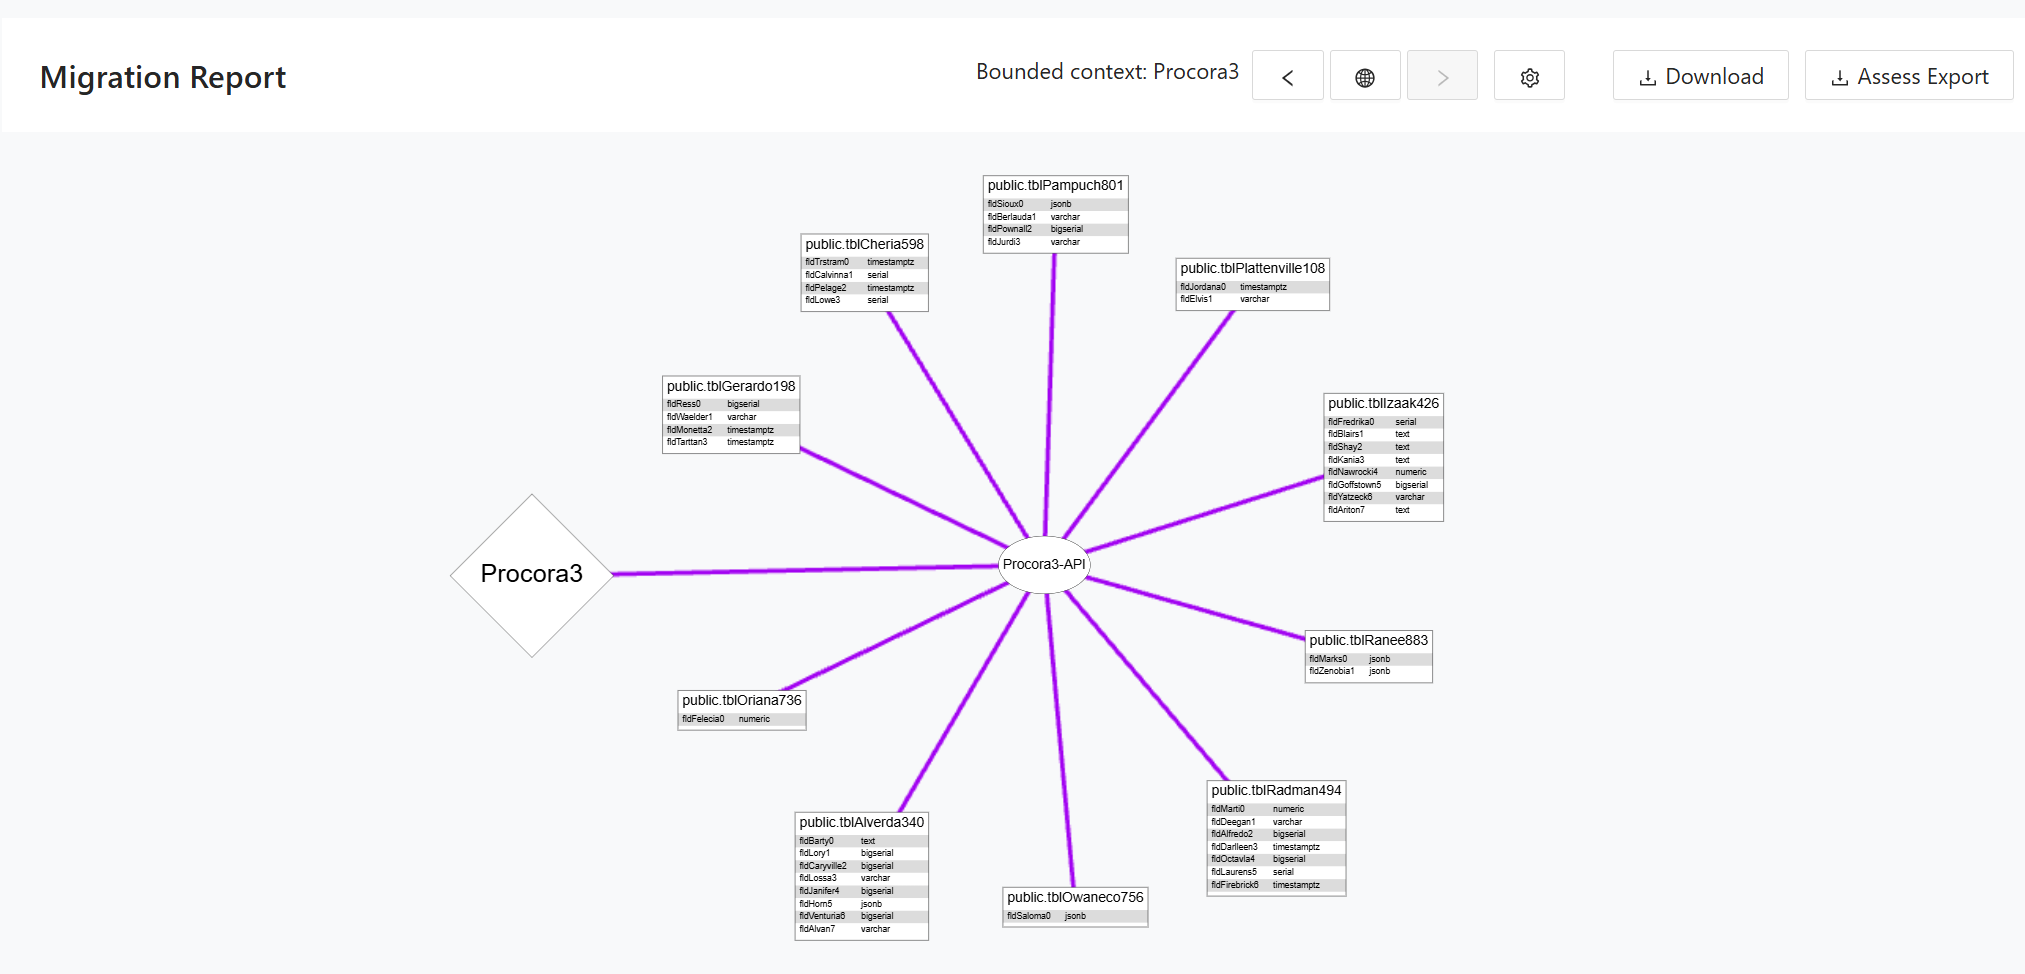
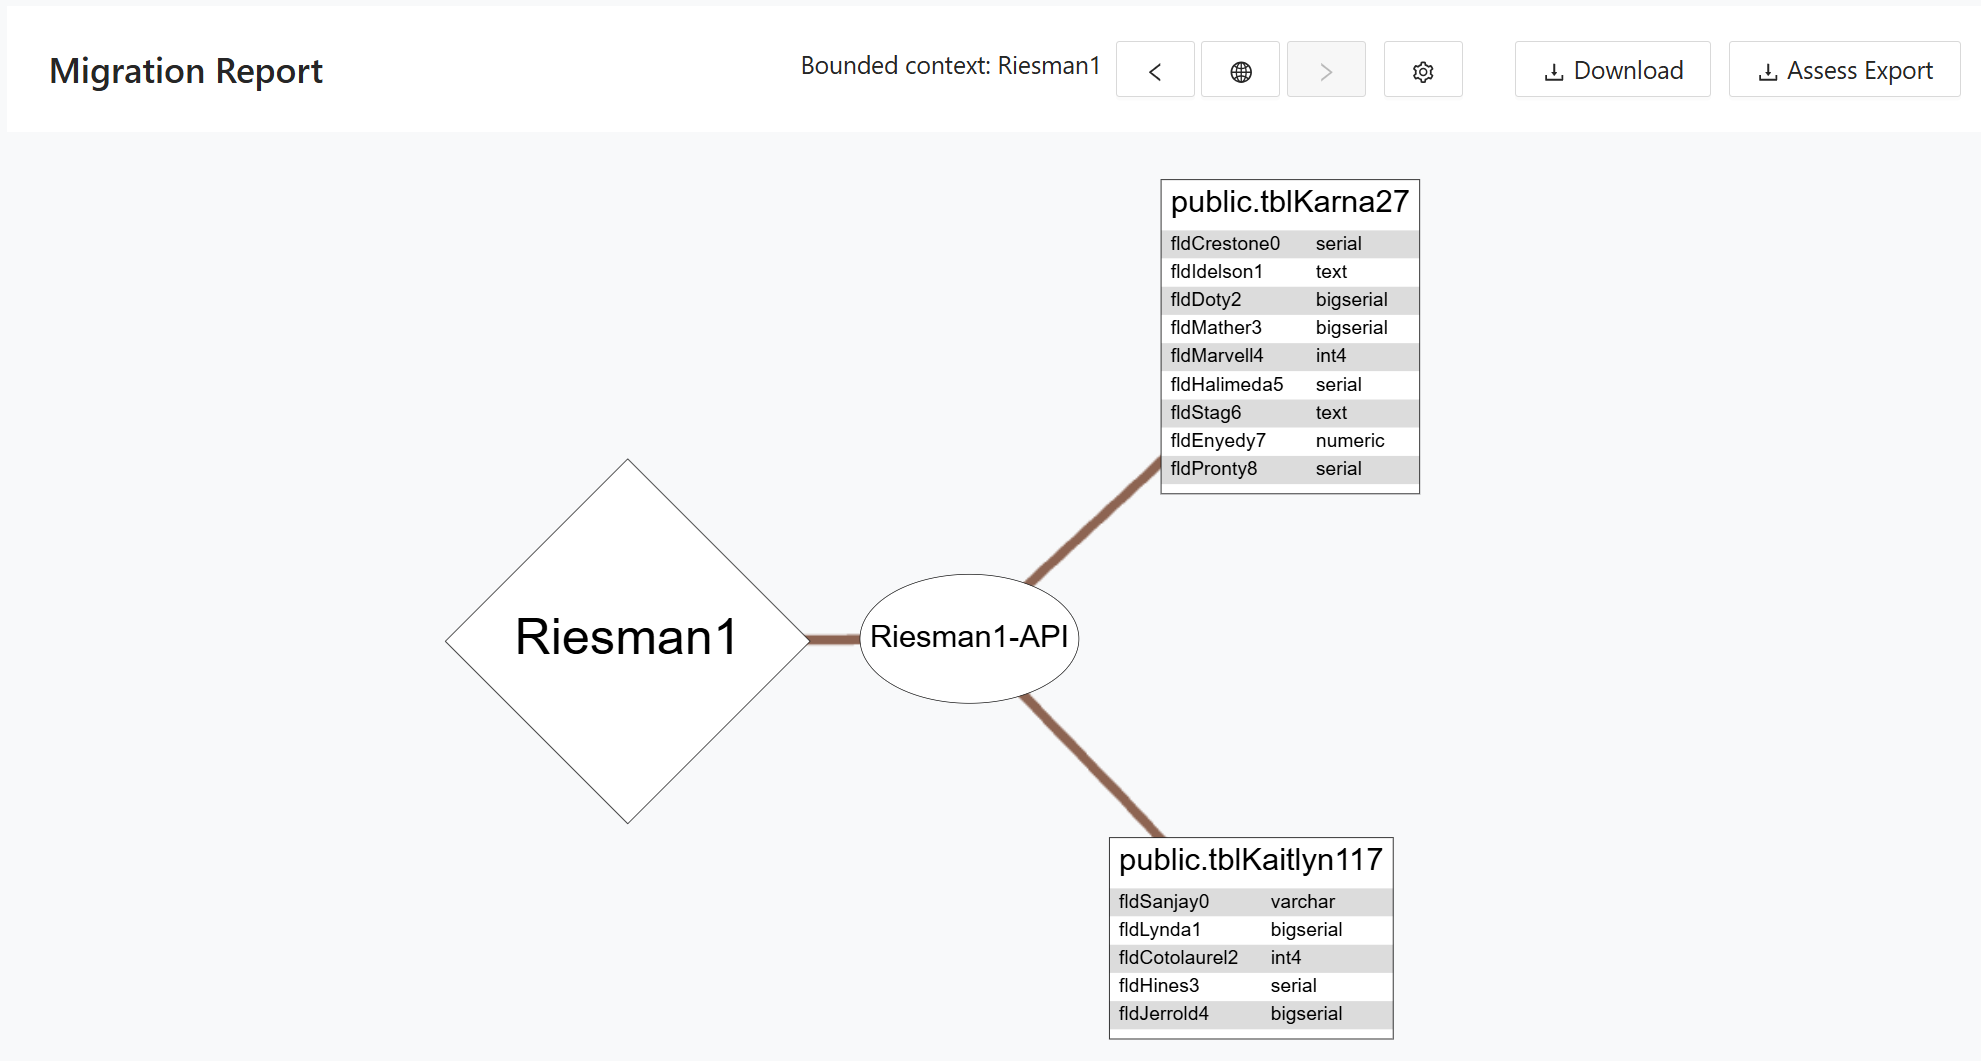
The graph view of the Migration Report for a selected bounded context. The bounded context node connects through a central API node to all associated database tables, each displayed with their column names and data types. The header provides navigation between bounded contexts, along with Download and Assess Export options.
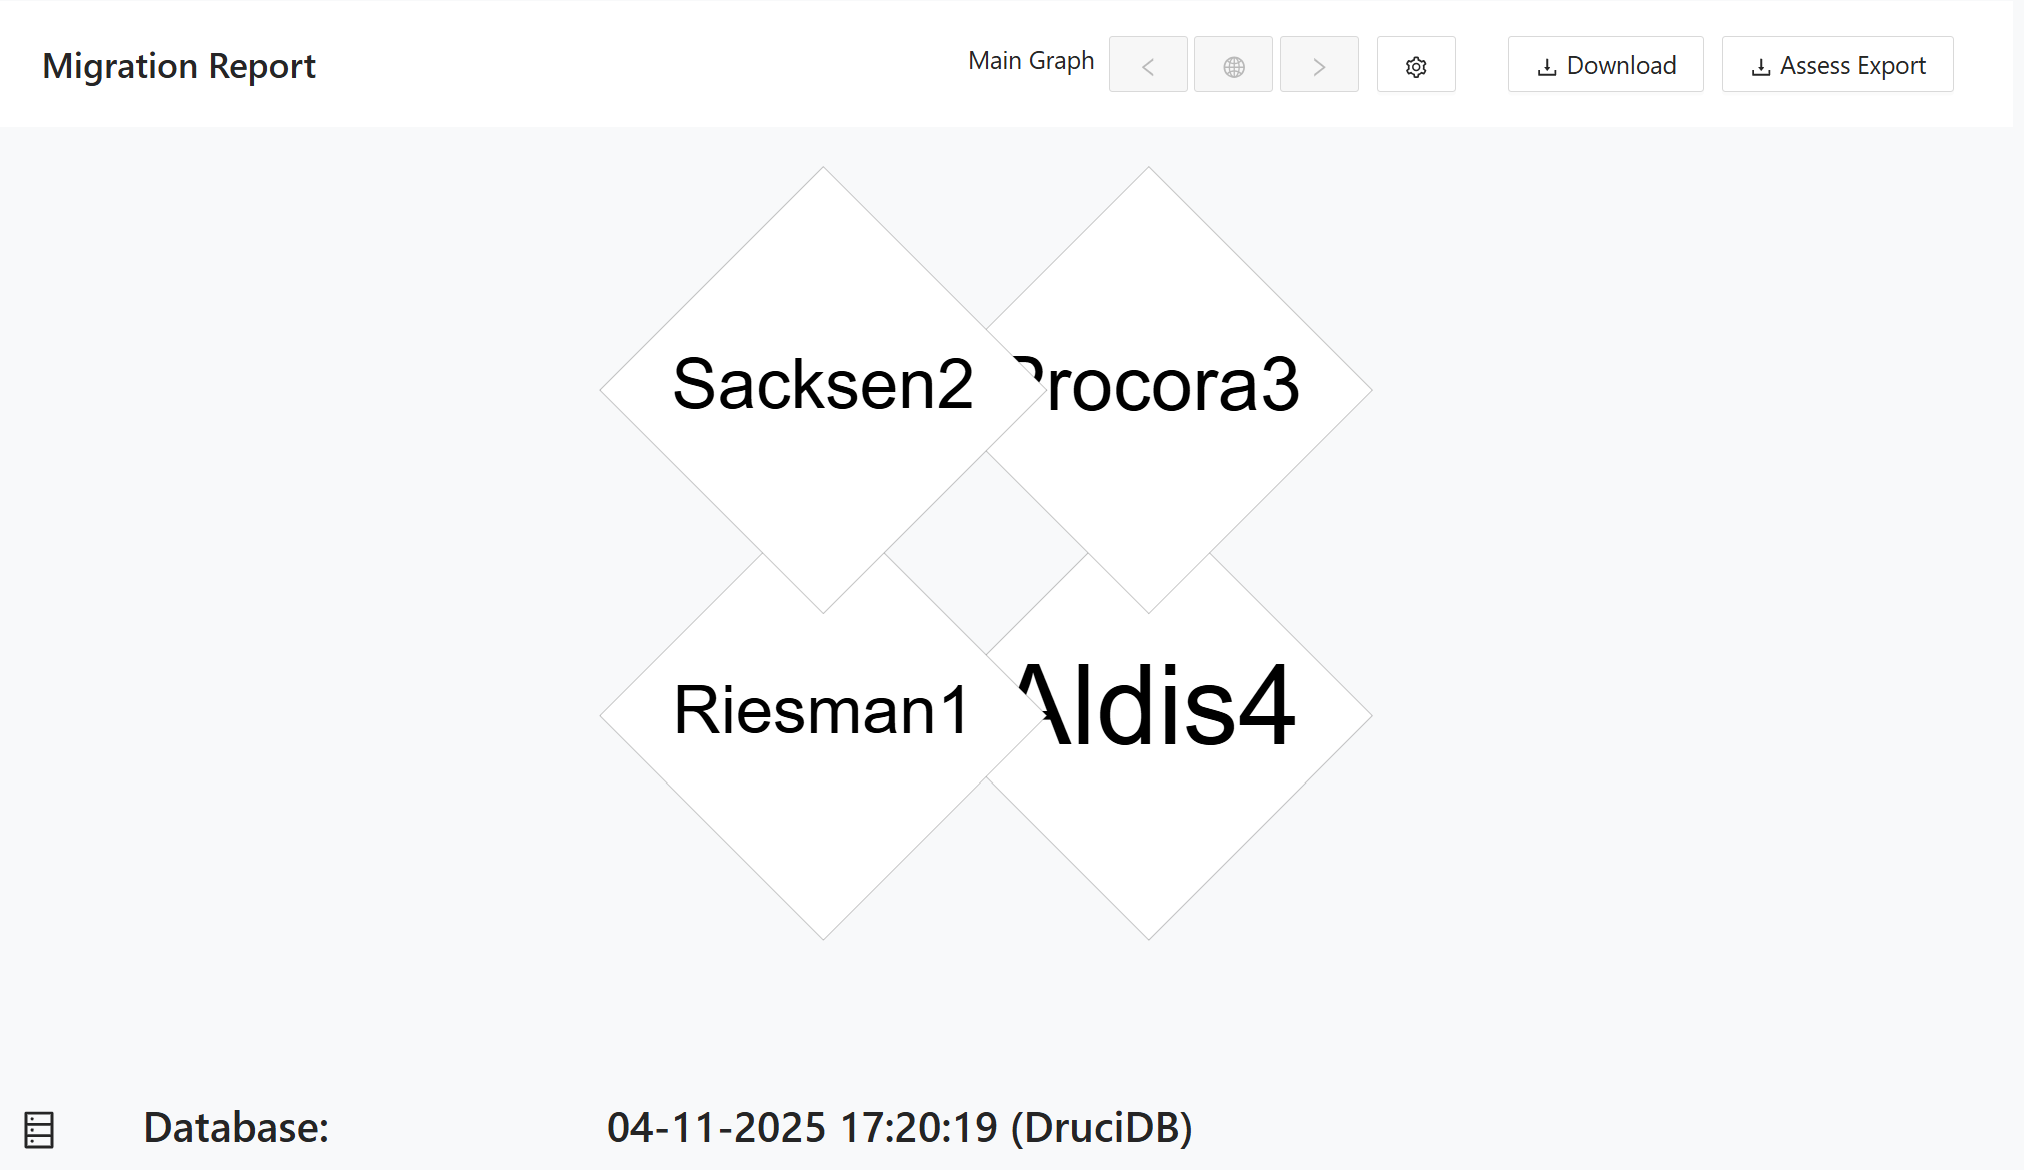
The main graph view of the Migration Report showing all bounded contexts as diamond-shaped nodes. Each node represents a distinct bounded context in the migration. The database name and import timestamp are displayed at the bottom of the page.
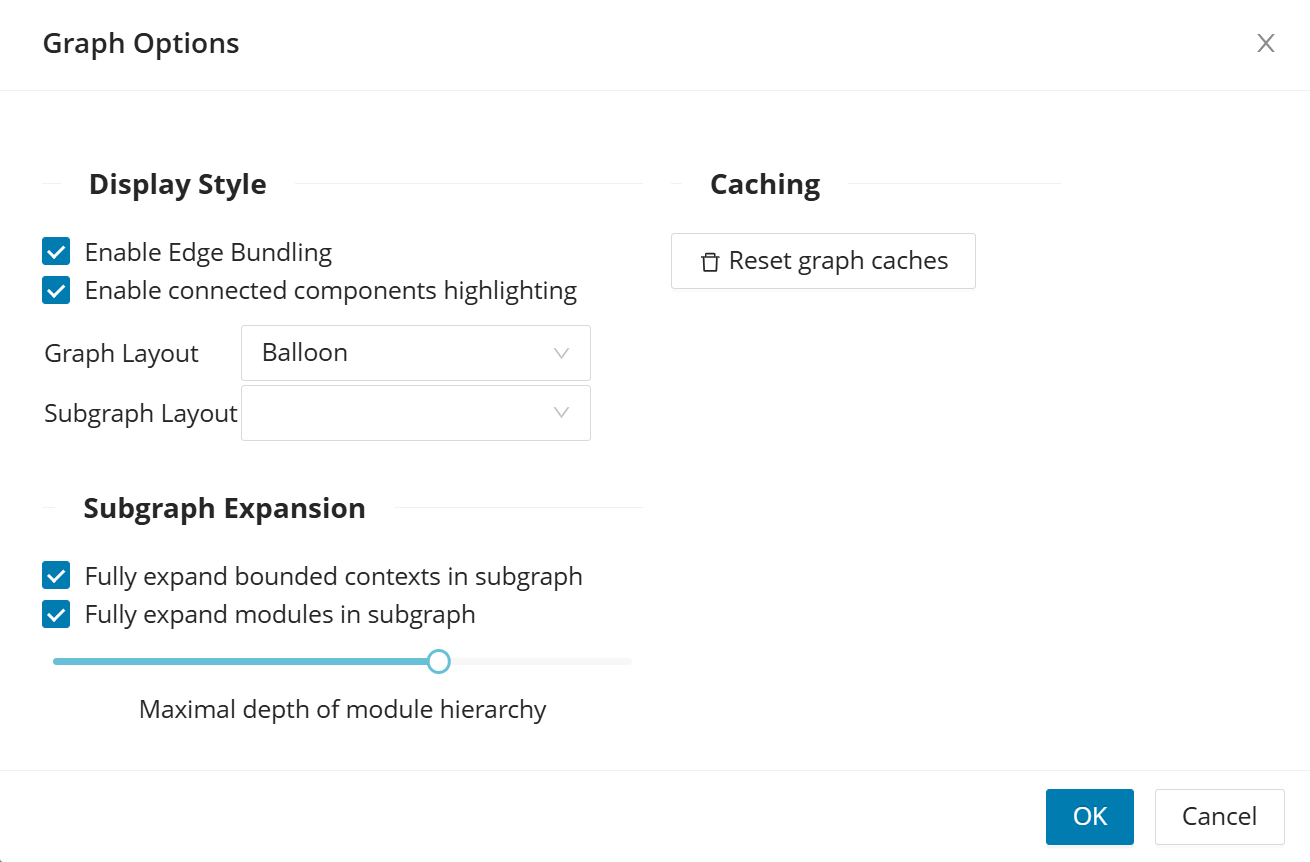
Click the
settings icon to customize the graph's display style.
Click a bounded context to expand its details, showing the tables and columns associated with that context along with their assigned migration strategies.
This is another example of a bounded context expanded.
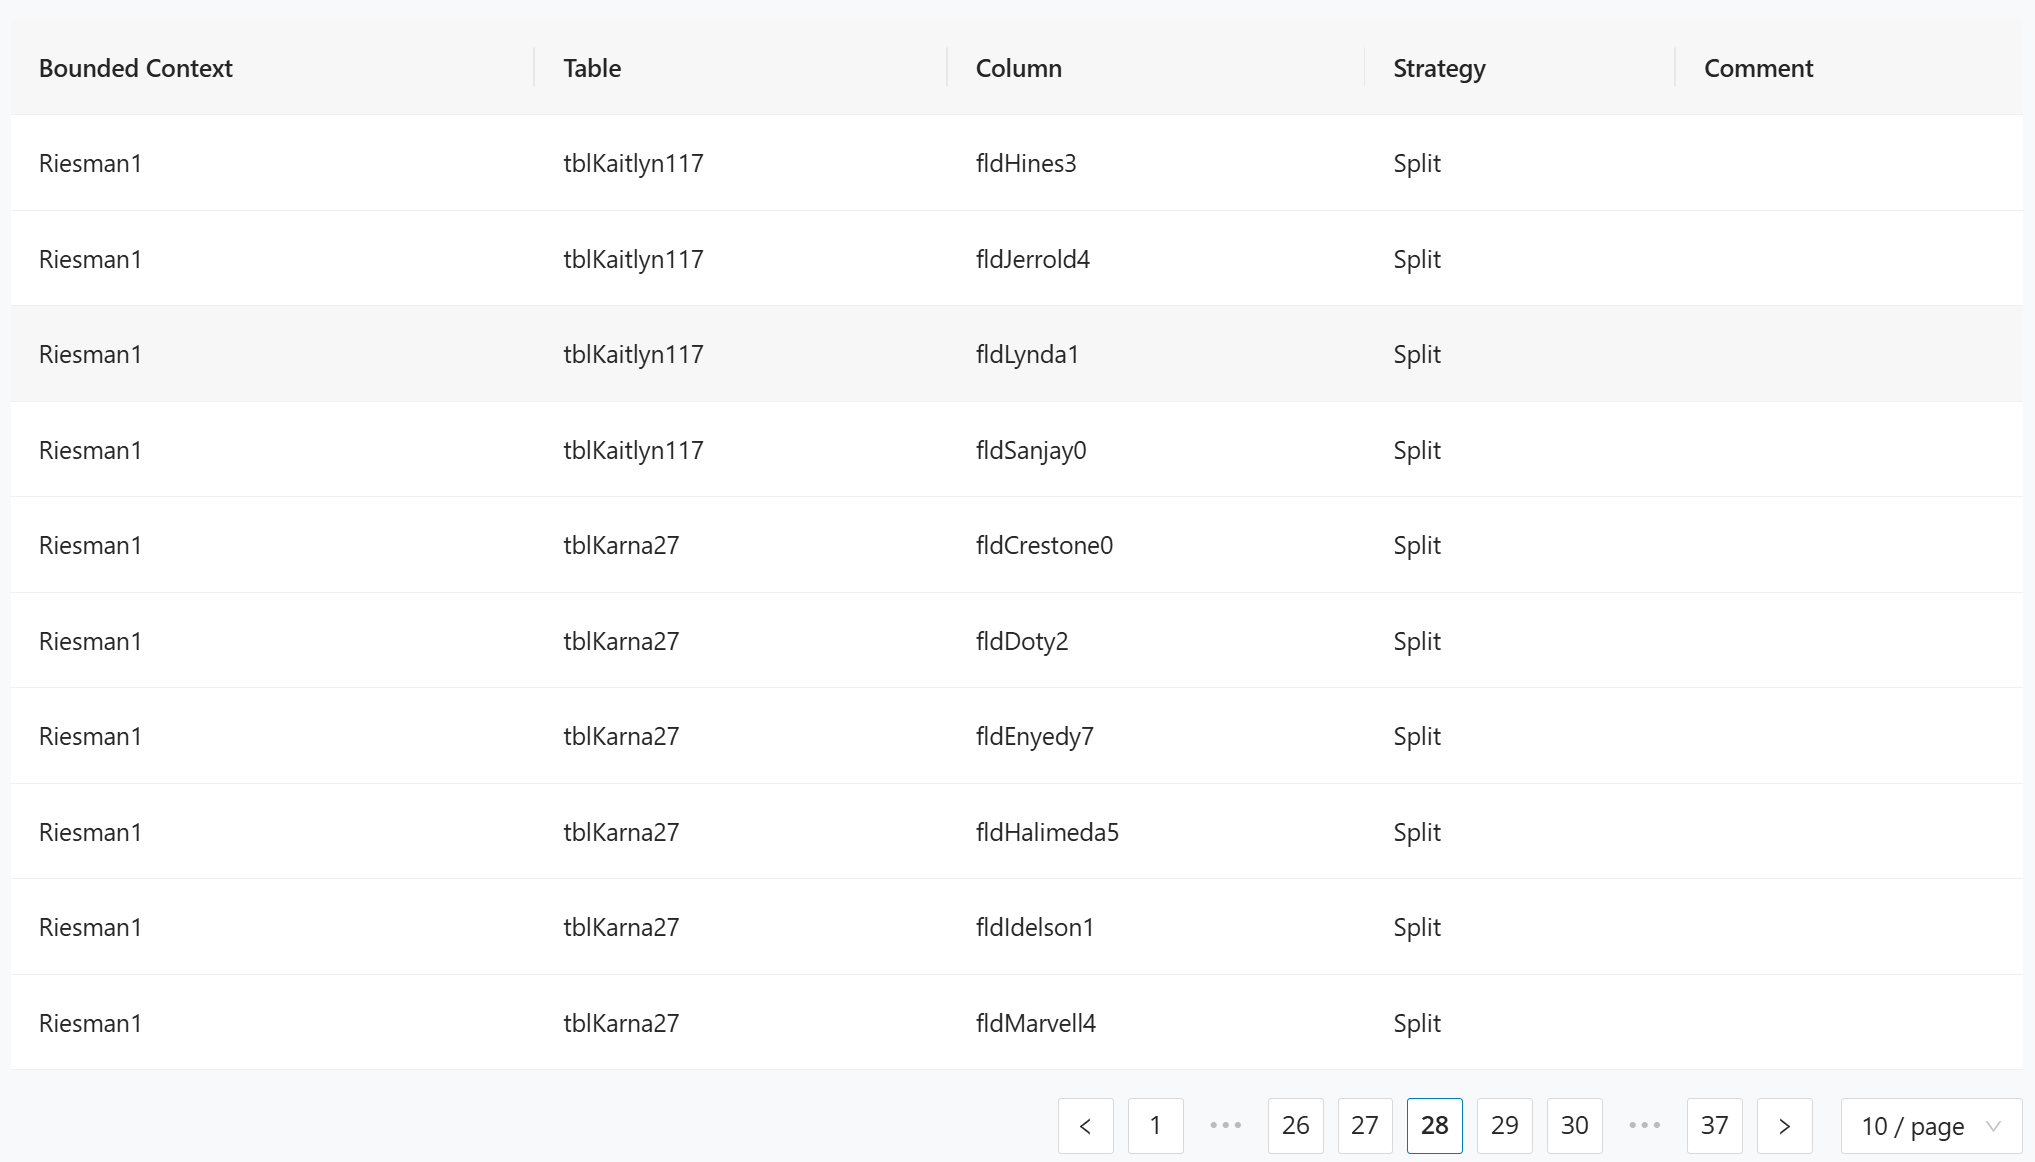
The tabular view of the Migration Report listing each migration entry at the column level. The table contains the following columns:
- Bounded Context identifies the bounded context to which the column is assigned.
- Table identifies the source table containing the column.
- Column identifies the specific column being migrated.
- Strategy identifies the migration strategy assigned to the column (for example, Split or Migrate).
- Comment provides optional notes for the entry.
Assess Export
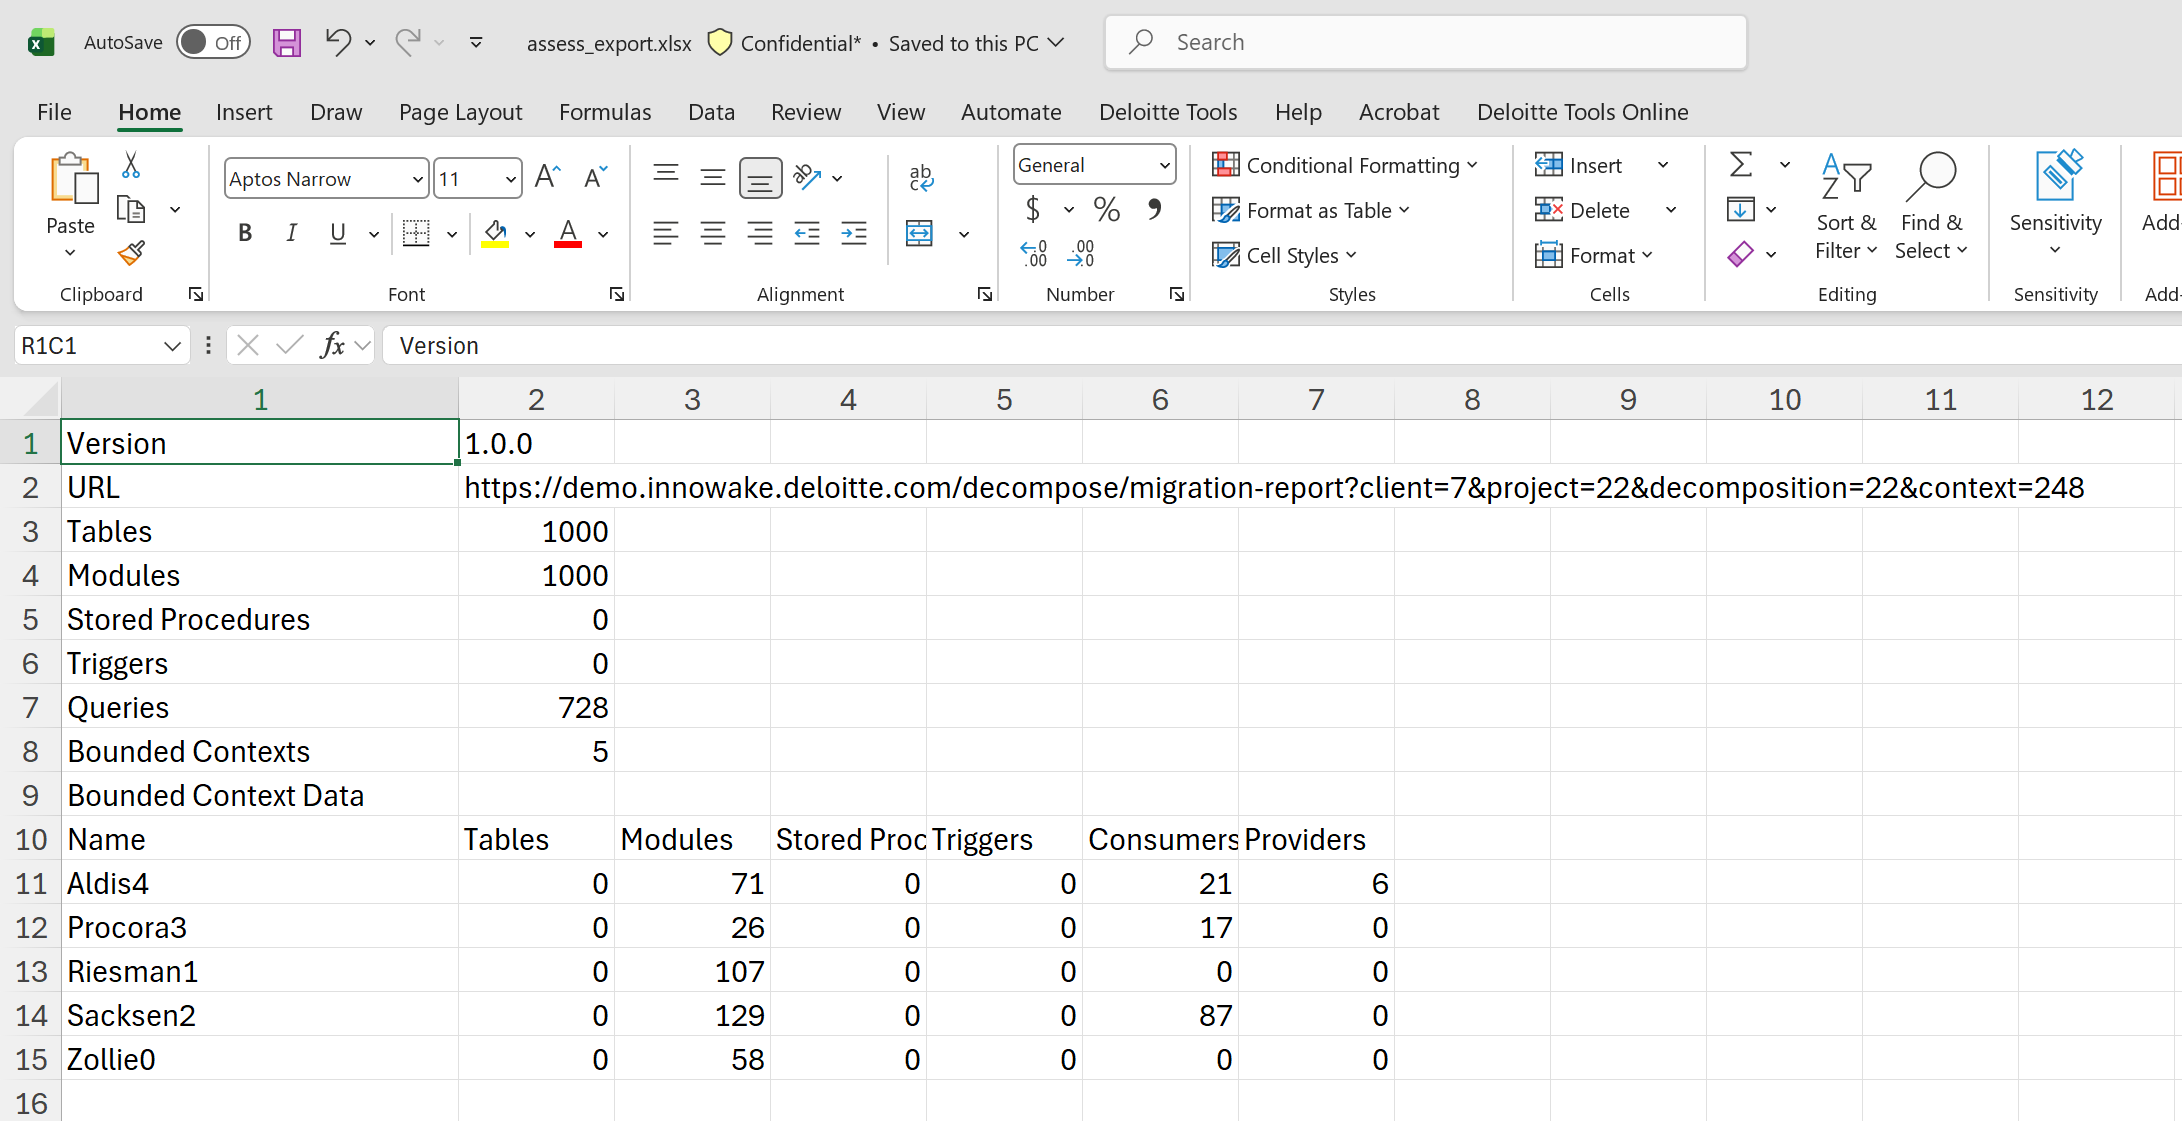
Decompose lets you export the database to import it into Assess. The general workflow is to first import the database schema and then the CSV file with the bounded contexts, modules, and queries.
Then navigate to Reports -> Migration and click Assess Export . This downloads an Excel file containing an overview of the database.
Here's an example of an exported xlsx file:
Database Cut
The Database Cut report lists all columns assigned across bounded contexts at the column level. All columns are sortable and can be filtered to narrow down results. The table contains the following columns:
- Bounded Context identifies the bounded context to which the column is assigned.
- Database identifies the source database.
- Schema identifies the database schema.
- Table identifies the source table containing the column.
- Column identifies the specific column included in the cut.
- Strategy identifies the migration strategy assigned to the column (for example, Migrate or Split).
- Reads indicates whether the column is read by the bounded context.
- Writes indicates whether the column is written by the bounded context.
- Comment provides optional notes for the entry.
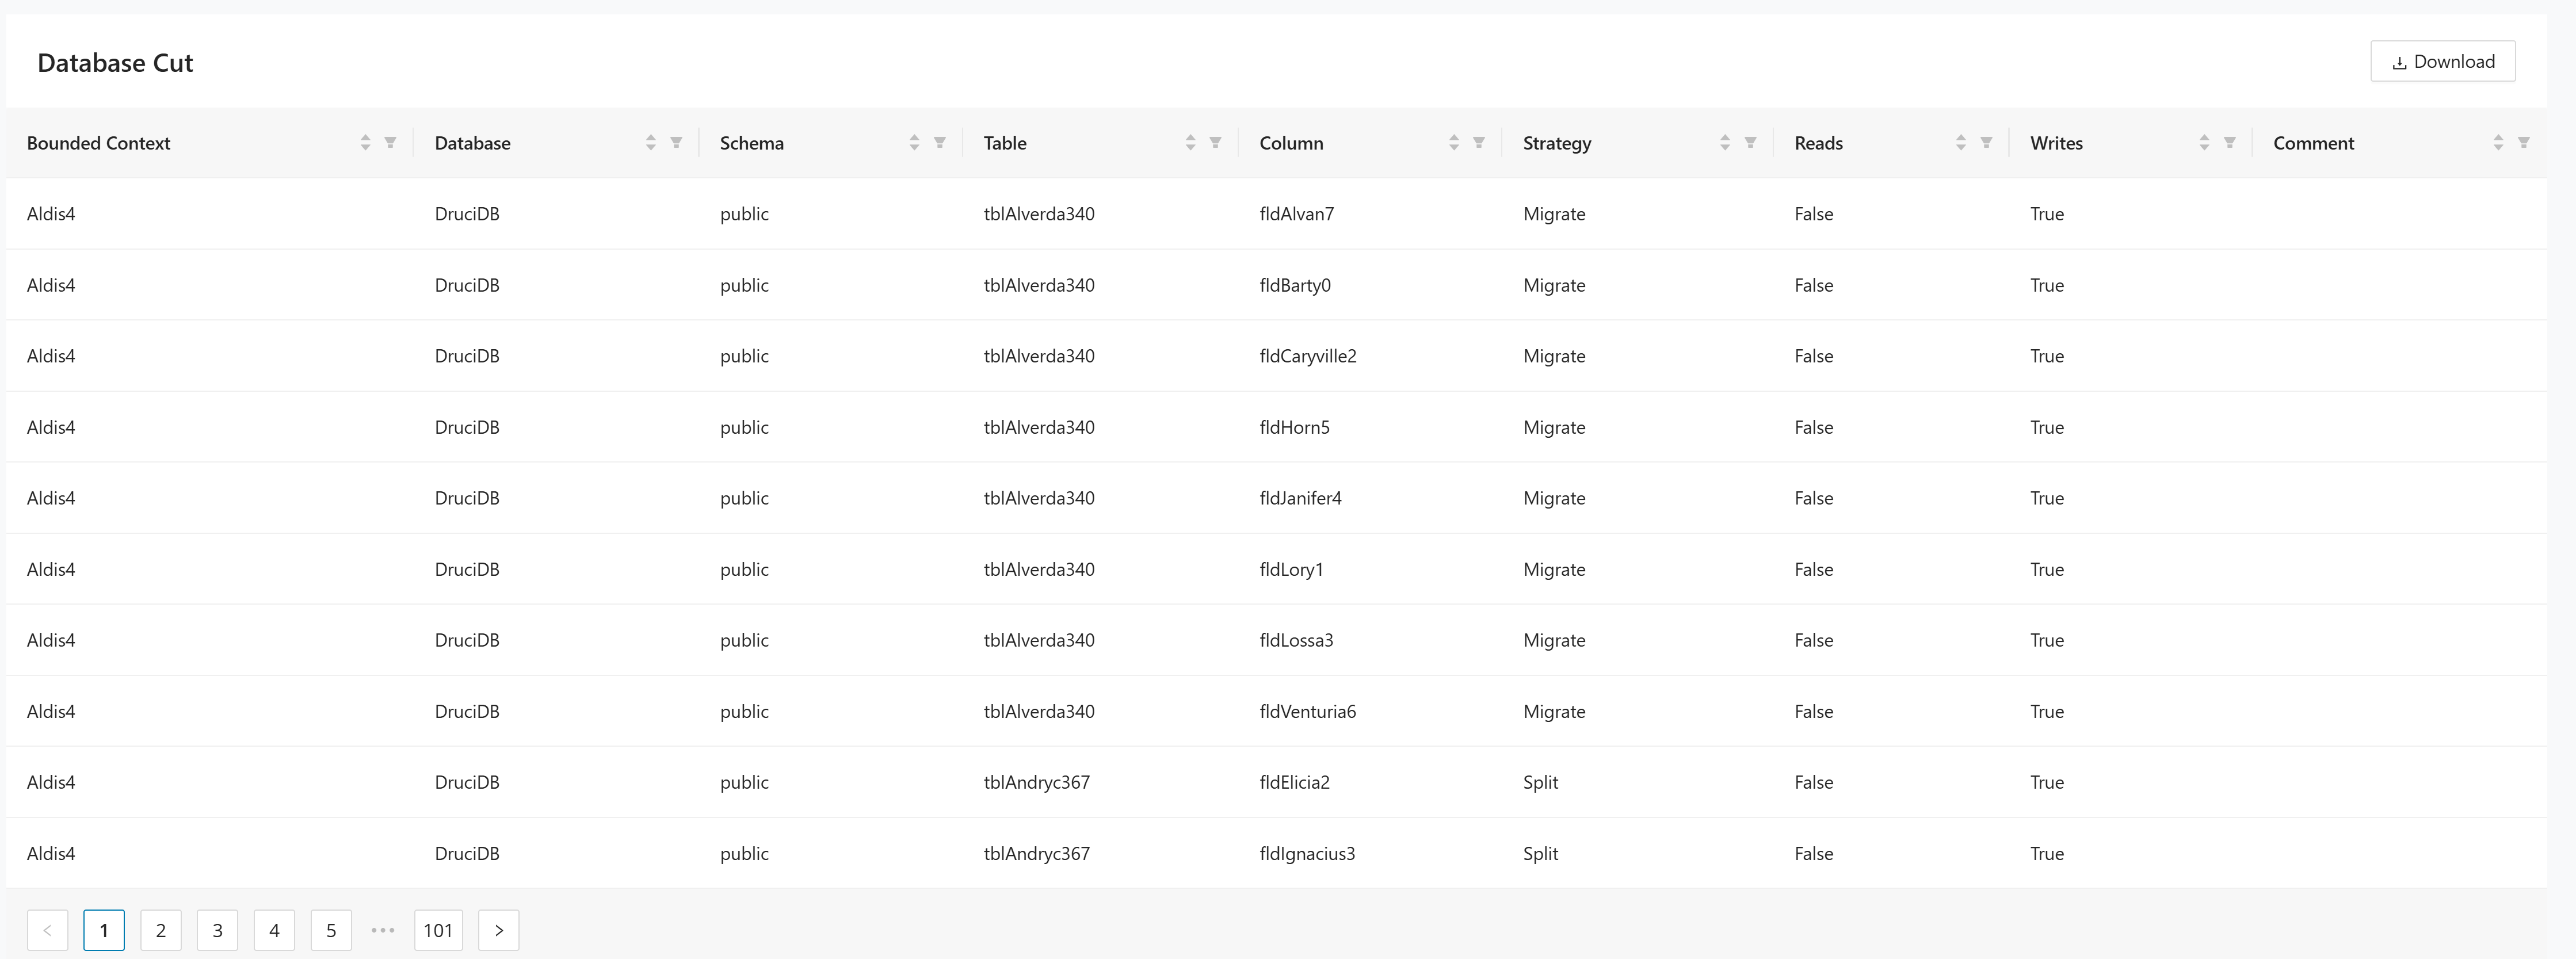
Click Download to export the current table view as a CSV file for use in external tools or further analysis.
Modernization Report
The Modernization Report is populated with the tables and columns defined in the Entities Designer. It provides a side-by-side comparison of the modernized database structure against the legacy database at the column level, showing how each column maps from the legacy system to the new microservice database. All columns are sortable and can be filtered. Click Download to export the report as a CSV file.
The table contains the following columns:
- Bounded Context identifies the bounded context to which the column belongs.
- Database identifies the target database for the modernized structure.
- Table identifies the modernized table name.
- Column identifies the modernized column name.
- Column Type identifies the data type of the modernized column.
- Legacy Table identifies the corresponding table in the legacy database.
- Legacy Column identifies the corresponding column in the legacy database.
- Legacy Column Type identifies the data type of the legacy column.
- Strategy identifies the migration strategy assigned to the column (for example, Migrate or Split).
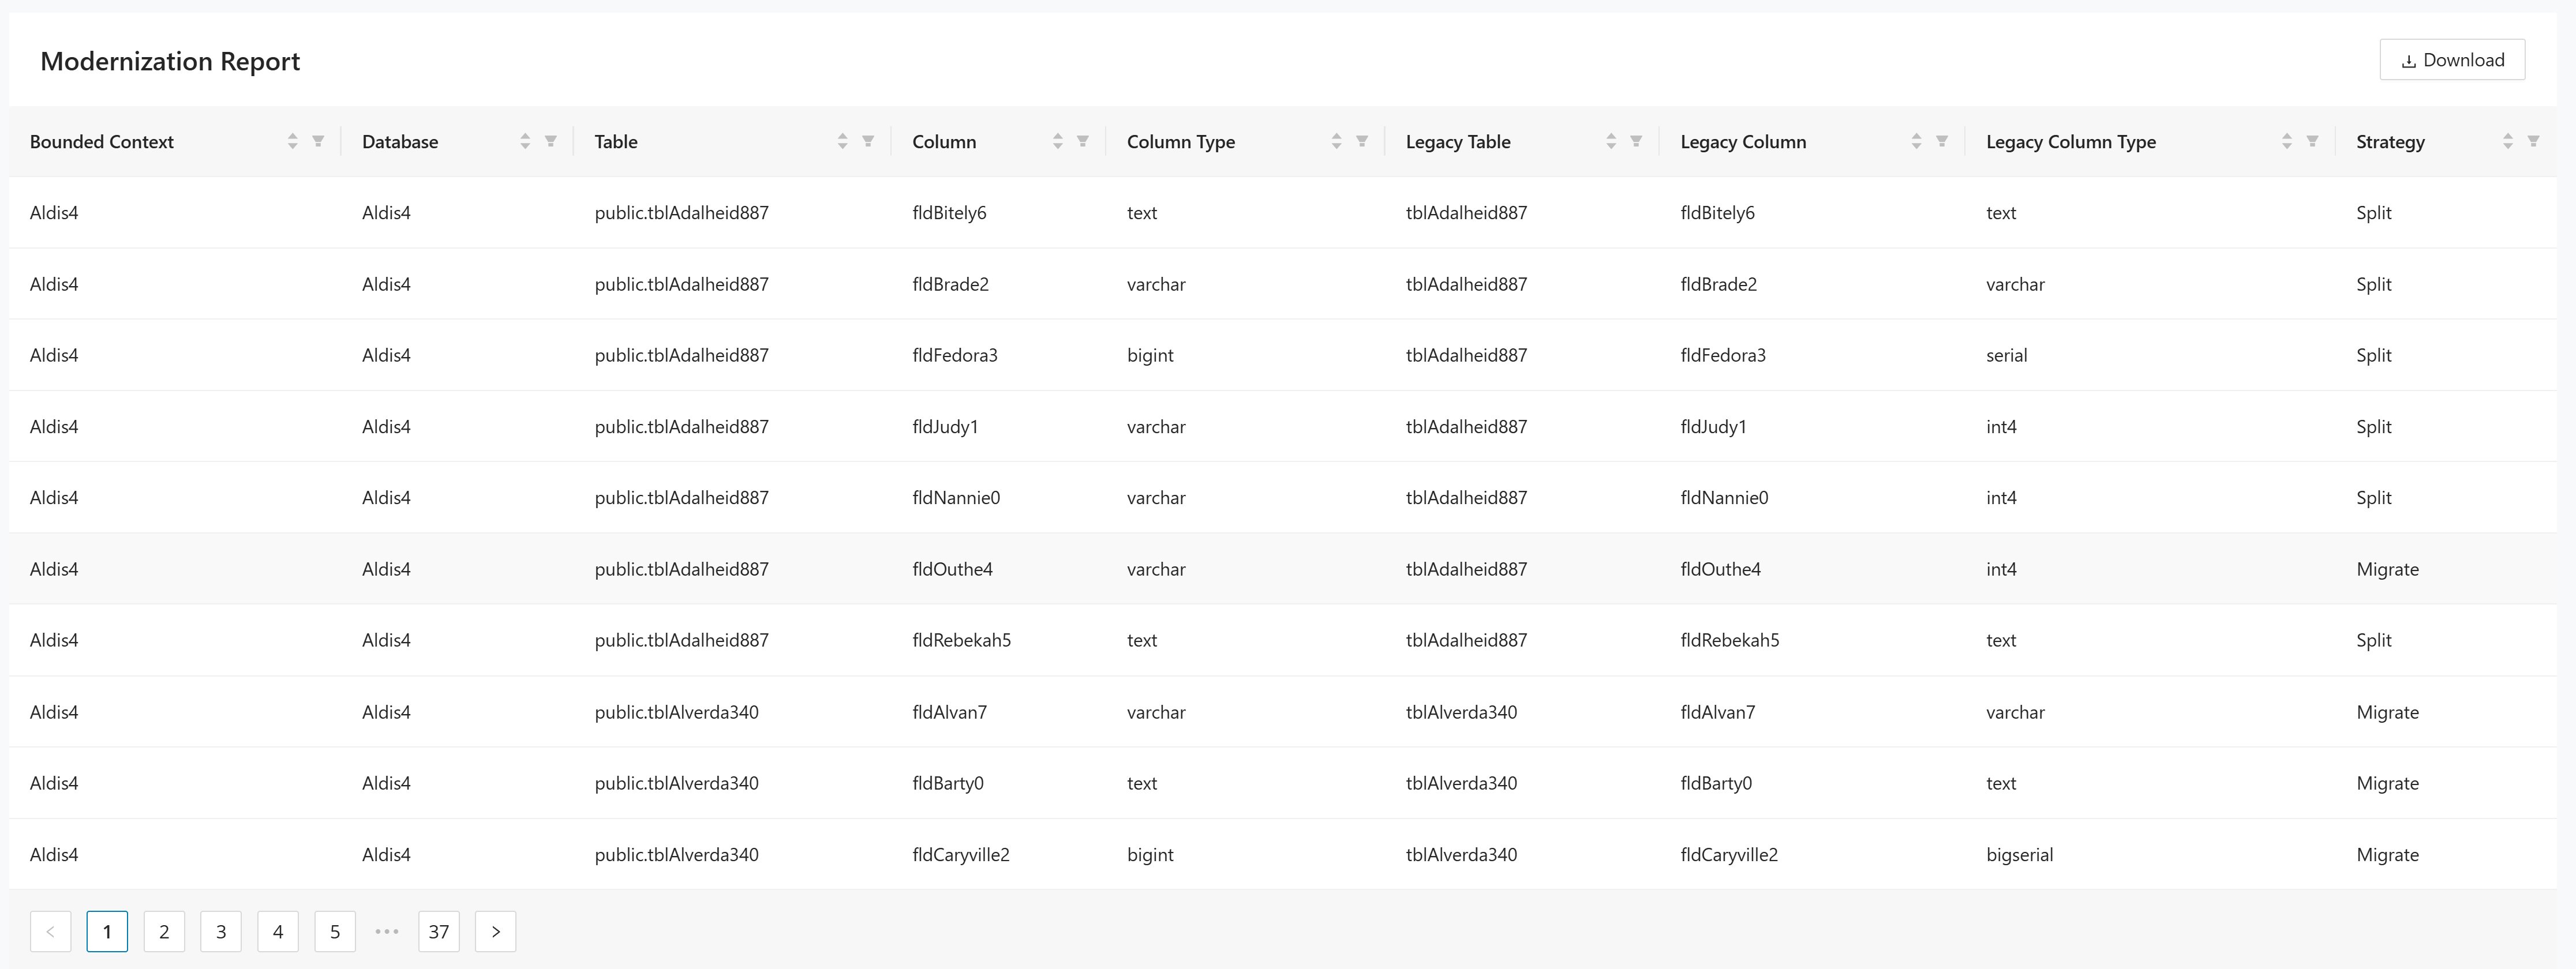
Click Download to export the current table view as a CSV file for use in external tools or further analysis.
Modernized Triggers report
The Modernized Triggers report lists trigger definitions that are associated with the modernized database design across the current project. Use this report to review whether trigger logic has been carried forward into the target schema and to identify missing trigger definitions before implementation.
The table contains the following columns:
- Bounded Context identifies the bounded context that owns the modernized trigger.
- Database identifies the target database that contains the trigger.
- Schema identifies the database schema.
- Table identifies the source or legacy table related to the trigger.
- Modernized Table identifies the target table in the modernized design.
- Trigger Name identifies the trigger.
- Trigger Event identifies the database event that fires the trigger.
- Event Timing identifies when the trigger executes, for example, before or after the event.
- Statement shows the trigger statement or expression.
To populate the Modernized Triggers report
Make sure that the project contains imported legacy trigger metadata together with a saved modernized database design. In practice, this usually means the following:
To populate the Modernized Triggers report,
1. Import the legacy schema in Imports > Schema Upload. Trigger metadata comes from the schema import, and there is no separate trigger-import page.
2. Import the related modules and queries in Imports > Modules and Queries. Decompose imports trigger activity together with the module/query data used for analysis.
3. Assign the affected legacy tables and columns to bounded contexts in Cut by Module or Cut by Table.
4. In Entities Designer, create or update the target database design for the bounded context and save it. The report depends on the saved modernized database design.
5. Open DB Cutting > Reports > Modernized Triggers to verify the generated rows and export them if needed.
After these prerequisites are met, the report shows one row per trigger associated with the modernized design.
Example:
| Bounded Context | Database | Schema | Table | Modernized Table | Trigger Name | Trigger Event | Event Timing | Statement |
|---|---|---|---|---|---|---|---|---|
| Order Management | order_service_db | dbo | Orders | order_header | trg_orders_audit | UPDATE | AFTER | INSERT INTO order_audit (order_id, changed_at) VALUES (NEW.id, CURRENT_TIMESTAMP); |
If no trigger definitions are available for the current project, the report displays an empty state.
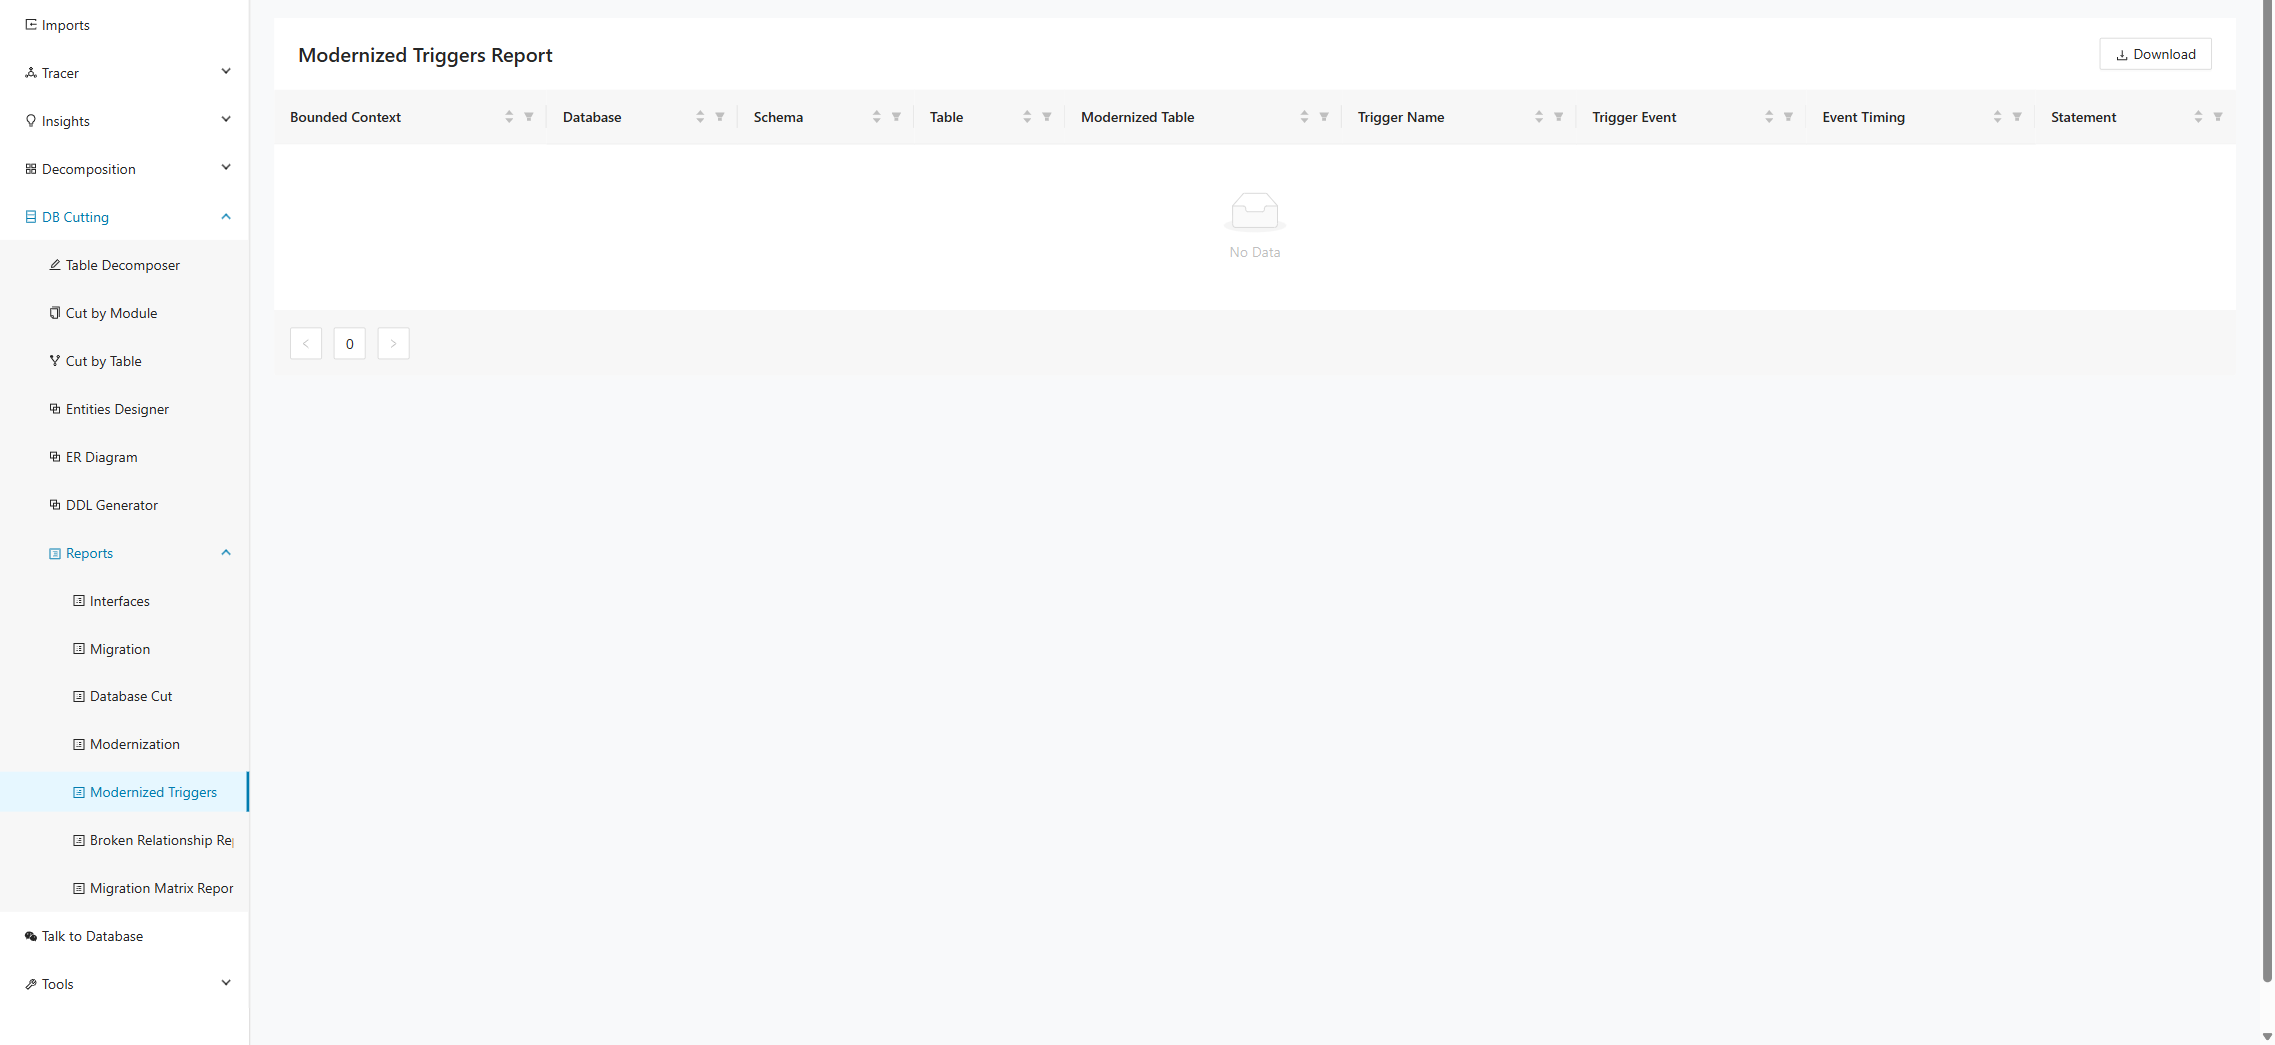
Click Download to export the current table view as a CSV file for use in external tools or further analysis.
Broken Relationship
The Broken Relationship report identifies foreign key relationships between tables that have been broken as a result of the database cut. This occurs when a table with a foreign key reference is assigned to a different bounded context than the table it references, creating a cross-context dependency that no longer holds a direct database relationship. The report helps users identify these inconsistencies so that the appropriate interface or integration strategy can be applied. All columns are sortable and can be filtered.
The table contains the following columns:
- Bounded Context 1 identifies the bounded context that owns the table containing the foreign key.
- Table 1 identifies the table that holds the foreign key reference.
- Foreign Column 1 identifies the foreign key column in Table 1.
- Bounded Context 2 identifies the bounded context that owns the referenced table.
- Table 2 identifies the table being referenced by the foreign key.
- Foreign Column 2 identifies the referenced column in Table 2.

Click Download to export the current table view as a CSV file for use in external tools or further analysis.
Migration Matrix report
The Migration Matrix report provides a side-by-side matrix of database columns and bounded contexts. Use this report to compare how the same source tables and columns are represented across multiple bounded contexts and to quickly spot overlaps or gaps in the database cut.
The table contains the following columns:
- Database identifies the source database.
- Schema identifies the source schema.
- Table identifies the source table.
- Column identifies the source column.
- Bounded Context columns display one column per bounded context so you can compare the same source column across all contexts in a single view.
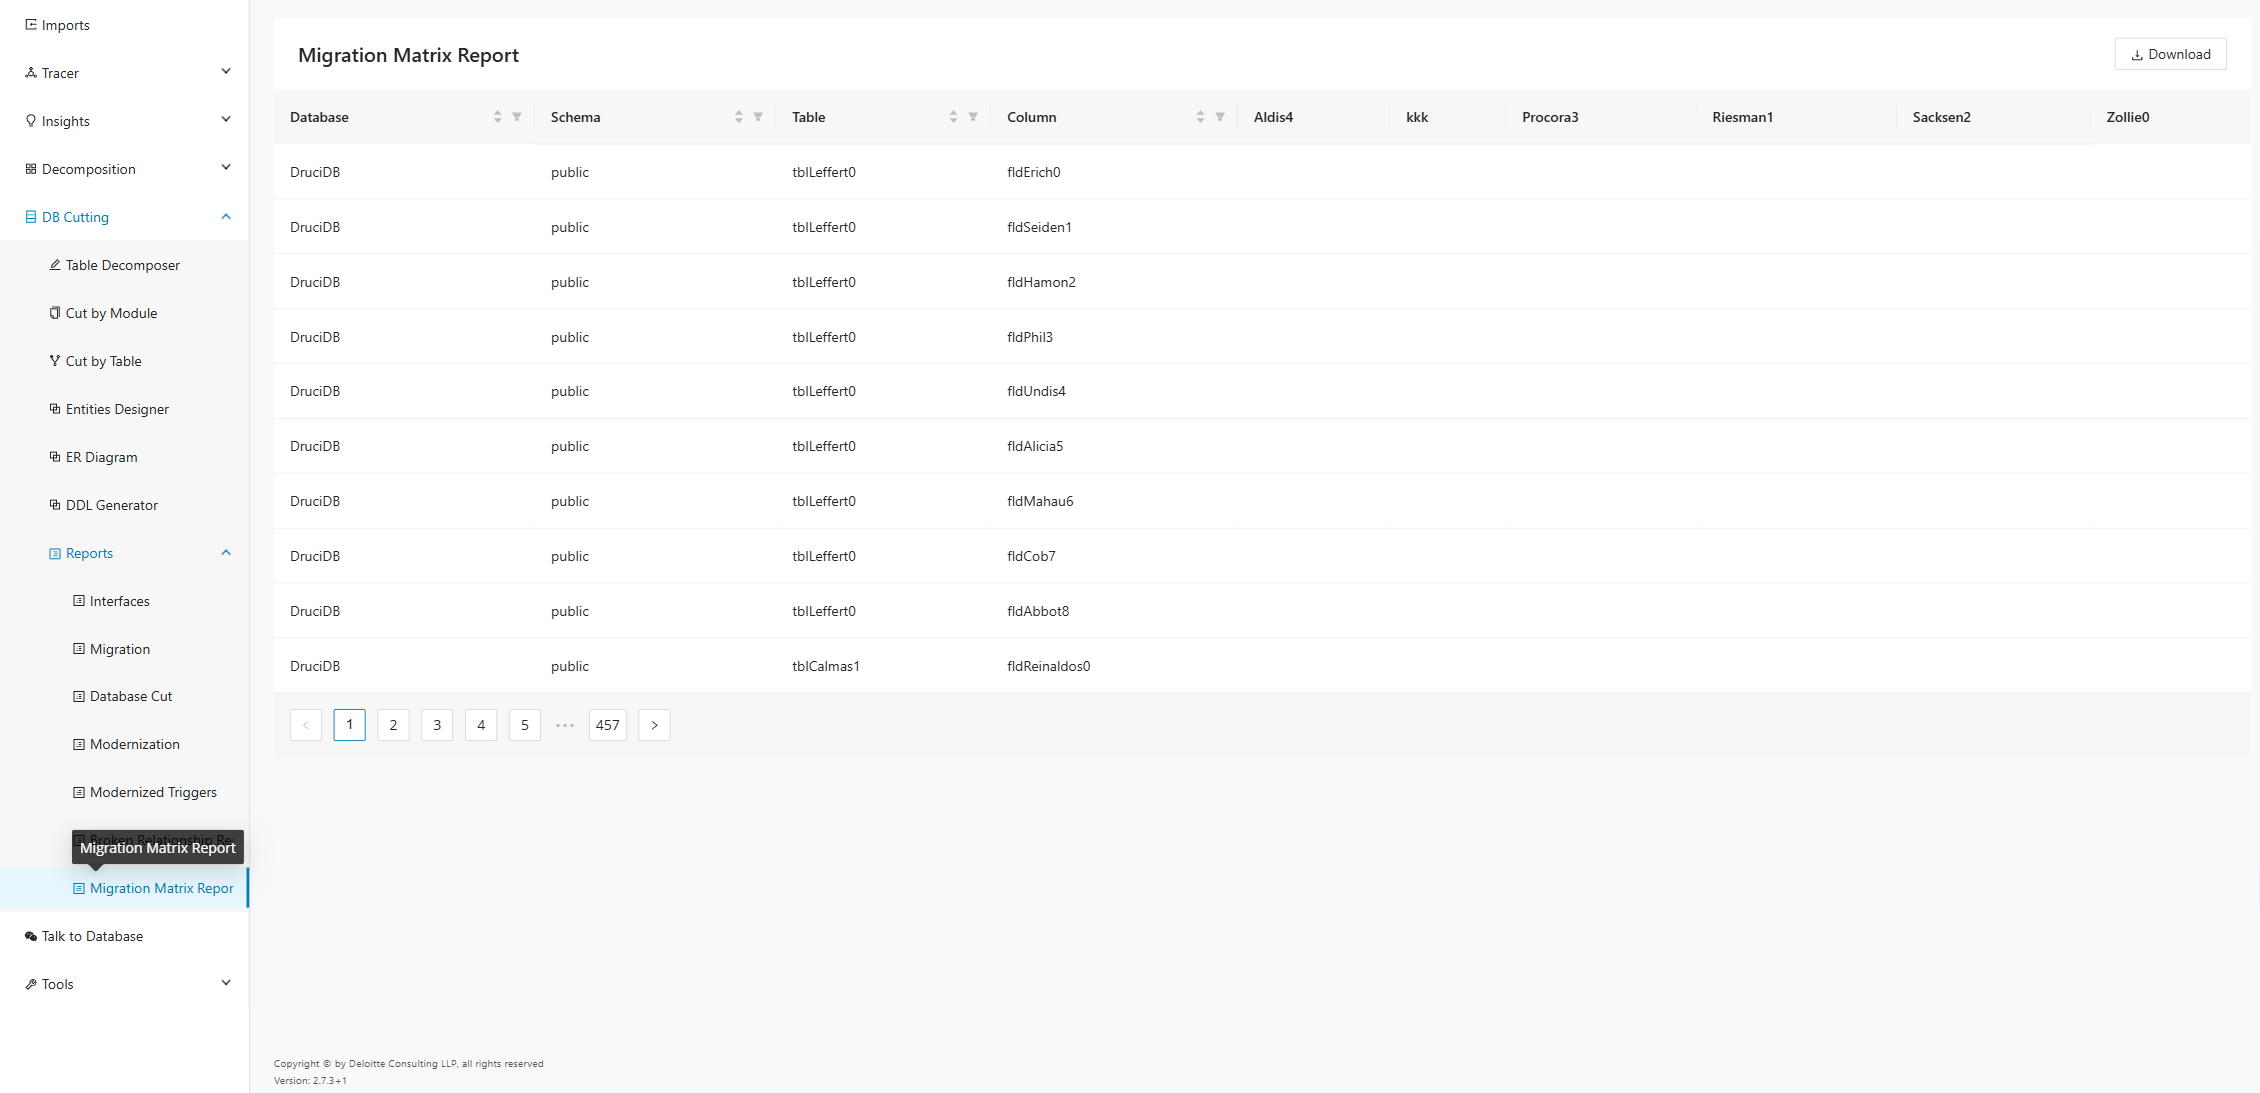
Click Download to export the current matrix for use in analysis, review sessions, or downstream tooling.