Configuration
The Configuration chapter guides you through the essential tools and settings available in the Code Discovery & Mining UI for customizing your project environment. Here, you’ll learn how to manage custom properties and imports to tailor the platform to your specific needs.
Custom properties
Each project has specific information that must be collected during mining, which could use the help of custom metadata. The following chapter describes each available custom property type and provides step-by-step instructions for managing custom properties.
Info
Custom properties are supported for Annotations, Data Dictionary, Modules, and Functional Blocks.
The following custom property types can be created:
-
Input String
-
String Repeater
-
Select Tag
-
URL
The following table lists examples of supported types, their UI representation, and corresponding example queries.
Type
Description
Input String
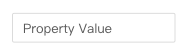
The Input String type is rendered in the UI as a simple text field, allowing input of a single-line text value.
String Repeater
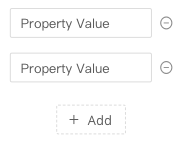
The String Repeater type is rendered in the UI as an expandable list of text fields, allowing input of a single-line text value in each field.
Select Tag
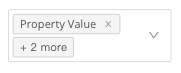
The Select Tag type is rendered in the UI as a drop-down field, allowing:
-
selection of previously configured default tags
-
selection of existing tags created by miners
-
creation of new tags
URL
The URL type is rendered in the UI as a simple text field, allowing input of the desired URL.
Users can add or select categories for custom properties to group them in the desired category instead of using the default "Custom Properties" category.
The custom properties are visible under the defined categories in the tree view of the customizable table in the selection column.
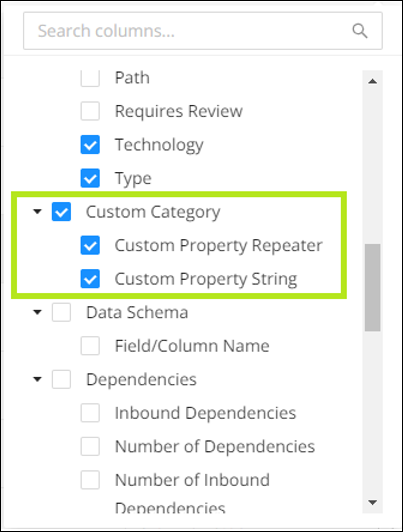
Adding custom properties
To add a custom property, navigate to the Configuration page and the desired entity tab in the Web UI.
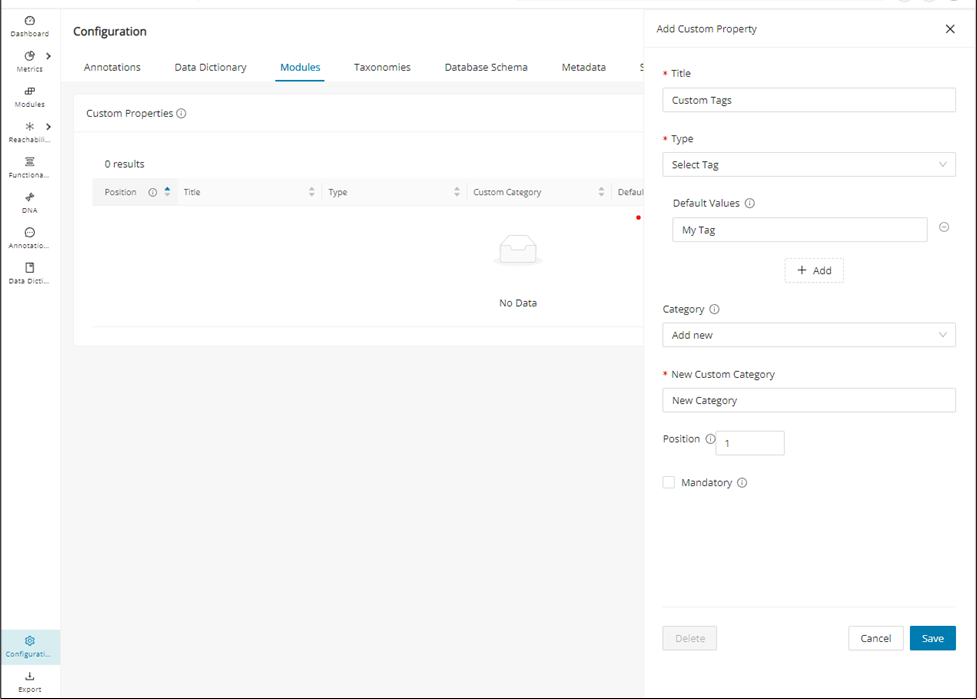
Step 1:
Click + Add in the top right corner of the custom properties table.
Step 2:
Select the title, type, category, and position of your desired property field.
If you select:
-
Select Tag as Type, add default values as needed
-
"other" as Category, add "New Custom Category"
Step 3:
Click Save to persist your changes. Your custom property will now be listed in the overview table.
Editing custom properties
Similar to property creation, custom properties can be edited in the Web UI's Configuration page.
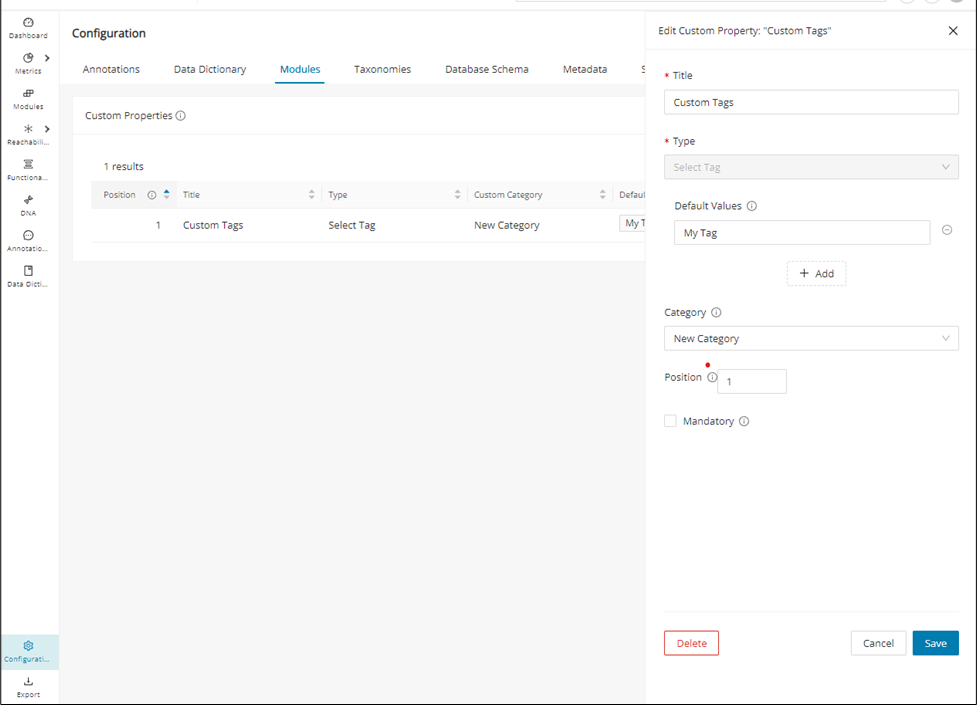
Step 1:
Click the edit icon on the right side of the custom properties table.
Step 2:
Edit the title, category, position, and default values of your property field as desired.
If you select "other" as Category, add “New Custom Category”.
Info
Note that the type of a property cannot be modified.
Step 3:
Click Save to persist your changes. Your changes are now reflected in the overview table.
Deleting custom properties
Similar to property editing, custom properties can be deleted in the Web UI's Configuration page.
Step 1:
Click the edit icon on the right side of the custom properties table.
Step 2:
Click Delete in the bottom left corner of the edit dialog, and confirm the deletion when prompted.
Searching & filtering custom properties
Once Custom Properties are configured and populated for the different supported Mining features, such as Annotations, Data Dictionary, Functional Blocks, and Modules, they can be searched and filtered just like other built-in metadata associated with those features.
Step 1
From the Annotations, Modules, or Data Dictionary tables, click the settings icon on the right next to the CSV link.
Step 2
In the settings menu, scroll down to the Custom Properties section and select your custom property(s) of interest.
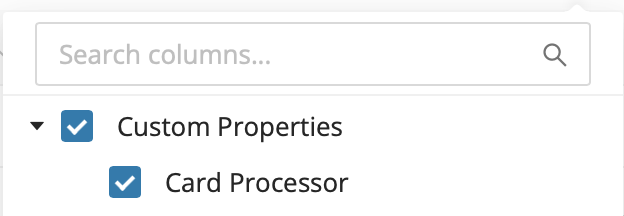
Step 3
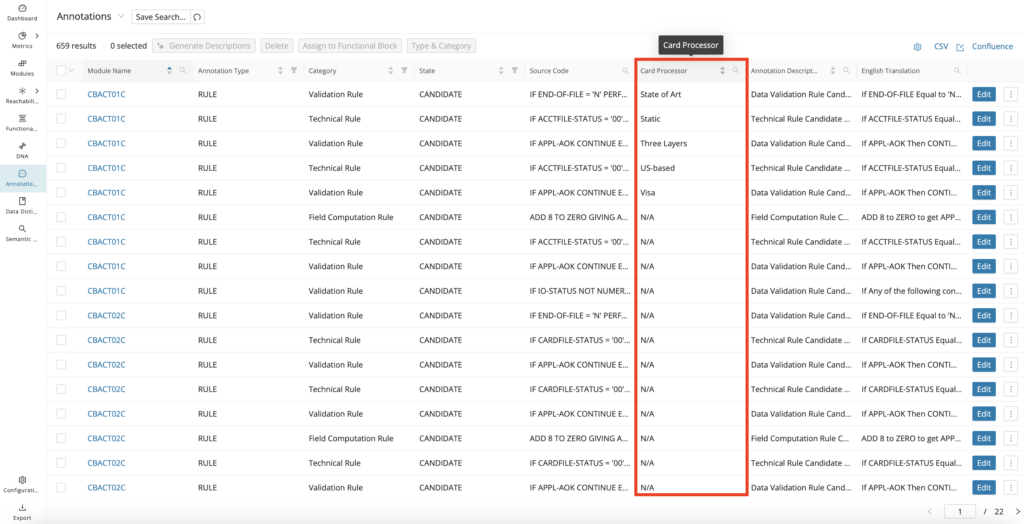
Once your custom properties are added to the customizable table, you can sort, search, or filter them (depending on the type of custom property) to find annotations, data dictionary entries, or modules that contain certain custom property values. Below is an example from the Annotations Reporting page:
Info
Custom Properties, once added to the customizable tables, can be exported into CSV or Confluence markup same as other built-in metadata.
Annotation configuration
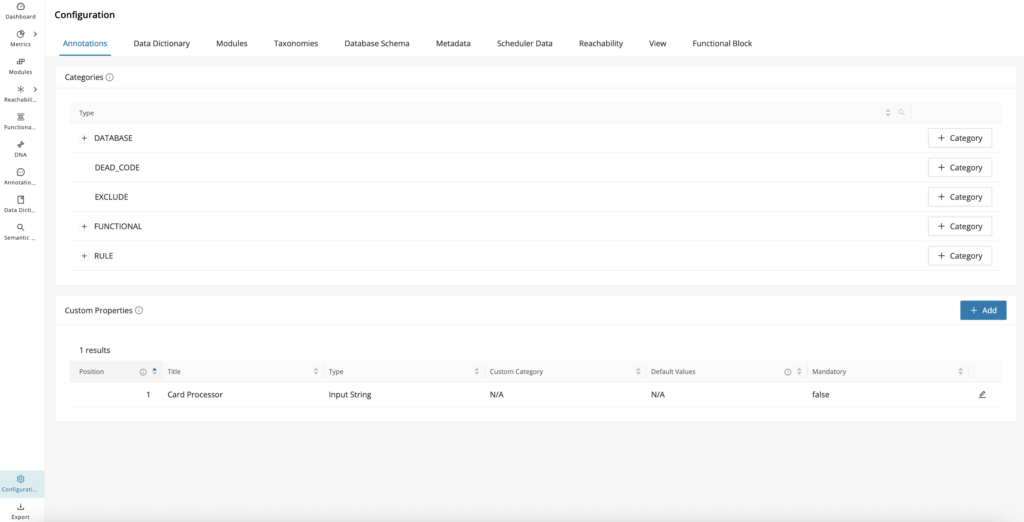
The Configuration page's Annotations tab allows users to create, edit, and delete annotation categories for each of the available annotation types (see Annotations).
To add a category, click + Category , enter a category name, and confirm via the tick icon next to the input field.
To edit, click the category name you would like to change to enable the input field.
To delete, select the
delete icon to the right of the category name and confirm your selection.
Configuration
Only custom categories can be edited and deleted. System default categories are not editable.
The Annotations tab also lists all available custom properties scoped to annotations, including their titles, types, default values, and the position in which they are displayed in the Annotation editor.
For information on creating, editing, and deleting custom properties, see "Custom Properties" below.
Data Dictionary configuration
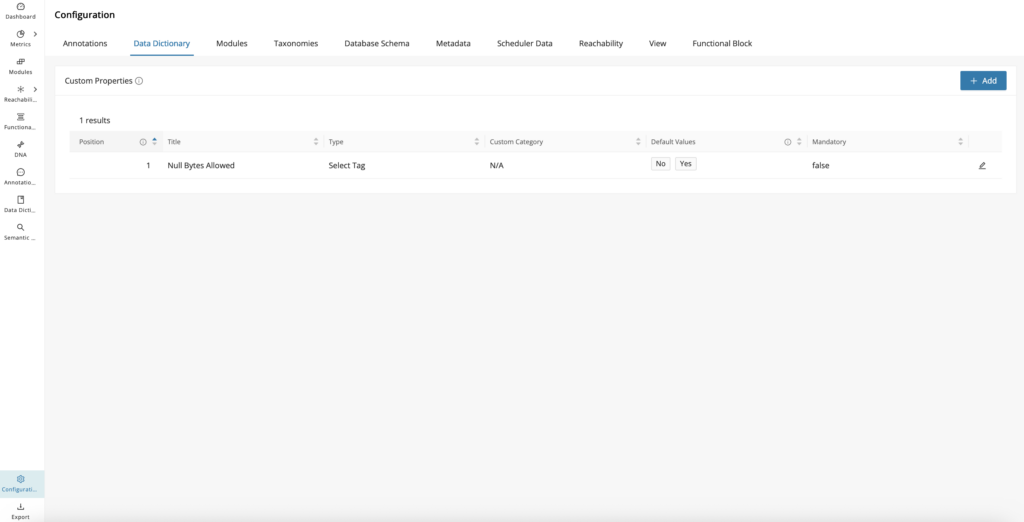
The Configuration page's Data Dictionary tab lists all available custom properties scoped to the Data Dictionary, including their titles, types, default values, and the position in which they are displayed in the Data Dictionary tables and Data Dictionary editor.
For information on creating, editing, and deleting custom properties, see Custom Properties.
Modules configuration
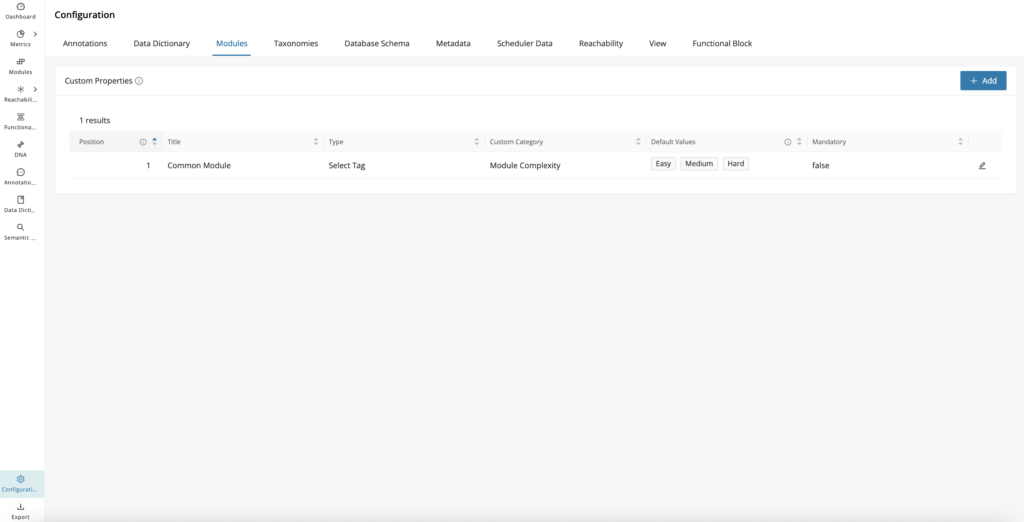
The Configuration page's Modules tab lists all available custom properties scoped to Modules, including their titles, types, default values, and the position in which they are displayed in the Modules Reporting page and on the Module Details page (Custom properties Card).
For information on creating, editing, and deleting custom properties, see Custom Properties.
Functional Block configuration
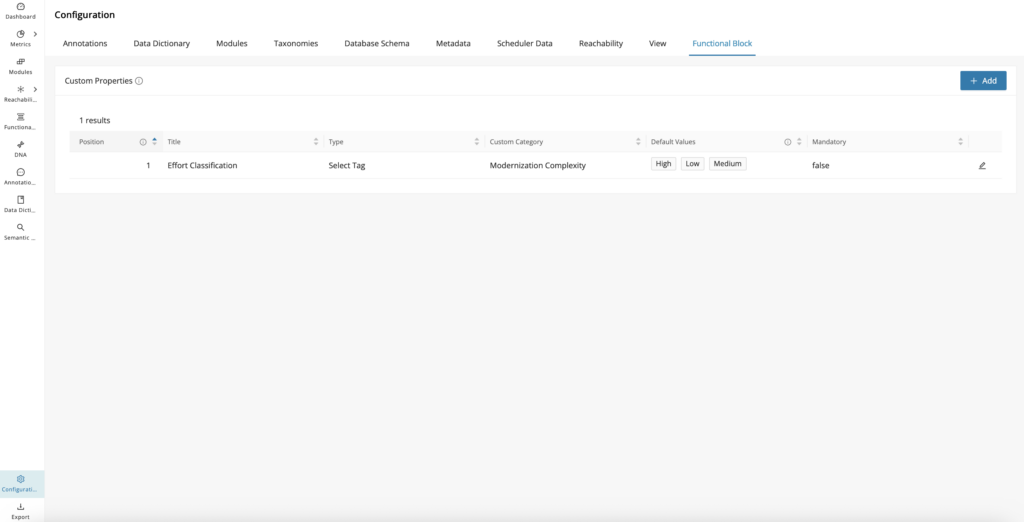
The Configuration page's Functional Block tab lists all available custom properties scoped to Functional Blocks, including their titles, types, default values, and the position in which they are displayed in the Functional Block Creation and Editing Modals.
For information on creating, editing, and deleting custom properties, see Custom Properties.
Taxonomies configuration
The Configuration page's Taxonomies tab is the main workspace for maintaining taxonomy structures in a project. It lets you review taxonomy categories, understand assignment counts, and prepare new terms before using them in analysis. The details below explain how the page reports counts and supports direct updates.
Info
This page also provides the Taxonomy Batch Import feature.
The Configuration page's Taxonomies tab lists all available taxonomies and groups them by their categories (Technical and Business Taxonomies). For each category, the number of unique modules assigned to each taxonomy is displayed.
The number of assigned modules on the right side of the Taxonomy table reflects the number of uniquely assigned modules. In the example screenshot below:
-
Categories: "Business Taxonomies" and "Technical Taxonomies"
The number reflects the number of modules with at least one business/technical taxonomy, not the number of all assigned taxonomies of each category. -
Taxonomies: "DB Access", "File Access", and "Program Type":
The number reflects the amount of modules with at least one of the taxonomy values assigned, not the sum of all values of that taxonomy, because one module can have multiple assigned taxonomy values. -
Taxonomy Terms: "Read" and "Write":
The number reflects the number of modules with the assigned term.
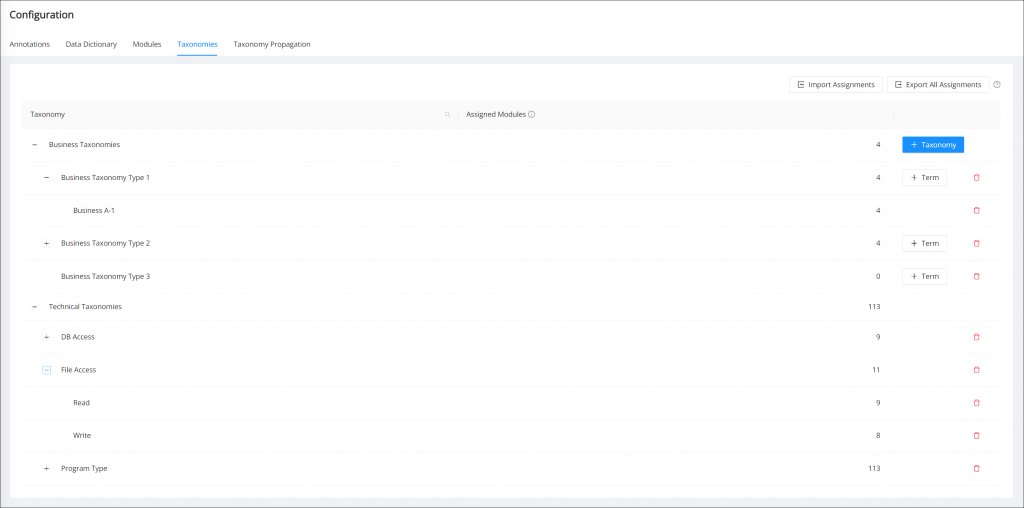
The Taxonomy column is searchable by selecting the search icon in the column header.
To add a new taxonomy to a taxonomy category, click + Taxonomy.
To add a new term to a taxonomy, click + Term.
To delete a taxonomy or term, click the delete icon for the respective row.
Info
Taxonomies and terms can be created in bulk by inserting multiple values separated by commas. In case the desired value contains a comma itself, it needs to be surrounded by double quotes.
Taxonomy batch import
Mining offers a batch import feature accompanied by a CSV template to speed up taxonomy assignments.
To get started, navigate to Configuration > Taxonomies in the Web UI and download the CSV template for your project via the Export All Assignments.
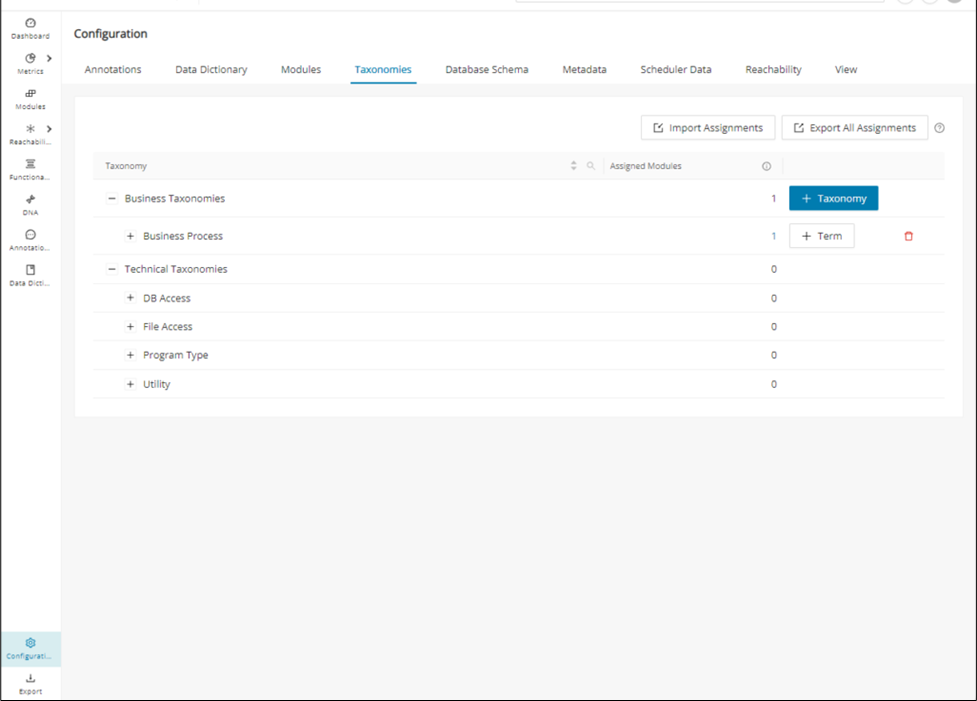
The template contains four columns used to identify a module, followed by any number of columns used to assign taxonomies. The first four columns are mandatory, and their headers must be named as follows:
| Column 1 | Column 2 | Column 3 | Column 4 |
|---|---|---|---|
| Module Name | Module Path | Technology | Type |
The remaining columns contain taxonomies (one per column) that are to be assigned to the modules.
The recommended starting point is the Export Assignments feature. Use it to download a list of the existing modules and taxonomy assignments. You can add, remove, and edit taxonomy columns in the exported template as needed.
Warning
When working with the exported CSV template, you must not modify or remove the first four columns ("Module Name", "Module Path", "Technology", "Type") to ensure that all modules can be located during the batch import. The import feature will notify you in case a module cannot be located properly.
The taxonomy import feature will only modify modules that are listed in the imported file and leave all other modules of your project untouched. This means you can remove rows, edit all or a subset of rows, or split the downloaded template into multiple parts.
This allows you to only modify the taxonomies for a part of your project, or to split the work of taxonomy assignment into smaller, independent work packages.
The following example explains how to assign Taxonomies using the template:
Our example project has 3 COBOL modules and no existing Taxonomy assignments. Downloading the taxonomy assignment using the "Export Assignments" results in a CSV file with the following content:
The file lists the modules that currently exist in the project and provides information on how to identify them. Do not alter this information.
We recommend using a CSV editor (for example, Microsoft Excel) to assign taxonomies for ease of editing in a tabular layout:
| Module Name | Module Path | Technology | Type |
|---|---|---|---|
| FIRST | src/cobol/programs/FIRST.cbl | COBOL | PROGRAM |
| SECOND | src/cobol/programs/SECOND.cbl | COBOL | PROGRAM |
| THIRD | src/cobol/programs/THIRD.cbl | COBOL | PROGRAM |
Warning
When using Excel or other CSV editors, it is imperative to ensure that one of the supported list separators is used. The taxonomy import feature requires fields in the CSV file to be separated by either comma ,, semicolon ; or tab characters. The chosen delimiter is typically auto-detected during the import step.
You can now assign taxonomies to the modules by adding new columns. For example, add a "Category" taxonomy and assign a taxonomy value to each program:
| Module Name | Module Path | Technology | Type | Category |
|---|---|---|---|---|
| FIRST | src/cobol/programs/FIRST.cbl | COBOL | PROGRAM | Security |
| SECOND | src/cobol/programs/SECOND.cbl | COBOL | PROGRAM | Utility |
| THIRD | src/cobol/programs/THIRD.cbl | COBOL | PROGRAM | Database |
When importing this file, the import will create the new "Category" Taxonomy and assign the category "Security" to the program "FIRST", the category "Utility" to the program "SECOND", and the category "Database" to the program "THIRD".
Info
Note that there are reserved Taxonomy names used by the Identify Technical Taxonomies feature, for example, File Access and Program Type. You can use and extend these Taxonomies by adding them as columns to the CSV template. When both the Identify Technical Taxonomies and Batch Import features are used, the Taxonomy assignments will be merged.
You can create more taxonomies by adding more columns. To assign multiple values for the same taxonomy to the same program, list all the values in one cell and separate the values with a comma:
| Module Name | Module Path | Technology | Type | Category | File Access |
|---|---|---|---|---|---|
| FIRST | src/cobol/programs/FIRST.cbl | COBOL | PROGRAM | Security | Read |
| SECOND | src/cobol/programs/SECOND.cbl | COBOL | PROGRAM | Utility | |
| THIRD | src/cobol/programs/THIRD.cbl | COBOL | PROGRAM | Database | Read, Write |
Here, we added another taxonomy, "File Access".
Note that the "File Access" column for the "SECOND" program is empty - the "File Access" taxonomy will not be assigned to this program.
On import, the "THIRD" program will be assigned both the "Read" and "Write" values for the "File Access" taxonomy.
To import the edited CSV file and apply the new Taxonomy assignments, use the Import Assignments on the Taxonomy overview page of the Web UI.
Info
Note that the import feature will verify the format of your CSV file and display a warning or error if the file is not compliant with the import requirements (for example, incorrect delimiters or missing columns).
Database schema configuration
Info
Uploading the SQL DDL scripts as part of your codebase project via Code Discovery will also accomplish the same goals as a DB Schema import when access to the legacy Database is not available. This includes SQL artifact module creations and Data Dictionary entry creation.
The Database Schema tab provides the capability to import database schemas to support the analysis of table structures in mining.
The imported schema information is combined with the project's discovery results to analyze and visualize inter-module data flow, variable to table mappings, and data-centric relationships and dependencies. Not only are the associated schema modules created, becoming the root module for any associated SQL tables, views, triggers, or stored procedures, but the SQL column/field information is automatically stored in the Data Dictionary.

Step 1:
A schema file in JSON format is required, which can be generated using the DB Crawler library.
Click DB Crawler to open a panel with instructions and a download option.
Step 2:
Click Download DB Crawler .
Follow the instructions to connect to your database and generate the database schema in JSON format.
Step 3:
Click Import Schema and select the JSON file.
The name of the uploaded file is now visible, followed by a table with available schema(s) that can be imported.
Step 4:
Select schemas relevant to your project from the table, then click Import selected below the table.
A success message is displayed, and the selected schemas are now shown in the Schemas in Project table
Info
A new JSON-formatted database schema file can be uploaded into Mining, which replaces previously uploaded schemas.
Step 5:
Each schema is represented by a module of language SQL and type SCHEMA.
Select one of the imported schemas by clicking the schema name to open the module details view.
This view's Contained Modules panel provides a list of objects defined in the schema.
Step 6:
Schema objects are represented by modules of language SQL and one of the following types:
SCHEMA, STORED PROCEDURE, TABLE, TRIGGER or VIEW.
Select one of the objects in the Contained Modules panel to open this object's module details view.
For example, if the selected module is of type TABLE, the tab Table Columns becomes available, displaying the respective information extracted from the database schema.
Metadata configuration
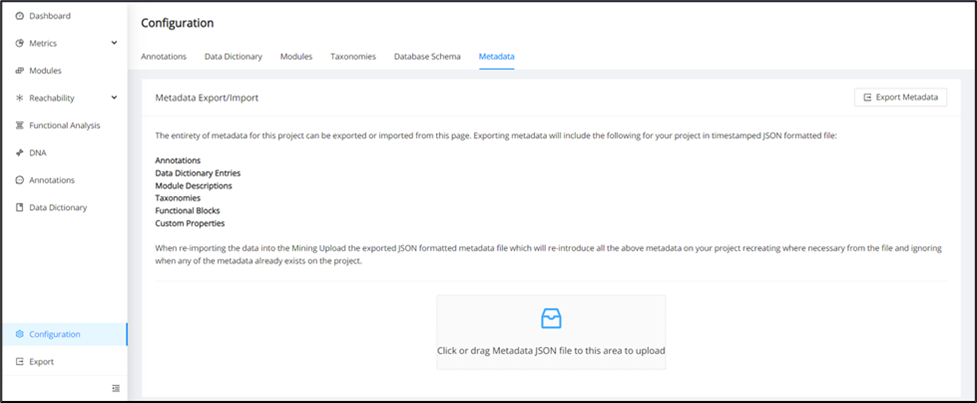
The Mining platform is a repository for knowledge about an application and its code base. The metadata tab enables you to import and export metadata. Export of metadata includes annotations, data dictionary entries, module descriptions, taxonomies, functional blocks, and custom properties in a JSON-formatted file with a timestamp.
To export the metadata, click Export metadata . To import it, click Click or drag the metadata JSON file to upload to this area .
Scheduler data configuration
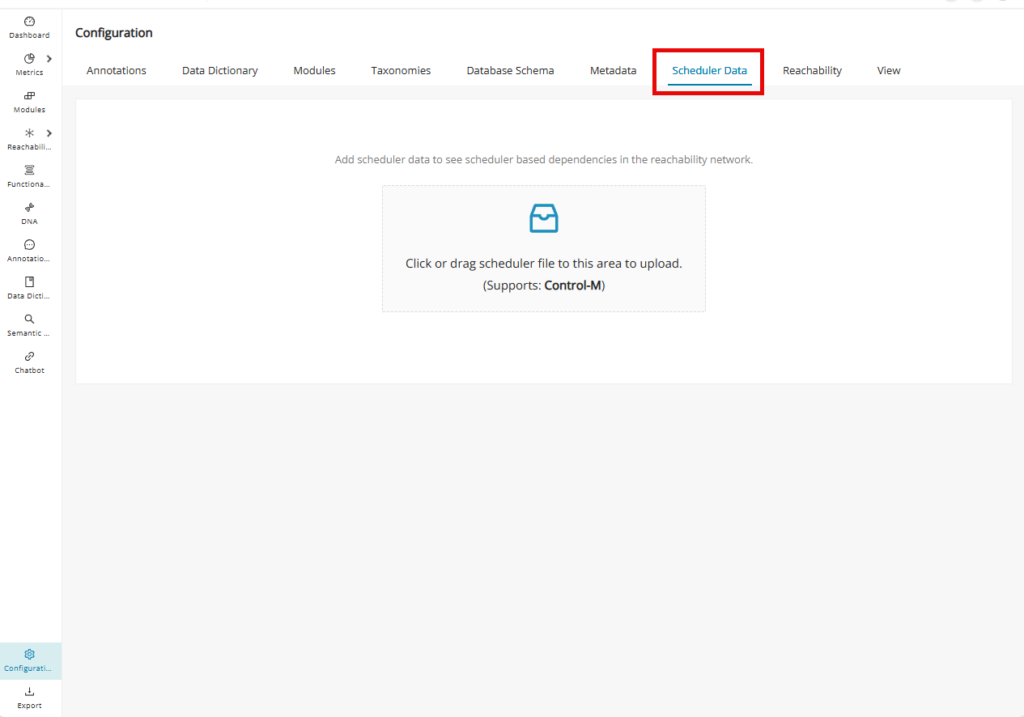
Control-M is a powerful workload automation software designed to streamline and automate the scheduling of various tasks and workloads. It offers a comprehensive solution for managing batch processing and other scheduled tasks across diverse IT environments. Control-M XML files containing batch scheduling and dependency information can be imported into Mining, establishing more modules and more system dependencies on those modules that could not be identified via the original Code Discovery alone. With this information available when you open the Reachability Network graph to visualize the batch system, you will be able to see any imported scheduler dependencies and how they integrate with the resource-level system.
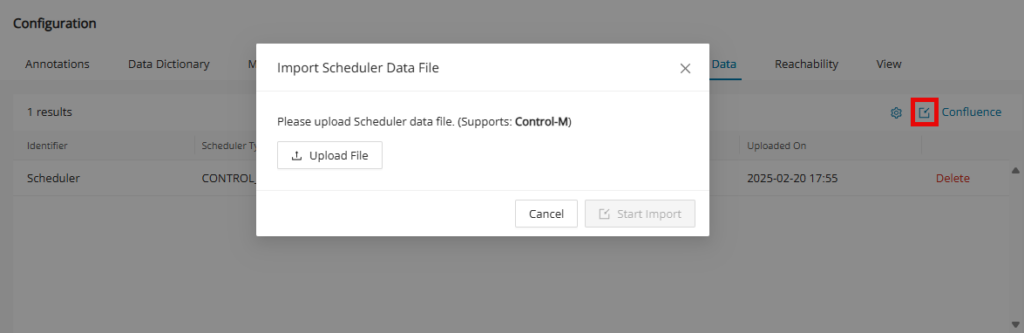
The Scheduler Data tab is where you can import a Control-M XML file into the Mining Web UI. Click or drag the scheduler file to import.
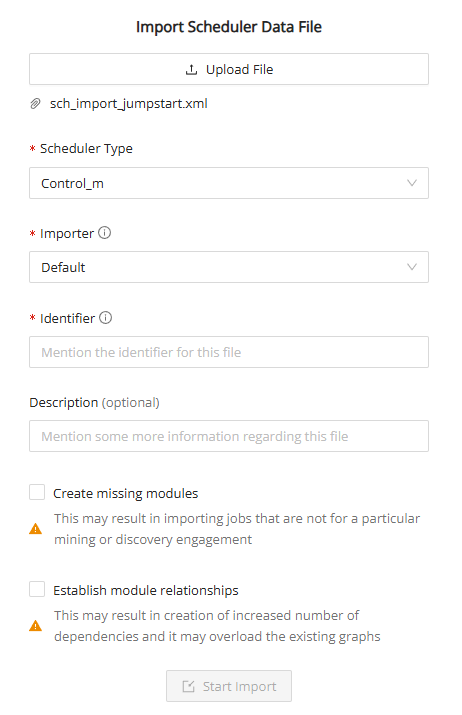
In the "Import Scheduler Data File" window, input the Identifier of the data file and click Start Import .
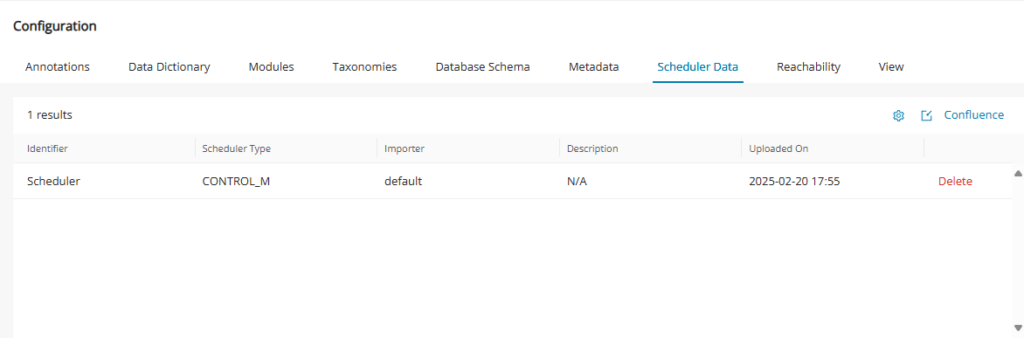
The scheduler data tab will be populated with the newly imported XML file.
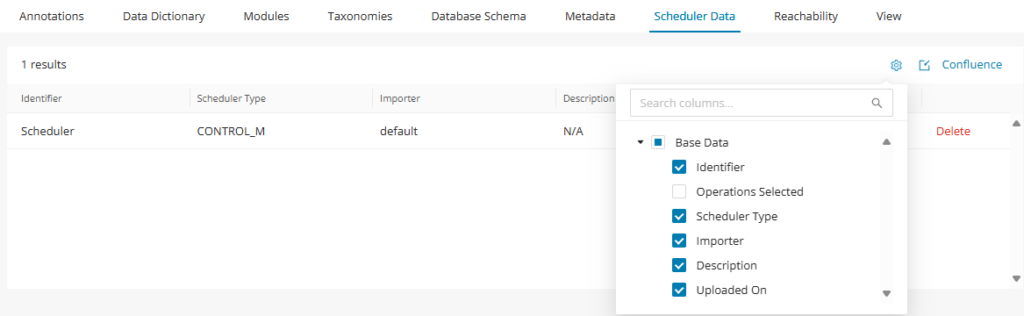
To customize the scheduler data table, click the settings icon and check the desired columns.
To import additional schedule data files, click the Import File icon shown below and repeat the previous steps.
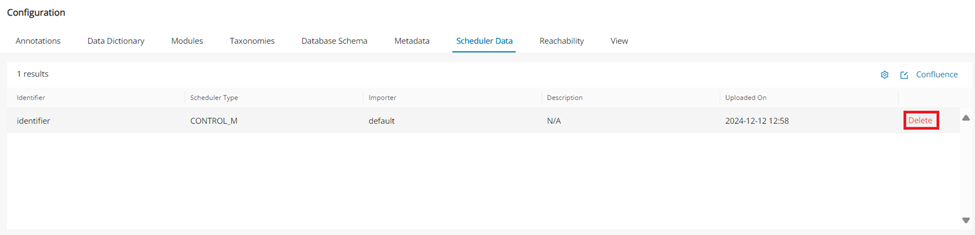
Delete scheduler import file
When a user deletes an already imported scheduler file and goes back to the reachability network, the scheduler dependencies will no longer be shown in the reachability network.
If any new module was created due to the scheduler import in the modules table, those modules will also no longer be seen in the modules table.
If call chain dependencies were previously established due to the scheduler import, they will also no longer be seen in the call chain page.
Reachability configuration
Reachability Blocks are a powerful tool for encapsulating and persisting system end-to-end flows. When generating Reachability Blocks from the Reachability Analysis page, you can configure the module technologies and types to be considered for the upper and lower bounds each time. However, if Reachability Analysis is being conducted multiple times on your project to keep consistency on which modules constitute the upper and lower bounds you can set them in the Reachability tab of the Configuration page for the entire project with no more need for ad-hoc adjustments.
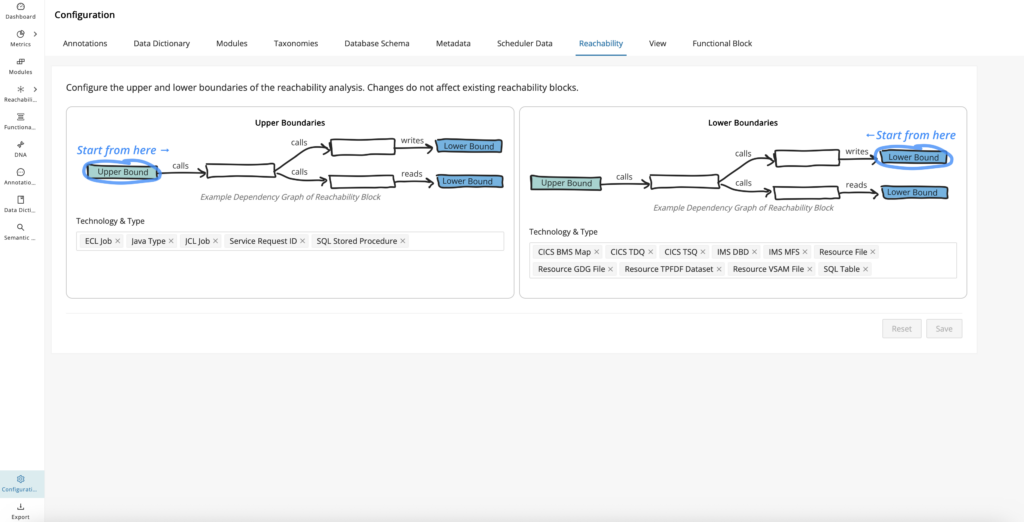
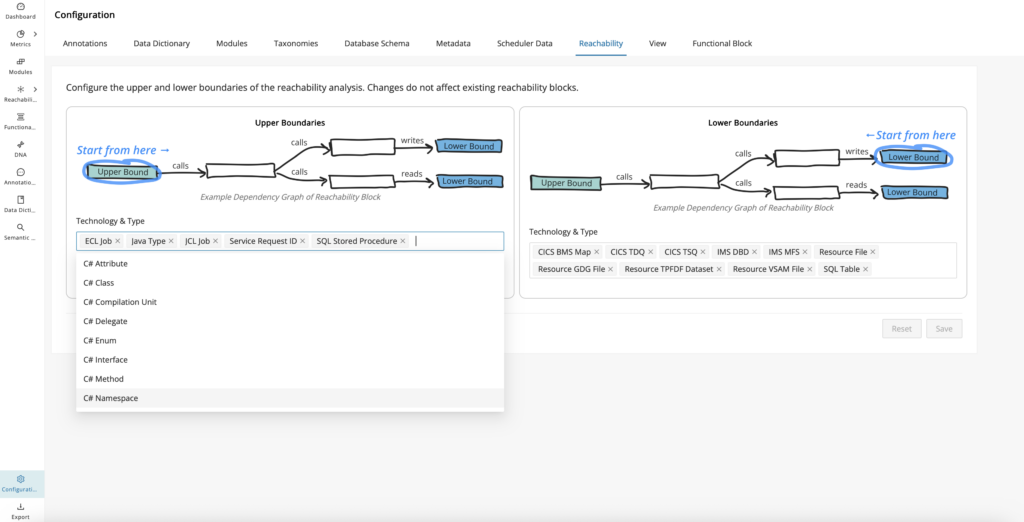
Click on the "Technology & Type" field on the left box to configure your upper bounds, and click on the same field on the right box to configure the lower bounds.
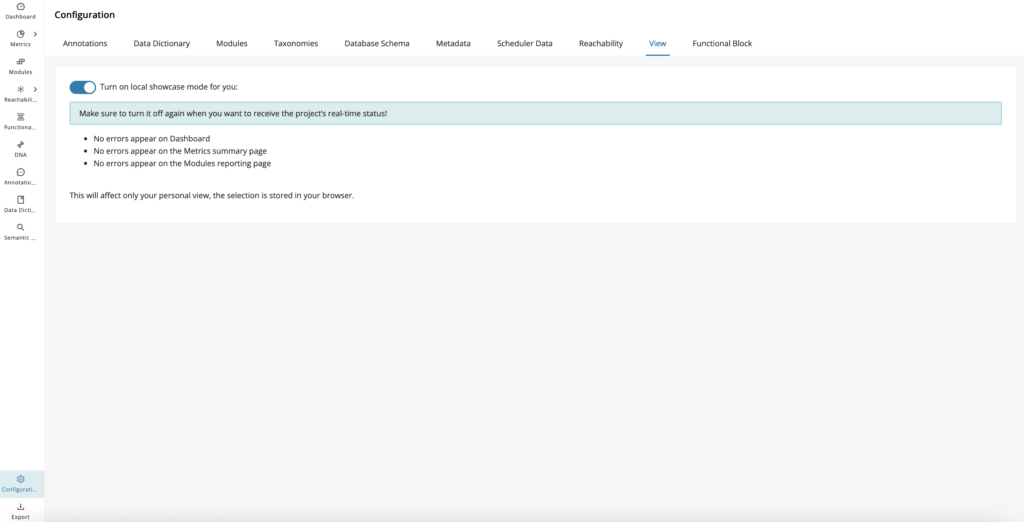
View configuration
The highlighted parser errors shown in the Mining UI are designed to signal parsing issues while ingesting a codebase project during Code Discovery. These issues could affect dependency resolutions and other downstream Mining activities, such as business rule identification and dead code calculation. However, when conducting product demos, it is not necessary to show these errors, which can distract from the overall message, so they can be disabled from the View tab on the Configuration page.